Welcome to NoosphereWriter
NoosphereWriter is an AI-assisted screenwriting application designed to help you craft professional screenplays. It follows industry-standard formatting conventions and provides intelligent assistance throughout your writing process.
Principles
-
Flexible AI Integration
You retain full creative control, utilizing AI as much or as little as you like.
-
The Studio System in a Box
NoosphereWriter democratizes the filmmaking process, replacing the infrastructure of a development team with flexible AI agents—acting as Producer, Director, and Script Doctor—to allow a single creator to execute a complex studio-level vision.
-
Adversarial Narrative Design
Beyond simple generative drafting, the application acts as an adversarial engine that operationalizes rigid Hollywood storytelling theories to stress-test your screenplay for structural integrity and commercial viability.
-
Unified Production Reality
The application collapses the gap between the writing and pre-production phases, seamlessly integrating creative storytelling with logistical planning to ensure your work is not just readable, but produceable.
Key Features
📝 Professional Formatting
Industry-standard screenplay formatting with automatic element detection
🤖 AI-Powered Assistance
Context-aware writing help, character generation, and story development
☁️ Cloud Integration
Google Drive sync with auto-backup capabilities
📊 Comprehensive Analysis
Professional screenplay evaluation and reporting tools
🎯 Story Development
Movie concept planning, theme structure, and plot board
🛡️ Red Teaming
Aggressive AI stress-testing for logical flaws and character agency
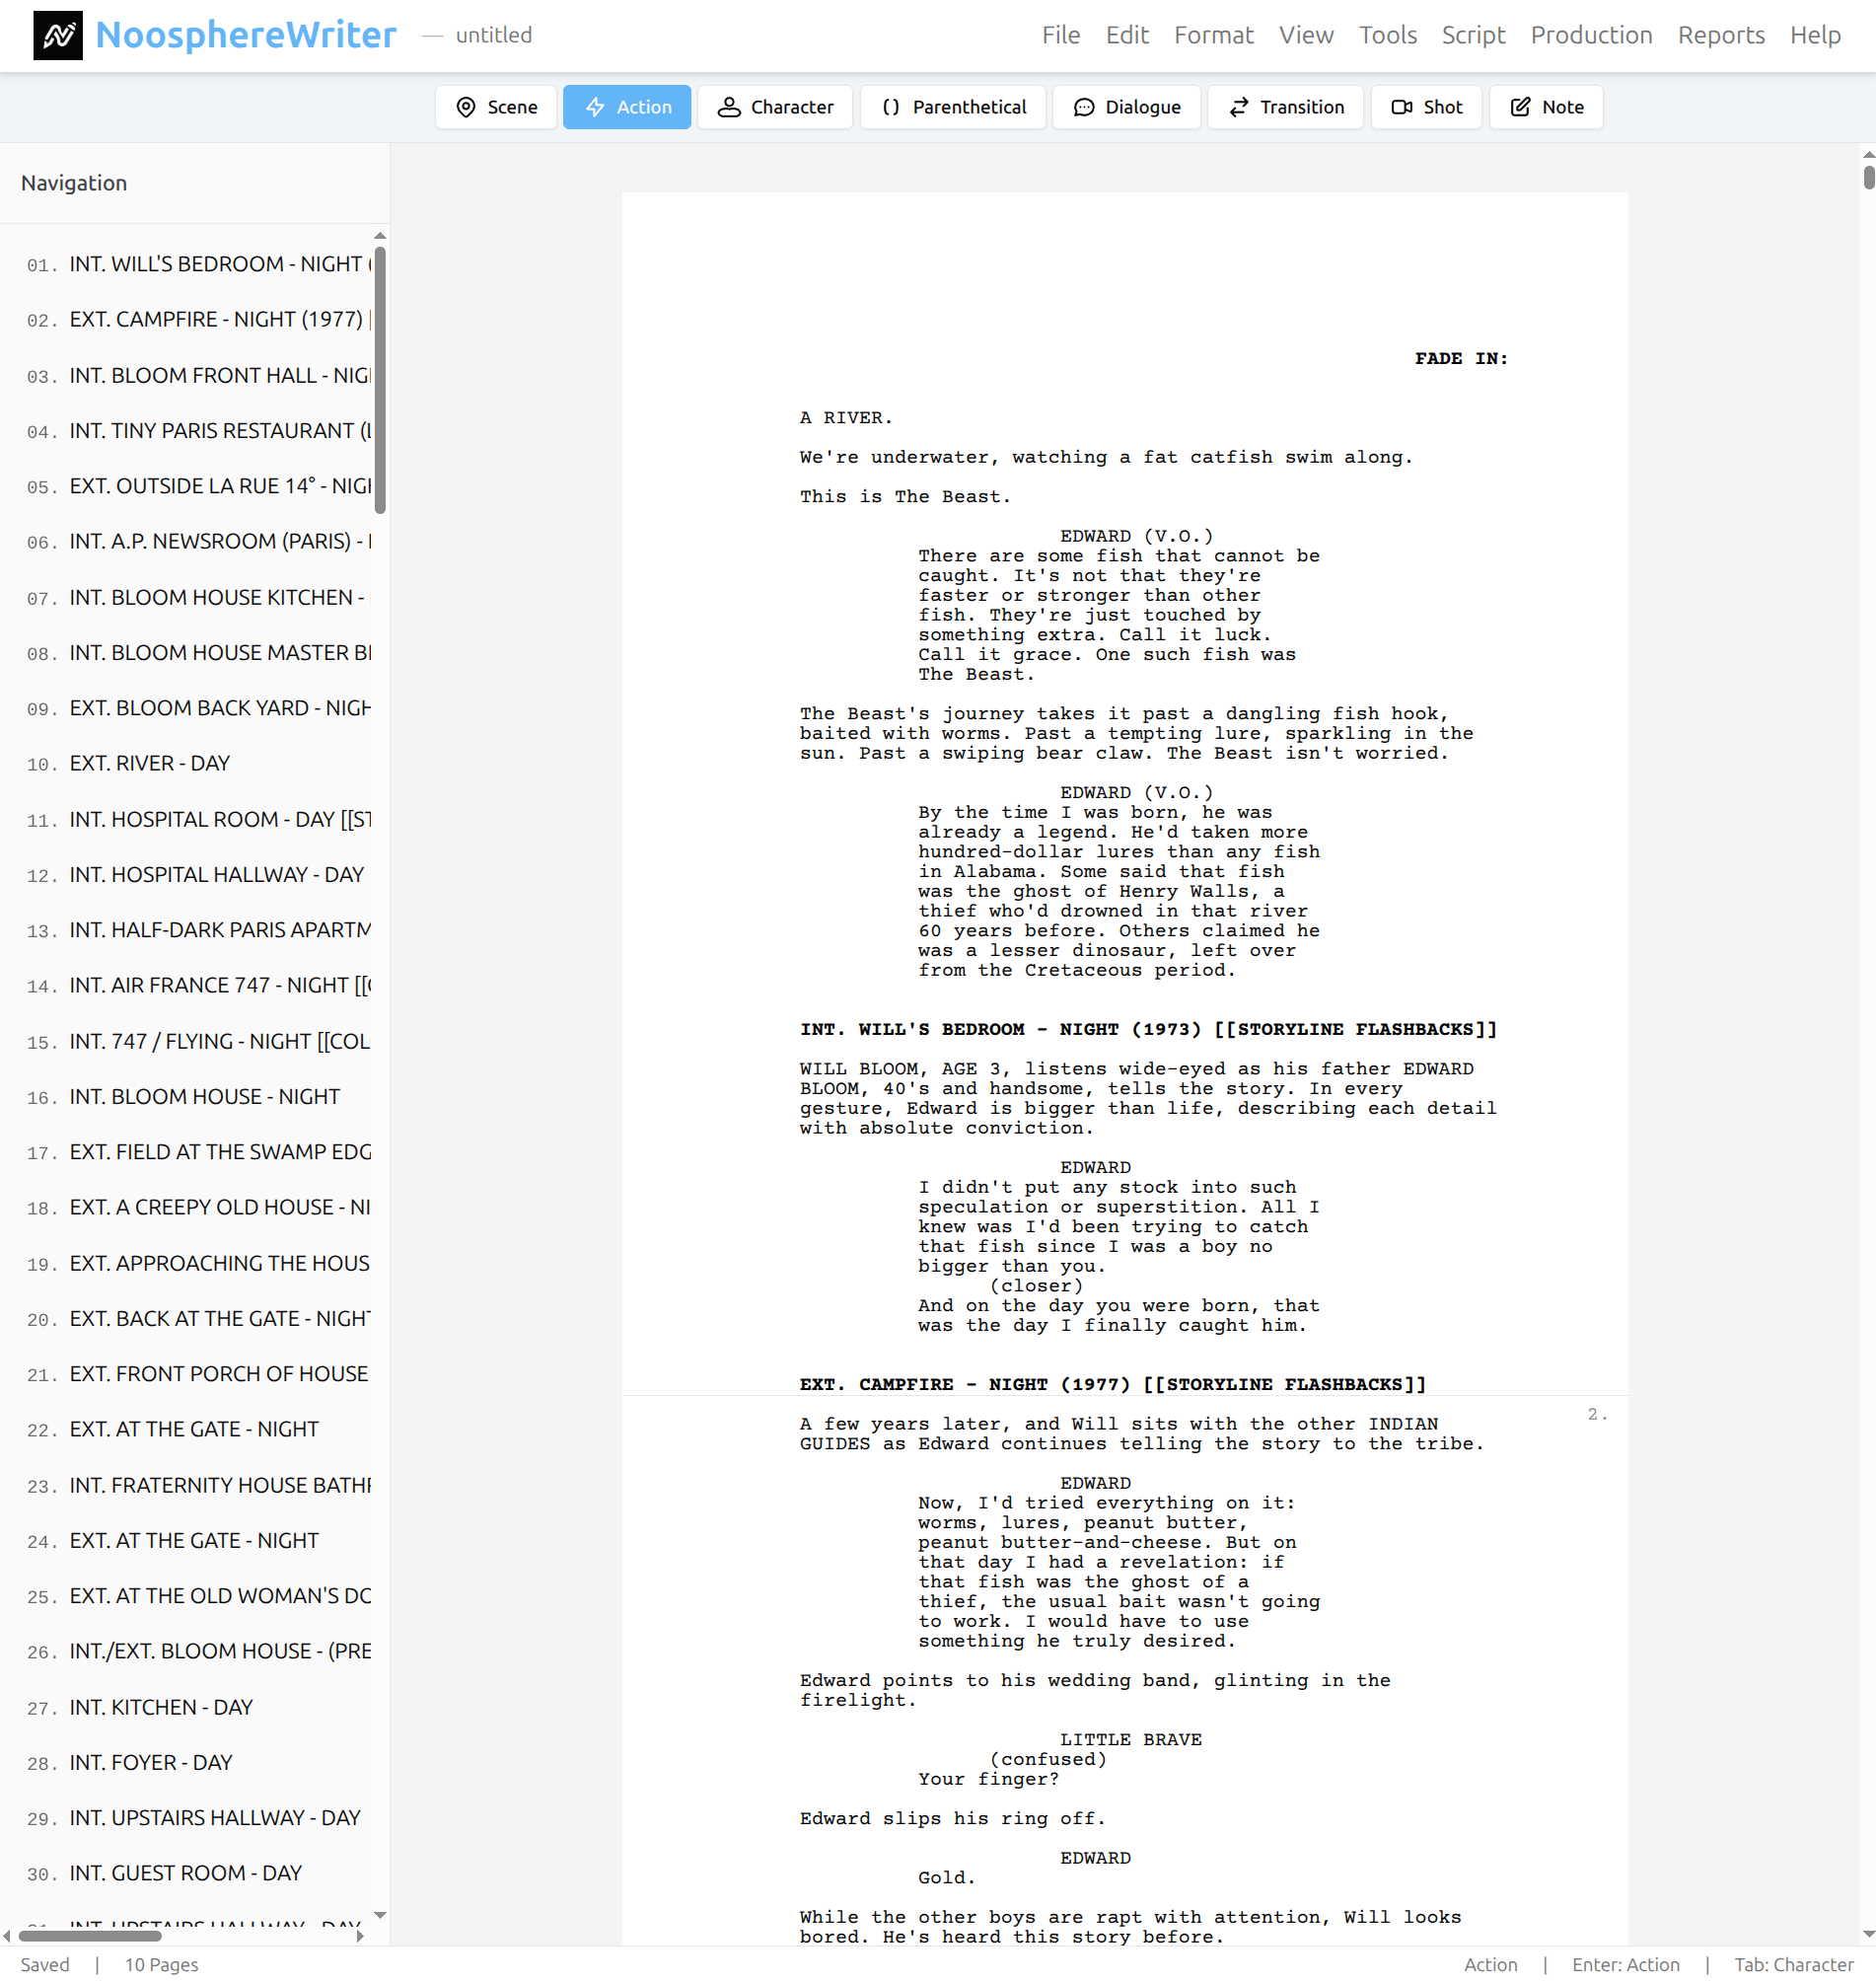
NoosphereWriter Editor Interface showing professional screenplay formatting
Command Palette
The Command Palette is a powerful tool inspired by "Spotlight" search. It allows you to find and execute any feature in NoosphereWriter instantly, without digging through menus.
Key Benefits:
- Speed: Execute commands without lifting your hands from the keyboard.
- Discovery: Find features you didn't know existed by searching for what you want to do (e.g., search "stress test" to find "Red Teaming").
- Categorization: See features grouped by workflow stage (Validation, Analysis, Production, Export).
How to Use
- Press Ctrl+K (Windows/Linux) or Cmd+K (Mac) anywhere in the app.
- Type the name of a feature or a keyword describing what you want to do.
- Select the feature from the list and press Enter (or click it).
Quick Start Guide
-
Create a New Screenplay
Go to
File → Newor press Ctrl+N to start a new screenplay. -
Set Up Your Title Page
Go to
Script → Title Pageto add your screenplay title, author name, and contact information. -
Define Your Movie Concept
Go to
Script → Movie Conceptto outline your story's genre, themes, and premise. -
Start Writing
Use the element buttons or keyboard shortcuts to format your screenplay:
- Ctrl+1 - Scene Heading
- Ctrl+2 - Action
- Ctrl+3 - Character
- Ctrl+4 - Parenthetical
- Ctrl+5 - Dialogue
- Ctrl+6 - Transition
-
Save Your Work
Go to
File → Saveor press Ctrl+S to save to Google Drive.
File → New
Creates a new, blank screenplay. If you have unsaved changes, you'll be prompted to save them first.
Shortcut: Ctrl+N (Windows/Linux) or Cmd+N (Mac)
File → Open
Opens the file picker to select a screenplay from your Google Drive. You can also access recent files for quick opening.
Shortcut: Ctrl+O (Windows/Linux) or Cmd+O (Mac)
Recent Files
The submenu shows your recently opened screenplays for quick access. Select any recent file to open it immediately.
File → Save
Saves the current screenplay to Google Drive. If the file hasn't been saved before, you'll be prompted to enter a filename.
Shortcut: Ctrl+S (Windows/Linux) or Cmd+S (Mac)
Save As
Creates a copy of your screenplay with a new name. Useful for creating different versions or drafts.
Shortcut: Ctrl+Shift+S (Windows/Linux) or Cmd+Shift+S (Mac)
File → Import
Import screenplays from various formats:
- Fountain (.fountain) - Plain text markup format
- Final Draft (.fdx) - Industry standard format
- Celtx (.celtx) - Celtx project files
- Fade In (.fadein) - Fade In document format
- NoosphereWriter (.nws) - NoosphereWriter project files (v1.0 and v2.0)
- Plain Text (.txt) - Basic text files
- PDF (.pdf) - Extract text from PDF screenplays
Security & XSS Protection
NoosphereWriter includes comprehensive security measures to protect against malicious content:
- Automatic Content Sanitization: All imported files are automatically scanned and cleaned of potentially dangerous content
- XSS Attack Prevention: JavaScript, script tags, and other executable content are automatically removed from imported files
- Security Warnings: If potentially unsafe content is detected during import, you'll receive a notification showing what was sanitized
- Performance Optimized: Security scanning uses intelligent detection to maintain fast import speeds while ensuring safety
Protected Content Types
Our security system automatically detects and removes:
<script>tags and JavaScript executionjavascript:URLs and protocol handlers- Event handlers (onclick, onerror, onload, etc.)
<iframe>,<object>, and<embed>elements<form>elements and data submission vectors- Dangerous CSS and style injections
Safe Import Process
- Content Analysis: Files are quickly scanned for dangerous patterns
- Threat Detection: Any potentially harmful content is identified and flagged
- Automatic Sanitization: Dangerous elements are safely removed while preserving screenplay formatting
- User Notification: If threats were found, you'll see a security warning with details
- Safe Loading: Only clean, safe content is loaded into your screenplay editor
Note: This protection works automatically in the background - you don't need to take any action. The system is designed to preserve all legitimate screenplay content while removing only genuinely dangerous elements.
File → Export
Export your screenplay in various formats:
- NoosphereWriter (.nws) - Native project format (for backup/sharing)
- PDF - Professional PDF with proper formatting
- Watermarked PDF - PDF with custom watermark text
- Word Document (.docx) - For Microsoft Word and other processors
- Rich Text Format (.rtf) - Universal document format
- Fountain - Plain text markup format
- Final Draft XML - For use in Final Draft
- Celtx - For use in Celtx
- Fade In - For use in Fade In
- Highland - For use in Highland 2
- Plain Text - Basic text file
- LaTeX (.tex) - Academy-compliant formatting for professional typesetting
LaTeX Export
The LaTeX export creates a professional, Academy-compliant screenplay format using John Pate's screenplay document class. This format is ideal for high-quality typesetting and professional submissions.
Requirements
To compile the exported .tex file, you'll need:
- John Pate's screenplay class: Available at https://github.com/JohnPate/Screenplay
- LaTeX distribution: TeX Live, MiKTeX, or similar
- LaTeX editor: TeXShop, TeXstudio, Overleaf, or any LaTeX compiler
Features
- Professional screenplay formatting with proper margins and spacing
- Title page integration (if configured in Tools → Title Page)
- All screenplay elements: scene headings, dialogue, action lines, transitions
- Character directions and parentheticals
- Academy-compliant layout and typography
- Automatic LaTeX character escaping for special characters
Usage
- Click File → Export → LaTeX (.tex)
- Save the downloaded .tex file
- Install John Pate's screenplay class in your LaTeX environment
- Compile the .tex file using your preferred LaTeX tool
Note: The LaTeX format provides precise control over formatting and is particularly useful for professional submissions requiring exact industry standards.
Settings
Configure application preferences, AI models, and integrations.
Models Tab
Manage your Google Gemini API key and configure how AI models are used across the application.
Google Gemini API Key
Enter your Google Gemini API key here. The key is encrypted and stored locally in your browser. You can obtain a free API key from Google AI Studio.
Model Allocation Strategy
Optimize performance and cost by assigning specific models to different types of tasks:
- Utilities: For fast, routine tasks like Thesaurus, Formatting, and Auto-complete. (Recommended: Gemini Flash)
- Creative Generation: For content creation tasks like Idea Lab, Character Interviews, and Scene Writing. (Recommended: Gemini Flash or Pro)
- Deep Analysis: For complex reasoning tasks like Script Doctor, Breakdowns, and Consultants. (Recommended: Gemini Pro)
Google Drive Integration
NoosphereWriter integrates seamlessly with Google Drive for cloud storage:
Initial Setup
- Click
File → SaveorFile → Open - You'll be prompted to authorize Google Drive access
- Sign in with your Google account
- Grant permissions to NoosphereWriter
Understanding Google Permissions
When you connect NoosphereWriter to Google Drive, Google will request several permissions. Here's why each one is necessary:
Required Permissions Explained
- Google Drive Files Access: "See, edit, create, and delete only the specific
Google Drive files you use with this app"
- This allows NoosphereWriter to save and load your screenplay files
- The app can ONLY access files it creates, not your entire Google Drive
- This is the most restrictive Drive permission available
- Personal Information: "See your personal info, including any personal info
you've made publicly available"
- Required by Google's OAuth system for identity verification
- Used to display your name when saving files
- Only accesses publicly available information
- Email Address: "See your primary Google Account email address"
- Used as a unique identifier to associate files with your account
- Required for Google Drive API to track file ownership
- Never shared or used for marketing
- Associate with Personal Info: "Associate you with your personal info on
Google"
- Links your app usage to your Google identity for security
- Required by Google for security audit trails
- Helps prevent unauthorized access to your files
Why Can't We Request Only Google Drive Permission?
Google's OAuth2 system automatically bundles identity scopes with Google Drive API access because:
- Security Requirements: Google needs to verify who is accessing files to enforce proper permissions
- File Ownership: The Drive API must associate saved files with a specific Google account
- Abuse Prevention: Identity information helps Google prevent abuse and maintain security
- API Design: This is standard for ALL Google Drive-integrated applications
Your Privacy and Security
- NoosphereWriter only accesses files it creates in your Drive
- Your email and personal info are never stored on our servers
- All communication with Google Drive uses secure HTTPS encryption
- You can revoke access at any time from your Google Account settings
- The app follows Google's security best practices and guidelines
File Organization
All screenplays are saved in a dedicated "NoosphereWriter" folder in your Google Drive. Files are saved with the .nws extension (NoosphereWriter Script).
Auto-Backup Settings
Configure automatic backups to protect your work:
Enabling Auto-Backup
- Go to
File → Settings - Select the Google Drive Backup tab
- Toggle "Automatic Backup to Google Drive"
- Choose backup frequency (e.g., every 5, 10, 15 minutes)
How It Works
- Automatic Backups: Created automatically based on your time interval settings while you work
- Backup on Save: A backup is also created every time you manually save (Ctrl+S)
- Storage: All backups are stored in a "Backups" subfolder within your "NoosphereWriter" folder on Google Drive
- File Naming: Backups use the filename with a timestamp appended
Other Settings
- Text-to-Speech: Configure voice settings for reading your script aloud.
- General: Application-wide preferences.
Project Phases
Project Phases customize your NoosphereWriter experience to match your creative workflow. Each phase shows the most relevant tools and AI assistance for that stage of your project.
Available Phases
NoosphereWriter includes three built-in phases:
- Ideation: Focus on expansion, structure, and thematic grounding. Emphasizes Movie Concept, Theme Structure, Characters, and Locations. Production tools are hidden.
- Drafting: Focus on execution, flow, and narrative integrity. Enables AI-powered context menu assistance (Generation, Refinement, Analysis, Report), craft and style tools, and script evaluation reports.
- Production: Focus on logistics, feasibility, and asset generation. Shows Marketing, Pre-Production, Design System, and Shot Planning tools. AI context menu assistance is disabled.
Accessing Project Phases
Open the Phase Configuration dialog via File → Preferences → Phases.
Select the phase that matches your current creative stage and click Set Phase.
How Phases Curate the UI
- Menu Filtering: Script, Production, and Reports menus show only relevant items for your phase.
- Context Menu: AI-powered features (Generation, Refinement, Analysis, Report) are only visible in Drafting phase.
- AI Context: AI assistants are informed of your current phase for more relevant responses.
Command Palette Override
Even with phase filtering active, you can access all features anytime via the Command Palette (Ctrl+K or Cmd+K). This ensures you're never locked out of any tool.
Workflow Recommendations
- Starting a new project? Begin in Ideation to establish your story's foundation.
- Writing your first draft? Switch to Drafting for AI assistance with scenes and dialogue.
- Preparing for production? Move to Production for breakdowns, shot lists, and storyboards.
Writer's Codex
The Writer's Codex is a sophisticated style analysis engine that captures your unique narrative voice and "teaches" it to the AI. This ensures that AI suggestions align with your personal writing style rather than sounding generic.
Key Features
- Voice Calibration: Analyzes your specific sentence rhythm, vocabulary, and subtext density.
- Structural Alignment: Adapts to your preferred pacing and act structure.
- Consistent Tone: Ensures AI-generated content (like Scene Lab drafts or Dialogue) feels like you wrote it.
How to Use
- Go to
File → Preferences → Writer's Codex. - Create a Profile: Upload an existing screenplay (.fountain, .pdf, .fdx) to analyze your style.
- Set Active Profile: Select a profile to be the "Active Writer Profile."
- Write: AI features like Scene Lab, Character Debate, and Storyboard will automatically use this profile to guide their output.
Analyzed Traits
The Codex builds a "Vector Summary" of your style based on 4 dimensions:
- Dialogue Style: Rhythm (rapid vs. deliberate), subtext, and voice distinction.
- Structure: Beat sheet alignment and act break intensity.
- Emotional Dynamics: Character agency and emotional arc trajectory.
- Format Metrics: Action-to-dialogue balance and scene length variance.
Basic Editing
Standard editing operations with screenplay-specific enhancements:
Undo/Redo
- Undo: Ctrl+Z - Reverses the last action
- Redo: Ctrl+Y or Ctrl+Shift+Z - Restores an undone action
Cut/Copy/Paste
- Cut: Ctrl+X - Removes selected text to clipboard
- Copy: Ctrl+C - Copies selected text to clipboard
- Paste: Ctrl+V - Inserts clipboard content
Select All
Ctrl+A - Selects the entire screenplay
Find & Replace
Search and replace text throughout your screenplay:
Find
Shortcut: Ctrl+F
- Case-sensitive search option
- Whole word matching
- Navigate with Next/Previous buttons
- Shows match count
Replace
- Replace single instance or all occurrences
- Preview replacements before applying
- Undo support for all replacements
Semantic Find
AI-powered search that understands context and meaning in your screenplay.
How It Works
Unlike regular find, Semantic Find understands what you're looking for conceptually:
- Search for "romantic moments" to find love scenes
- Search for "conflict" to find arguments and tension
- Search for "character reveals" to find important disclosures
Using Semantic Find
- Go to
Edit → Semantic Findor press Ctrl+Alt+F - Enter a natural language description
- Review the AI-identified matches
- Click any result to jump to that location
Go to Page/Scene
Quickly navigate to specific pages or scenes:
Go to Page
Shortcut: Ctrl+G
Enter a page number to jump directly to that page.
Go to Scene
Enter a scene number or partial scene heading to jump to that scene.
Screenplay Elements
NoosphereWriter automatically formats screenplay elements according to industry standards:
Scene Heading
Shortcut: Ctrl+1
Location and time of day (e.g., INT. COFFEE SHOP - DAY)
Auto-detected when line starts with INT., EXT., or EST.
Action
Shortcut: Ctrl+2
Scene description and character actions
Character
Shortcut: Ctrl+3
Character name before dialogue
Auto-detected when typing in ALL CAPS
Parenthetical
Shortcut: Ctrl+4
Acting directions (e.g., (sarcastically))
Auto-detected when line starts with (
Dialogue
Shortcut: Ctrl+5
Character speech
Transition
Shortcut: Ctrl+6
Scene transitions (e.g., CUT TO:)
Auto-detected when line ends with TO:
Shot
Shortcut: Ctrl+7
Camera angles and shots
Note
Shortcut: Ctrl+8
Production notes (not printed in final script)
Auto-Formatting
NoosphereWriter intelligently detects and formats screenplay elements as you type:
Scene Headings
- Type "INT." or "EXT." at the start of a line
- Automatically converts to scene heading format
- Suggests common locations as you type
Character Names
- Type character name in ALL CAPS
- Automatically formats as character element
- Remembers character names for auto-completion
Parentheticals
- Start a line with "(" after a character name
- Automatically formats as parenthetical
Transitions
- End a line with "TO:" (e.g., "FADE TO:")
- Automatically formats as transition
Text Formatting
Apply emphasis to your screenplay text:
Bold
Shortcut: Ctrl+B
Makes selected text bold. Use sparingly in screenplays.
Italic
Shortcut: Ctrl+I
Makes selected text italic. Commonly used for emphasis.
Underline
Shortcut: Ctrl+U
Underlines selected text. Rarely used in modern screenplays.
Scene Numbers
Add scene numbers for production drafts:
Show/Hide Scene Numbers
Toggle scene number visibility via Format → Scene Numbers
Scene Number Format
- Numbers appear on left and right margins
- Automatically updates when scenes are added/removed
- Preserved in PDF exports when enabled
Page Zoom
Adjust the display size of your screenplay:
Zoom Levels
- 50% - Overview mode
- 75% - Compact view
- 100% - Default size
- 125% - Enlarged view
- 150% - Large text
- 200% - Maximum zoom
Shortcuts
- Ctrl+Plus - Zoom in
- Ctrl+Minus - Zoom out
- Ctrl+0 - Reset to 100%
Dual Dialogue
Format two characters speaking simultaneously:
Creating Dual Dialogue
- Write the first character's dialogue normally
- Position cursor after the dialogue
- Go to
Format → Dual Dialogue - Write the second character's dialogue
Display
Dual dialogue appears side-by-side in the script, clearly showing simultaneous speech.
Full Screen Mode
Enter distraction-free writing mode:
Toggle Full Screen
Shortcut: F11
Or go to View → Full Screen
Features
- Hides browser interface
- Maximizes writing space
- Press Esc to exit
Active To-Do List
The Active To-Do List is an intelligent task management system designed specifically for screenwriters. It doesn't just track tasks; it actively helps you move your script forward with context-aware suggestions and workflow templates.
Core Features
- Smart Workflows: Choose from pre-built guides like "Idea First," "Production Prep," or "Rewrite & Rescue" to get a tailored checklist for your current writing phase.
- Active Monitoring: The system analyzes your script's state (e.g., page count, character development) and intelligently suggests relevant tasks, such as "Analyze Act 1 Pacing" or "Flesh out Protagonist."
- AI Producer: Click "Generate Tasks" to have the AI analyze your current script section and generate specific, actionable revision tasks automatically.
- Sprint Mode: A dedicated planning tool to help you hit deadlines. Learn more about Sprint Mode.
Workflow Templates
Access the Workflow List button (📋) to select a guided path:
- Idea First: For turning a spark of an idea into a solid concept.
- Character-First: For building a story around strong characters.
- Production Prep: For getting a script ready for shooting (Shot Lists, Props, Breakdowns).
- Rewrite & Rescue: For fixing structural issues in existing drafts.
- Visual Director: For establishing the "look and feel" before writing scenes.
Active Suggestions
As you write, you may see suggestions appear at the top of your list with an "Add" button. These are triggered by:
- Milestones: Reaching page count targets (e.g., "Act 1 Complete").
- Missing Elements: Detecting undefined characters or lack of themes.
- Stagnation: Prompting checks if you haven't written for a while.
AI Producer Mode
Click the Generate Tasks button (✨) to open the AI Producer. It will read your current 10-page chunk and generate 3-5 specific, actionable revision tasks to improve dialogue, pacing, and description.
Sprint Mode
Sprint Mode helps screenwriters plan and execute focused writing sprints by automatically generating daily goals based on your timeline and page count targets.
What is Sprint Mode?
Sprint Mode is a wizard-based planning tool that creates a structured writing schedule following the three-act screenplay structure. It calculates how many pages you need to write each day and distributes the work across acts to help you complete your screenplay on time.
Accessing Sprint Mode
- Open the To-Do List (click the checkbox icon or press Ctrl+Shift+2)
- Click the rocket icon (🚀) in the To-Do List header
- Alternatively, if your To-Do list is empty, click the "Start Sprint Mode" button
Sprint Mode Wizard Steps
Step 1: Sprint Duration
Choose how many days for your writing sprint:
- Presets: 7, 10, 14, 21, or 30 days
- Custom Date: Pick any end date using the calendar
Step 2: Screenplay Parameters
- Target Page Count: Set your screenplay's target length (default: 120 pages)
- Research/Outline Days: Optionally add 2 days at the start for research and beat sheet creation
- Revision Days: Optionally add 2 days at the end for revisions and polish
The wizard displays a summary showing your writing days, average pages per day, and other calculated metrics.
Step 3: Preview & Apply
- Review all generated daily goals before adding them
- Edit individual goal text if needed
- Click "Apply Goals" to add them to your To-Do List
Three-Act Structure
Sprint Mode distributes writing goals according to the standard three-act screenplay structure:
- Act 1 (25%): Setup & Inciting Incident
- Act 2A (25%): Rising Action & Midpoint
- Act 2B (25%): Complications & Crisis
- Act 3 (25%): Climax & Resolution
Goal Categories
Generated goals are color-coded by category:
- Research (purple) - Initial research and brainstorming
- Outline (blue) - Beat sheet and structure planning
- Writing (green) - Daily page writing targets
- Revision (orange) - Polish and cleanup tasks
Example Sprint
A 10-day sprint with 120 pages and both research and revision days enabled would generate:
- Days 1-2: Research and outline
- Days 3-8: Writing (averaging 20 pages per day across acts)
- Days 9-10: Revision and final polish
Tips for Success
- Be realistic about your daily output when setting page counts
- Include research days if you haven't fully outlined your story
- Leave revision days at the end for a polished final draft
- Edit goal text to add specific scene or beat targets
- Check off completed goals daily to track your progress
Plot Board
Visual story structure tool for planning and organizing your screenplay's beats and sequences.
Board Structure
- Act 1: Setup beats
- Act 2A: Rising action
- Act 2B: Complications
- Act 3: Resolution
Creating Beats
- Click + in any act section
- Add beat description
- Set beat type (Plot, Character, Theme)
- Add detailed notes
- Link to script scenes
Templates
Start with proven structures:
- 15-beat Blueprint
- Hero's Journey
- Three-Act Structure
- Five-Act Structure
- Custom templates
AI Customization
Generate story-specific beats:
- Choose a template
- Click "Customize with AI"
- AI adapts beats to your story
- Edit and refine as needed
Generate Draft
Transform your Plot Board beats into a first draft screenplay using AI. This powerful feature converts your story structure directly into properly formatted screenplay scenes.
How It Works
The Generate Draft feature uses a two-phase AI approach:
- Beat Expansion: Each beat is expanded into a detailed step outline, identifying key moments, character interactions, and scene flow
- Scene Writing: The step outline is transformed into properly formatted screenplay content with scene headings, action lines, and dialogue
Using Generate Draft
- Open the Plot Board dialog (
View → Plot Board) - Click the "Generate Draft" button in the toolbar
- Configure your generation settings:
- Scope: Generate all acts or Act 1 only
- Creativity Level: Adjust from strict adherence to creative expansion
- Dialogue/Action Ratio: Control the balance between dialogue and action lines
- Max Word Count: Set the target length for each generated scene
- Include Character Notes: Add parenthetical directions for key moments
- Click "Generate" to start the process
- Monitor progress as each scene is generated
- Generated scenes are automatically inserted into your screenplay
Configuration Options
- Generate All Acts: Converts all beats across your entire plot board
- Generate Act 1 Only: Focuses on the first act for faster iteration
- Creativity Level Slider:
- Strict Adherence (left): Closely follows beat descriptions
- Creative Expansion (right): Adds more creative details and elaboration
- Dialogue vs. Action Ratio:
- Action Heavy (left): Prioritizes visual storytelling and movement
- Balanced (center): Equal mix of dialogue and action
- Dialogue Heavy (right): Focuses on character interaction and speech
- Max Word Count per Scene: Adjustable target length (200-1000 words) to control scene pacing and depth
- Character Notes: When enabled, includes acting directions and emotional beats
Best Practices
- Detailed Beats: Write detailed beat synopses for better scene generation
- Character Data: Set up your characters in Script → Characters before generating
- Movie Concept: Fill in your Movie Concept for better context and continuity
- Iterative Approach: Start with Act 1 to test results before generating the full script
- Review and Revise: Treat generated content as a first draft to be refined
Scene Linking
After generation, each beat is automatically linked to its corresponding scene in the screenplay. This connection allows you to:
- Navigate directly from a beat to its scene
- Track which beats have been written
- Maintain alignment between structure and content
Cancellation
If you need to stop generation mid-process:
- Click the "Cancel Generation" button
- Already generated scenes will be preserved
- You can resume from where you left off by regenerating
Requirements
- Google AI API key configured in File → Settings
- At least one beat in your Plot Board
- Internet connection for AI generation
Zen Mode
Zen Mode provides a distraction-free writing environment by hiding all UI elements except the editor.
Activating Zen Mode
- Go to
View → Zen Mode - Or press Ctrl+Alt+Z
Features
- Distraction-Free: Hides the menu bar, toolbar, status bar, and sidebar
- Full Screen: Automatically enters full-screen mode
- Auto-Close: Automatically closes floating dialogs (To-Do, Comments)
Exiting Zen Mode
To exit Zen Mode and restore the standard interface:
- Press Ctrl+Alt+Z again
- Or press Esc (this also exits full-screen mode)
Workflow Builder
Create custom AI workflows by chaining multiple features together. Workflow Builder allows you to automate complex tasks, create personalized writing assistants, and standardize your production processes.
Creating a Workflow
- Open Workflow Builder from the Tools menu
- Click "Create New Workflow"
- Name your workflow (e.g., "Polishing Assistant", "Production Prep")
- Add a description
- Select features to include in the workflow:
- Validation: Format Check, Continuity, etc.
- Production: Breakdown, Shot List, Actor Breakdown
- Story Development: Scene Optimizer, Final Polish, etc.
- Reorder actions using up/down arrows to set execution order
- Click "Create Workflow" to save
Executing a Workflow
- Open Workflow Builder
- Find your workflow in the list
- Optionally enable "Force regenerate all features" to ignore cached results
- Click the Play button (▶) next to the workflow
- Monitor progress as each action executes
- View consolidated results when complete
Understanding Results
After execution completes, Workflow Builder displays:
>- Execution Summary: How many actions succeeded/failed
- Consolidated Findings: All issues grouped by severity:
- Critical: Major problems requiring immediate attention
- Warning: Significant issues to address
- Minor: Small improvements to consider
- Finding Details: Each issue shows:
- Category (Format, Continuity, Readability, etc.)
- Description of the problem
- Location in script (page/scene number)
Managing Agents
Editing Agents
- Click the Edit button (✏) next to any agent
- Modify name, description, or selected features
- Reorder actions as needed
- Click "Update Agent" to save changes
Deleting Agents
- Click the Delete button (🗑) next to any agent
- Agent is immediately removed
- This action cannot be undone
Cache Control
Workflow Builder integrates with NoosphereWriter's intelligent caching system:
>- Default Behavior: Uses cached results when screenplay and context haven't changed (faster execution)
- Force Regenerate: Enable this option to run fresh analyses for all features, ignoring cache
- When to Force: After making significant script changes, when you want the latest analysis
- Cache Validation: System automatically detects when screenplay content or context (characters, locations, themes) has changed
Example Workflows
Script Quality Audit
Comprehensive validation before submission:
- Format Error Detector
- Continuity Check
- Common Flaws Report
- Readability Report
- On-the-Nose Detector
Pre-Production Package
Complete production planning suite:
- Script Breakdown
- Shot List
- Actor Breakdown
Final Polish Check
Last-pass optimization before locking script:
- Readability Report
- Cinematic Language
- Cadence Analyzer
- Scene Optimizer
- Final Polish
Best Practices
- Start Small: Create focused agents for specific tasks (validation only, production only, etc.)
- Logical Ordering: Arrange actions in a meaningful sequence (e.g., fix formatting before analyzing style)
- Descriptive Names: Use clear names that indicate the agent's purpose
- Regular Use: Run quality check agents periodically during development
- Pre-Submission: Execute comprehensive audit agents before sharing your script
- Production Prep: Use production-focused agents when transitioning from development to pre-production
Global Agent Library
Agents are saved globally and available across all your screenplays. Create once, reuse everywhere:
- Agents persist between sessions
- Available for any screenplay you work on
- Build a library of specialized workflows
- Share agent configurations with writing partners (future feature)
Performance Tips
- Caching: Leave "Force regenerate" disabled for faster execution when script hasn't changed
- Selective Execution: Create multiple focused agents instead of one giant agent
- Sequential Processing: Features execute one at a time to ensure reliable results
- Background Work: Workflow Builder shows progress - you can review results while it runs
Troubleshooting
Agent Execution Failed
- Check that you have screenplay content in the editor
- Verify your AI API key is configured in Settings
- Review the error message for specific feature failures
- Try running the failing feature individually to diagnose
No Results Displayed
- Some features don't produce "findings" (e.g., Breakdown, Shot List)
- Check the Execution Log to verify which features completed
- Individual feature results are saved to their respective storage locations
Cached Results Not Updating
- Enable "Force regenerate all features" to bypass cache
- Cache automatically invalidates when screenplay or context changes
- Individual features can be run separately to refresh specific results
Screenwriting Coach
Your personal AI screenwriting tutor that provides progressive lessons and remembers your learning journey.
Features
- Personalized tutoring based on your experience level
- Progressive curriculum from basics to advanced techniques
- Conversation memory across sessions
- Practical exercises and examples
- Industry insights and best practices
Getting Started
- Go to
Tools → AI Coaching → Screenwriting Coach - Choose your experience level
- Ask questions or request specific topics
- Complete suggested exercises
Topics Covered
- Story structure and three-act format
- Character development and arcs
- Dialogue techniques
- Scene construction
- Professional formatting
- Industry standards and practices
Theme Excavation
Discover the deeper thematic questions hidden within your story concept through Socratic dialogue.
Accessing Theme Excavation
Theme Excavation is now integrated into the Movie Concept dialog for a seamless workflow:
- Go to
Script → Movie Concept - Navigate to the Themes tab
- Click the Excavate button (blue button with target icon)
- The excavation process starts automatically
The Process
Theme Excavation uses a series of probing questions to help you uncover what your story is really about:
- Start with your surface-level concept
- Answer thought-provoking questions
- Dig deeper into character motivations
- Uncover universal themes
- Clarify your story's message
Applying Extracted Themes
When the excavation reaches the "statements" phase, you'll see potential thematic statements. Click Apply to Movie Concept to automatically match these statements to the 65 predefined themes in your Movie Concept.
Example Questions
- "What does your protagonist really want?"
- "What lie does your character believe?"
- "What truth must they discover?"
- "What universal human experience does this explore?"
Benefits
- Adds depth to your screenplay
- Strengthens character arcs
- Creates more resonant stories
- Helps with writer's block
- Automatically maps to predefined themes for consistency
World-Building
Generate rich, story-focused world-building research that brings your locations to life with authentic details and plot opportunities. World-Building is now integrated into the Location form.
How It Works
World-Building creates a comprehensive Research Dossier for each location:
- Go to
Script → Locations - Click Add Location or edit an existing location
- Click the World-Building button in the dialog header
- Select characters from the dropdown (multi-select with full character context)
- Set the time period and story mood
- Click Generate Research Dossier
- Review results and click Apply All to populate location fields
Research Dossier Categories
Your research dossier includes six detailed categories with visual icons:
- Five Senses: Specific sights, sounds, smells, textures, and tastes unique to your setting
- Jargon & Lingo: Authentic professional slang and technical terms with definitions
- Daily Rhythms: Specific routines, habits, and rituals unique to this environment
- Tools of Trade: Specific equipment with functions and potential plot uses
- Points of Conflict: Inherent tensions and problems that could complicate your story
- Hidden Detail: One fascinating, insider detail that only professionals would know (highlighted in a special callout box)
Context Fields
The World-Building dialog automatically uses your Movie Concept data for richer context. You can also provide:
- Character Focus: Select characters from a dropdown - their full profiles (role, description, flaw, want, need, ghost) are included in the AI prompt
- Time Period: Include relevant timing details (e.g., "Present Day (Summer 2025), during hurricane season")
- Story Mood: Define the atmosphere and emotional tone of your scenes
Key Features
- Smart Button Logic: Generate button enables when any field is filled
- Reset Functionality: Reset button appears when you have data, allowing you to start fresh
- Persistent Data: Your research and input fields are automatically saved and restored between sessions
- AI Integration: Uses your configured AI settings and model preferences
- Visual Organization: Results displayed with bullet points and icons for easy scanning
- Context Awareness: AI considers your movie concept and character data for more relevant results
Best Practices
- Be as specific as possible in your context descriptions
- Focus on authentic, research-based details rather than generic information
- Use the research to enhance character development and plot opportunities
- Save your research dossier for reference during writing
- Reset and generate new research for different settings or time periods
- Combine multiple contexts for complex stories (location, time, character, mood)
Benefits
- Adds authenticity to your screenplay with professional-level details
- Provides plot opportunities through inherent conflict points
- Enhances dialogue with authentic jargon and terminology
- Improves sensory details in scene descriptions
- Saves research time with targeted, story-focused information
- Helps overcome writer's block with specific environmental details
- Creates consistency across scenes in the same setting
Usage Tips
- Layer Your Research: Generate research for multiple aspects of your story (different locations, time periods, character perspectives)
- Use the Hidden Detail: This unique insider information often makes the best plot devices
- Save Different Versions: Reset and regenerate for different takes on the same setting
- Reference During Writing: Keep the research dossier open in another tab while writing scenes
- Character Integration: Use the jargon and tools in character dialogue and actions
Stakes Escalation
Generate powerful ways to escalate stakes at crucial story moments, focusing on personal, temporal, moral, and dramatic consequences that deepen audience investment. Stakes Escalation is now available as a contextual right-click action on Scene Headings.
How It Works
Stakes Escalation is available as a context menu action when you right-click on a Scene Heading:
- Right-click on any Scene Heading line in your screenplay
- Navigate to Generation → Stakes Escalation
- AI automatically uses your Characters data (protagonist/antagonist) and scene context
- Review your five escalation strategies
Automatic Context Extraction
Stakes Escalation automatically gathers context from your screenplay project:
- Protagonist & Antagonist: Extracted from your Script → Characters data
- Current Scene: The scene content where you triggered the action
- Previous Scene: Context from the preceding scene
- Movie Concept: Your overall story concept and themes
Five Escalation Categories
Your escalation strategies include five powerful categories designed by script doctors:
- Ticking Clock (Temporal Stakes): Time-based pressure that creates urgency and forces immediate action
- Public Stakes (Professional & Social): Threats to reputation, career, or social standing that amplify personal consequences
- Personal Stakes (Emotional & Relational): Impact on family, loved ones, or core relationships that matter most
- Moral Stakes (Compromising the Soul): Ethical dilemmas that force characters to choose between values and victory
- Antagonist's Counter-Move: How the opposition escalates in response, making the protagonist's situation more desperate
When to Use Stakes Escalation
- Plot Development: When planning major story beats and turning points
- Rewriting: When scenes feel flat or lack dramatic tension
- Character Arcs: To deepen the personal cost of the protagonist's journey
- Pacing Issues: When the middle act needs more forward momentum
- Climax Planning: To ensure your final confrontation has maximum impact
- Antagonist Development: To make your opposition more formidable and reactive
Best Practices
- Set up your Characters first (Script → Characters) so the AI knows your protagonist and antagonist
- Focus on consequences that genuinely matter to your protagonist
- Layer multiple types of stakes for compound pressure
- Ensure escalations feel organic to your story world
- Connect stakes to your protagonist's deepest fears and desires
- Build progressively throughout your screenplay - save the biggest stakes for the climax
Character Crucible
Test your character's true nature through difficult moral choices under pressure, generating powerful dilemmas that reveal character depth and drive dramatic conflict.
How It Works
Character Crucible creates targeted moral dilemmas based on your character's psychology and story context:
- Go to
Script → Characters, select a character, and switch to the "Crucible" tab. - Select a character from your character roster
- Describe the current situation creating pressure
- Define what's currently at stake for the character
- Click "Generate Crucible Scenario"
- Review 3-5 powerful moral dilemmas designed to test your character
Crucible Setup Fields
All fields work together to create targeted, character-specific dilemmas:
- Character to Test: Select from your defined characters (requires Script → Characters)
- The Situation: Current plot circumstances creating pressure and urgency
- What's Currently at Stake: What will be lost or gained based on the character's choice
Character Context Integration
The AI uses your character's defined psychology to create authentic dilemmas:
- Character Flaw: Weaknesses that can be exploited
- Want vs. Need: Surface desires vs. deeper psychological needs
- Lie They Believe: False beliefs that drive poor choices
- Ghost (Backstory): Past trauma that influences current decisions
- Relationships: Connections that can be threatened or leveraged
Generated Crucible Scenarios
Each dilemma includes four critical elements designed by character psychology experts:
- The Choice: The specific decision the character must make
- Immediate Consequence: What happens right after they choose
- What This Reveals: What the choice exposes about their true nature
- Character Truth: How this contradicts or confirms their established characterization
Key Features
- Character-Driven Design: Dilemmas tailored to each character's unique psychology
- Context-Aware Scenarios: Considers current story situation and stakes
- Multiple Dilemma Options: Generates 3-5 different crucible scenarios per session
- Copy-Friendly Results: Click any choice to copy to clipboard for easy reference
- Session Persistence: Your scenarios and input are automatically saved between sessions
- Reset Functionality: Start fresh with new scenarios anytime
- AI Integration: Uses your configured AI settings and model preferences
Types of Moral Dilemmas Generated
Character Crucible focuses on dilemmas that force genuine character revelation:
- Competing Values: Force choice between two things the character holds dear
- Loyalty vs. Self-Preservation: Test bonds against personal safety
- Truth vs. Compassion: Honesty that could devastate someone they care about
- Personal Gain vs. Collective Good: Individual benefit at others' expense
- Past Promises vs. Present Needs: Old commitments that conflict with current reality
- Moral Principles vs. Practical Necessity: Ideals challenged by harsh circumstances
When to Use Character Crucible
- Character Development: Deepen character psychology and reveal hidden aspects
- Plot Planning: Generate dramatic turning points that test character growth
- Midpoint Crises: Create powerful Act 2 dilemmas that raise stakes
- Climax Design: Craft the ultimate test of character transformation
- Relationship Dynamics: Test bonds between characters under extreme pressure
- Theme Exploration: Force characters to confront story's central philosophical questions
Best Practices
- Define Characters First: Use Script → Characters to create detailed character profiles before crucible generation
- Be Specific About Stakes: The more specific your stakes, the more targeted the generated dilemmas
- Consider Story Timing: Different dilemmas work better at different story beats
- Layer Multiple Dilemmas: Use different scenarios for different characters in the same story
- Test Character Growth: Generate new dilemmas as characters evolve throughout your story
- Connect to Theme: Choose dilemmas that also explore your story's central themes
Story Integration Tips
- Plant Seeds Early: Establish what matters to your character in Act 1 so crucible moments have maximum impact
- Progressive Difficulty: Start with smaller moral tests, build to life-changing dilemmas
- Active Choice Required: Best crucibles force characters to make active decisions, not just react
- No Easy Answers: Great dilemmas have compelling arguments for multiple choices
- Character Arc Integration: Use crucibles to push character development at key story beats
- Consequence Follow-Through: Show the long-term impact of crucible choices on character relationships and self-image
Example Scenario Generation
For a character defined as a "loyal detective with trust issues from betrayal," given the situation "partner is revealed to be corrupt" with stakes "career vs. friendship," Character Crucible might generate:
- Choice: "Report your partner immediately or give them 24 hours to come clean"
- Immediate Consequence: "Either your career advances but friendship ends, or you become complicit in corruption"
- Character Revelation: "Whether loyalty to individuals trumps loyalty to justice"
- Character Truth: "Tests their claim that betrayal destroyed their ability to trust"
Integration with Other Tools
Character Crucible works seamlessly with NoosphereWriter's other features:
- Characters System: Automatically loads character psychology from Script → Characters
- Movie Concept: Considers genre and story archetype for appropriate dilemma types
- Theme Structure: Aligns dilemmas with your story's central thematic questions
- Stakes Escalation: Complements stakes generation with character-specific pressure points
- Plot Board: Crucible scenarios can be integrated into story beat planning
Inner World Explorer
Dive deep into your character's psychology, emotions, and internal landscape to discover authentic inner thoughts, complex emotional states, and psychological barriers that drive compelling character development.
How It Works
Inner World Explorer analyzes your character's psychological profile and current context to generate authentic inner world insights:
- Go to
Script → Characters, select a character, and switch to the "Inner World" tab. - Provide context through one or more fields:
- Current Situation: What's happening in the character's circumstances
- Internal Conflict: The emotional or psychological battle they're fighting
- External Pressure: Forces, people, or situations pressuring the character
- Click "Explore Inner World"
- Review 2-3 comprehensive psychological insights about your character's inner experience
What You Get
Each insight provides four key psychological dimensions:
- Internal Dialogue: The character's authentic inner voice and thoughts in this moment
- Emotional State: The complex mix of emotions they're experiencing beyond surface feelings
- Psychological Barrier: What defense mechanism, fear, or psychological pattern is blocking them
- Breakthrough Moment: What would need to happen for them to have a moment of truth or breakthrough
Key Features
- Character-Centric: Requires character selection to ensure personalized insights
- Multiple Context Fields: Flexible input allowing different types of story context
- Psychological Depth: Focuses on authentic inner experience rather than external actions
- Click-to-Copy: Easily copy internal dialogues and insights to your clipboard
- Session Persistence: Saves your exploration data automatically per file
- Reset Functionality: Start fresh with new explorations anytime
- AI Integration: Uses your configured AI settings and model preferences
Types of Insights Generated
Inner World Explorer reveals different layers of character psychology:
- Conscious Thoughts: What the character is actively thinking about their situation
- Unconscious Patterns: Hidden psychological tendencies and defense mechanisms
- Emotional Complexity: The layered emotional reality beneath surface reactions
- Psychological Blocks: What's preventing the character from growth or change
- Breakthrough Opportunities: Moments of potential transformation or realization
- Inner Conflicts: The competing desires and values creating internal tension
When to Use Inner World Explorer
- Character Development: Deepen understanding of character psychology and motivations
- Scene Writing: Generate authentic internal monologue and subtext for scenes
- Emotional Beats: Explore how characters process important story moments internally
- Character Arc Planning: Understand psychological barriers that need to be overcome
- Dialogue Enhancement: Create subtext by understanding what characters aren't saying
- Method Writing: Get inside your character's head for more authentic writing
Best Practices
- Character Foundation: Ensure your character has detailed psychology (flaw, want, need, lie, ghost) for richer insights
- Specific Context: Provide concrete situations rather than vague descriptions for more targeted insights
- Emotional Honesty: Be honest about your character's emotional state, including uncomfortable feelings
- Multiple Explorations: Use different contexts to explore various facets of your character's inner world
- Scene Integration: Use insights to inform how characters behave and react in specific scenes
- Character Growth: Track how inner world insights change as your character develops through the story
Example Exploration
For a character defined as a "paranoid and distrustful warrior mother," given the situation "cleaning weapons while her son sleeps" with internal conflict "wants to give him a normal life but knows they can never be safe," Inner World Explorer might generate:
- Internal Dialogue: "I can't let my guard down, not even for a moment. Every shadow could hide a threat."
- Emotional State: "A complex mix of hypervigilance, exhaustion, and deep-seated fear masked by determination"
- Psychological Barrier: "Trust issues stemming from past betrayals, creating walls that keep others at a distance"
- Breakthrough Moment: "Realizing that her isolation is actually making her son more vulnerable, not safer"
Integration with Other Tools
Inner World Explorer works seamlessly with NoosphereWriter's other features:
- Characters System: Automatically loads detailed character psychology from Script → Characters
- Character Crucible: Complements moral choice testing with deep psychological understanding
- Movie Concept: Considers genre and story archetype for psychologically appropriate insights
- Theme Structure: Aligns inner explorations with your story's thematic questions
- Screenwriting Coach: Provides character psychology insights for scene writing lessons
- Comments System: Use insights to add psychological depth notes to specific scenes
Character Interview
Conduct dynamic conversations with your characters to discover their voice, mannerisms, and deeper psychological insights. This interactive tool helps you understand your characters as living beings rather than plot devices.
How It Works
Character Interview creates a conversation between you and your selected character, powered by AI that understands their psychology and context:
- Go to
Script → Characters, select a character, and switch to the "Interview" tab. - Choose from curated questions or ask your own
- Have a real-time conversation with your character
- Export the conversation for reference
Question Categories
Character Interview provides expertly crafted questions across four strategic categories:
- Warm-Up & Foundation: Establish comfort and immediate context ("What's on your mind right now?", "Describe the room you're in")
- Voice & Mannerisms: Discover how they speak and behave ("Tell me a story you've told a hundred times", "How do you order a drink?")
- Psychological Depth: Explore motivations and internal conflicts ("What do you believe you want more than anything?", "What's a small lie you tell yourself?")
- Story Possibilities: Generate plot potential ("What's your biggest secret?", "Who has the most power over you?")
Character Context Integration
The AI uses your character's defined attributes to create authentic responses:
- Character Profile: Role, archetype, description, and character arc
- Psychology: Flaw, want, need, lie they believe, and ghost (backstory trauma)
- Relationships: How they relate to other characters
- Story Context: Movie concept, themes, and current story situation
Key Features
- Dynamic Conversation: Real-time back-and-forth dialogue with your character
- Expert Questions: Curated by professional character development techniques
- Custom Questions: Ask anything specific to your story or character needs
- Conversation History: Full transcript maintained throughout your session
- Export Function: Save conversations as text files for later reference
- Persistent Sessions: Conversations automatically saved between sessions
- Markdown Processing: Character responses support rich formatting for emphasis and structure
- Context Awareness: Character responses consider conversation history and project context
Question Strategy and Purpose
Each question category serves specific character development goals:
- Warm-Up Questions: Establish the character's immediate state and environment, creating natural entry points into deeper topics
- Voice Questions: Reveal speech patterns, humor, social behavior, and how they adapt to different situations
- Psychology Questions: Uncover motivations, internal contradictions, self-awareness, and emotional patterns
- Story Questions: Explore secrets, power dynamics, fears, and potential plot catalysts
When to Use Character Interview
- Character Creation: Develop new characters beyond basic profiles
- Dialogue Writing: Discover authentic voice patterns and speech habits
- Character Development: Deepen existing characters with new insights
- Scene Planning: Understand how characters would react in specific situations
- Plot Development: Generate story ideas through character secrets and conflicts
- Character Consistency: Verify character reactions align with their psychology
- Writer's Block: Get unstuck by letting characters guide story direction
Best Practices
- Define Characters First: Use Script → Characters to create detailed character profiles before interviewing
- Start with Warm-Up: Begin conversations with foundation questions to establish context
- Follow Natural Flow: Let the conversation develop organically based on character responses
- Ask Follow-Up Questions: Dig deeper when characters reveal interesting details
- Challenge Characters: Don't accept surface answers - push for deeper truths
- Note Voice Patterns: Pay attention to how characters speak and express themselves
- Export Important Sessions: Save breakthrough conversations for future reference
Advanced Interview Techniques
- Situational Questions: Place characters in hypothetical scenarios to test reactions
- Relationship Queries: Ask about specific other characters to explore dynamics
- Time-Based Questions: Explore past events, future hopes, and present concerns
- Contradiction Challenges: Point out inconsistencies to discover deeper truths
- Emotional Pressure: Ask difficult questions that create emotional responses
- Value Testing: Present moral dilemmas to understand character principles
Story Integration Tips
- Voice Consistency: Use interview insights to maintain authentic dialogue throughout your script
- Backstory Details: Incorporate revealed backstory elements into scene context and character behavior
- Conflict Seeds: Transform discovered secrets and fears into plot complications
- Character Arcs: Use psychological insights to design meaningful character growth
- Relationship Dynamics: Apply character perspectives to improve interactions with other characters
- Subtext Creation: Use internal conflicts to add layers beneath surface dialogue
Example Interview Flow
A typical character interview might progress:
- Foundation: "What's on your mind right now?" → Establishes current emotional state
- Context: "Describe where you are" → Creates environmental grounding
- Voice: "Tell me about your morning routine" → Reveals behavioral patterns
- Depth: "What do you want more than anything?" → Uncovers core motivation
- Challenge: "What's stopping you from getting it?" → Explores obstacles and fears
- Story Potential: "What would you do if that obstacle disappeared tomorrow?" → Generates plot possibilities
Integration with Other Tools
Character Interview works seamlessly with NoosphereWriter's character development ecosystem:
- Characters System: Automatically loads character psychology and relationships
- Character Crucible: Use interview insights to create more targeted moral dilemmas
- Inner World Explorer: Complement psychological exploration with conversational discovery
- Movie Concept: Character responses consider genre expectations and story archetype
- Theme Structure: Align character insights with your story's thematic questions
- Screenwriting Coach: Use character voice discoveries in scene writing lessons
Technical Features
- Persistent Storage: Conversations automatically saved to browser local storage
- Session Management: Multiple interviews tracked separately per character
- Export Format: Clean text format with speaker labels for easy integration
- Markdown Support: Character responses can include emphasis, lists, and formatting
- Context History: AI maintains conversation context throughout entire session
- Error Recovery: Graceful handling of API failures with retry options
Character Debate
Simulate a debate between two characters to explore their conflict, voice, and differing perspectives. This tool helps you test how characters interact when their goals or beliefs clash.
How It Works
Character Debate creates a dialogue between two selected characters based on a specific topic or context:
- Go to
Script → Characters, check the selection boxes for exactly two characters, and click the "Start Debate" button. - Enter a topic, situation, or context for them to discuss
- Click "Start Debate" to generate the initial dialogue
- Click "Continue Debate" to extend the conversation
Key Features
- Dual Character Selection: Pit any two characters against each other
- Context-Aware Dialogue: Characters speak according to their defined profiles and the screenplay's context
- Topic-Based Generation: Focus the debate on specific themes, plot points, or conflicts
- Suggestion Chips: Quickly select common debate topics like "The ethics of the plan" or "A betrayal"
- Copy Functionality: Easily copy individual lines of dialogue to your clipboard
When to Use Character Debate
- Conflict Testing: See how characters handle disagreement
- Voice Differentiation: Ensure characters sound distinct from one another
- Scene Brainstorming: Generate ideas for argument scenes
- Relationship Exploration: Discover the dynamics between two specific characters
Name Database
Find the perfect name for your characters using a searchable database of over 200,000 names with rich metadata. Search by demographics, phonetics, archetypes, or use natural language descriptions with AI-assisted search.
How to Access
Go to Script → Characters and click "Add Character" (or edit an existing one) to access
the Name Database.
Search Modes
The Name Database offers two powerful search modes:
Structured Search
Use specific filters to narrow down names by category:
- Gender: Filter by Female, Male, or Any
- Origin: Search by cultural or geographic origin (e.g., Greek, Celtic, Hebrew, African)
- Class Connotation: Names associated with different social classes (Aristocratic, Working Class, etc.)
- Phonetics Feel: How the name sounds (Soft, Hard, Lyrical, Harsh, Sibilant)
- Archetype: Character archetypes the name evokes (Hero, Sage, Rebel, etc.)
- Vibe: The overall feeling of the name (Elegant, Tough, Mystical, etc.)
- Syllable Count: Set minimum and maximum syllables
AI-Assisted Search
Describe your character in natural language and let AI find matching names:
- Enter descriptions like "A tough female detective with Eastern European roots"
- The AI interprets your description and searches the database
- If the database has no matches, AI generates appropriate names
Name Results
Each name result includes rich metadata to help you choose:
- Name: The character name
- Origin: Cultural or geographic origin
- Meaning: The traditional meaning of the name
- Gender Skew: Whether the name tends masculine, feminine, or neutral
- Class Connotation: Social class associations
- Archetype: Character archetypes evoked by the name
- Vibe: The overall feeling or impression
- Phonetics: Sound characteristics and syllable count
- Tags: Additional descriptive keywords
Using Results
Once you find a name you like:
- Copy to Clipboard: Click the copy icon to copy the name for use in your screenplay
- View Details: Expand names to see full metadata for informed choices
- Refine Search: Adjust filters and search again for more options
LLM Fallback
When the database doesn't have matching names for your search criteria:
- The AI automatically generates appropriate names matching your description
- Generated names include complete metadata (origin, meaning, archetype, etc.)
- This ensures you always get useful results, even for unusual requests
Best Practices
- Start Broad: Begin with fewer filters and refine as needed
- Consider Phonetics: Think about how names sound when spoken aloud
- Match Character Archetypes: Use the archetype filter to find names that fit your character's role
- Check Origin: Ensure the name's origin fits your story's setting and cultural context
- Use AI Search for Complex Requests: For nuanced requirements, describe your character to the AI
Database Coverage
The Name Database contains over 207,000 names with:
- 18,000+ distinct cultural origins
- Comprehensive phonetic analysis
- Character archetype associations
- Meaning and etymology information
- Social class connotations
Creative Consultant
Consult with film industry professionals about your screenplay. Get specialized expertise from 14 different roles across all production phases—from producers and screenwriters to cinematographers and VFX supervisors.
How It Works
Creative Consultant connects you with AI-powered industry experts who understand filmmaking from their specialized perspective:
- Go to
Tools → AI Coaching → Creative Consultant - Select a consultant role from the dropdown menu
- Choose specific scenes to discuss (or consult on the entire screenplay)
- Ask questions and receive expert guidance
- Continue the conversation with follow-up questions
- Export the consultation for reference
Available Consultant Roles
Creative Consultant provides access to 14 specialized industry professionals organized by production phase:
Pre-Production Consultants
- Producer: Budget management, financing strategies, distribution planning, risk management, and balancing creative vision with practical constraints
- Screenwriter: Story structure, character arcs, dialogue, visual storytelling, scene economy, genre conventions, and the rewriting process
- Director: Shot composition, visual metaphor, actor performance, blocking, tone and atmosphere, pacing, and translating script to screen
Production Consultants
- Actor: Character psychology, emotional preparation, subtext, physical characterization, scene objectives, and the difference between written text and performed reality
- Director of Photography: Lighting design, camera movement, color palette, visual motifs, lens choice, depth of field, and collaboration with production design
- Assistant Director: Production logistics, shooting schedules, location scouting, crew coordination, and managing on-set workflow
- Production Designer: Set design, color theory, period accuracy, visual motifs, practical vs. built sets, and how physical spaces tell stories
- Costume Designer: Character psychology through wardrobe, color symbolism, period research, costume evolution reflecting character arc, and practical considerations
- Makeup Artist: Character transformation, aging techniques, injury effects, continuity, and how makeup reveals character state
- Production Sound Mixer: On-set audio capture, dialogue recording, ambient sound, microphone placement, and production sound challenges
Post-Production Consultants
- Editor: Narrative assembly, pacing, rhythm, performance selection, scene transitions, and building emotional arcs through cutting
- Composer: Musical themes, emotional underscore, leitmotifs, instrumentation, and how music supports narrative without overpowering
- Sound Designer: Audio world-building, sound effects, Foley, ambient layers, sonic storytelling, and creating immersive soundscapes
- VFX Supervisor: Visual effects planning, practical vs. digital effects, green screen logistics, and integrating VFX into storytelling
Context-Aware Consultations
Each consultant has access to comprehensive project context, providing advice tailored to your specific screenplay:
- Screenplay Content: Selected scenes or full script for targeted or comprehensive consultations
- Characters: Character profiles, psychology (want, need, flaw, ghost, lie), archetypes, and relationships
- Locations: Location roster with types (interior/exterior), descriptions, and story significance
- Movie Concept: Genre, logline, themes, story archetype, and overall vision
- Theme Structure: Central argument, thematic questions, and narrative structure
- Production Design System: Visual themes, character styling, location design, and prop library (for relevant roles)
Role-Based Context Filtering
Each consultant receives information relevant to their expertise:
- All Roles: Screenplay scenes, characters, locations, movie concept, theme structure
- Design-Focused Roles: Production Designer, Costume Designer, Makeup Artist, Production Sound Mixer receive additional Production Breakdown data and Design System information
- Director of Photography: Receives character styling and location design for cinematography planning
- Other Roles: Receive screenplay and story-level context appropriate to their focus
Key Features
- 14 Specialized Roles: Consult with experts from every production phase
- Scene Selection: Focus consultations on specific scenes or discuss the entire screenplay
- Select All/Deselect All: Quickly include or exclude all scenes with one click
- Context Indicators: Visual badges show what project information is available to the consultant
- Conversation History: Full transcript maintained throughout your session
- Follow-Up Questions: Continue the conversation and dig deeper into specific topics
- Persistent Sessions: Consultations automatically saved between sessions per role
- Role Switching: Change consultants mid-session to get different perspectives
- Markdown Processing: Consultant responses support rich formatting for clarity and structure
- Export Function: Save consultations as text files for production notes and collaboration
- Clear Conversation: Start fresh consultations with confirmation protection
When to Use Creative Consultant
- Pre-Writing Planning: Consult with Producer about budget feasibility or Director about visual approach
- Script Development: Get Screenwriter feedback on structure, character arcs, or dialogue
- Scene-Specific Questions: Ask Director of Photography about lighting a night scene or Actor about character motivation
- Production Planning: Consult Assistant Director about scheduling or Production Designer about set requirements
- Technical Feasibility: Check with VFX Supervisor about effects complexity or Sound Designer about audio challenges
- Character Visualization: Work with Costume Designer and Makeup Artist on character appearance evolution
- Post-Production Vision: Discuss pacing with Editor or musical themes with Composer
- Multiple Perspectives: Get different viewpoints on the same scene from different roles
- Professional Development: Learn industry workflows and professional approaches to filmmaking
Best Practices
- Define Project Data First: Complete Script → Movie Concept, Characters, and Locations before consulting for richer context
- Use Scene Selection: Focus consultations on specific scenes for targeted advice
- Ask Specific Questions: "How should I light this interrogation scene?" works better than "Tell me about lighting"
- Consider the Role: Match your question to the consultant's expertise area
- Follow Up: Dig deeper when consultants provide interesting insights or suggestions
- Switch Perspectives: Ask multiple consultants about the same scene for holistic understanding
- Reference Context: Consultants can see your screenplay—reference specific lines, actions, or moments
- Save Important Sessions: Export breakthrough consultations for production notes
- Production Design Integration: Use Design System data (themes, styling, locations) for more detailed consultations with relevant roles
Example Consultation Flow
A typical consultation might progress:
- Select Consultant: Choose "Director of Photography" from dropdown
- Select Scenes: Choose the interrogation scene and warehouse confrontation
- Initial Question: "How should I approach the lighting for the interrogation scene to create psychological pressure?"
- Consultant Response: Detailed advice on harsh overhead practicals, eliminating fill light, creating shadow patterns
- Follow-Up: "What about the transition to the warehouse? Should the lighting contrast or continue the harsh approach?"
- Further Discussion: Continue refining visual approach based on consultant expertise
- Export: Save consultation for director and DP collaboration
Applying Consultation Insights
- Screenplay Revisions: Incorporate structural or dialogue suggestions from Screenwriter consultations
- Production Notes: Add consultant insights as scene notes or production breakdown annotations
- Shot Lists: Use Director and DP advice to create detailed shot lists in Production menu
- Design Documents: Incorporate Production Designer, Costume Designer, and Makeup Artist suggestions into Design System
- Collaboration: Share exported consultations with actual crew members as starting points for discussion
- Budget Planning: Use Producer insights to create realistic budget expectations and contingency plans
- Schedule Planning: Apply Assistant Director logistics advice to shooting schedules
Integration with Other Tools
Creative Consultant works seamlessly with NoosphereWriter's production ecosystem:
- Movie Concept: Consultants consider genre, themes, and story archetype in their advice
- Theme Structure: Advice aligns with your thematic questions and central argument
- Characters System: Consultants understand character psychology, relationships, and arcs
- Locations System: Location context informs production planning and scene-specific advice
- Production Breakdown: Design-focused consultants access detailed breakdown data
- Design System: Visual themes, character styling, location design, and props inform consultant responses
- Scene Navigation: Select specific scenes from your screenplay for targeted consultations
- Character Tools: Complement Character Interview, Character Crucible, and Inner World Explorer with professional production perspectives
Technical Features
- Persistent Storage: Consultations automatically saved to browser local storage per role
- Role-Based Sessions: Each consultant maintains separate conversation history
- Scene Extraction: Automatic scene detection from screenplay for selection interface
- Export Format: Clean text format with consultant role labels and timestamps
- Markdown Support: Consultant responses include formatting, lists, emphasis for clarity
- Context Optimization: Intelligent context packaging based on consultant expertise
- Error Recovery: Graceful handling of API failures with clear error messages
- Design System Integration: Seamless loading of production design data from localStorage
Professional Use Cases
- Film Students: Learn industry workflows and professional perspectives from multiple departments
- Independent Filmmakers: Get expert advice when you can't afford to hire all these roles
- Screenwriters: Understand how different departments will interpret and execute your script
- Directors: Plan shots and collaborate with virtual department heads before hiring crew
- Producers: Evaluate production complexity and identify potential challenges early
- Film Educators: Teach students how different roles collaborate and think about scripts
- Development Executives: Assess scripts from multiple production perspectives
Character Introduction
Analyze how your characters are introduced to the audience, evaluating their first appearance for maximum impact and proper storytelling foundation using professional character introduction techniques.
How It Works
Character Introduction analyzes your character's first appearance in the screenplay against established character introduction best practices:
- Go to
Script → Story & Structure → Character Introduction - Select a character from your character roster
- The tool identifies their first appearance in the screenplay
- Click "Analyze Introduction"
- Receive comprehensive analysis of introduction effectiveness
- Get strategic recommendations for improvement
- Export detailed analysis as PDF report
Character Introduction Checklist Framework
The analysis evaluates character introductions against a comprehensive professional checklist organized into five key categories:
- Core Goals & First Impressions: Timing, memorable impact, reader hook, and genre alignment
- Character Revelation: Core essence, revealing actions, flaw establishment, purposeful dialogue, environment reflection, and vulnerabilities
- Narrative and Plot Function: Plot advancement, conflict foreshadowing, and information balance
- Common Pitfalls to Avoid: Physical description lists, clichéd scenarios, info-dumping, name clarity, and character objectification
- Formatting and Clarity: Proper name formatting, age inclusion, and mystery identity handling
Professional Analysis Interface
The Character Introduction tool provides a comprehensive tabbed interface with four detailed analysis sections:
- Assessment Tab: Character information, first appearance details, strengths/weaknesses analysis, genre considerations, archetype analysis, and marketability notes
- Checklist Details Tab: All 21 individual checklist items organized by category with visual pass/fail indicators and detailed analysis for each criterion
- Recommendations Tab: Priority-based recommendations (High/Medium/Low) with specific action items and rationale for improvement
- Industry Insights Tab: Professional insights about genre expectations, archetype considerations, standards, and marketability factors
What You Get from Analysis
Each character introduction analysis provides:
- Overall Effectiveness Score: 0-100 rating with readiness level (amateur/developing/professional/exceptional)
- First Appearance Details: Scene location, page number, and introduction text
- Comprehensive Checklist Results: Pass/fail evaluation of 21 specific industry-standard criteria across five categories
- Detailed Item Analysis: In-depth explanation for each checklist item, including why it passed or failed
- Category Performance Summary: Pass rates and priority recommendations for each major checklist category
- Actionable Recommendations: Specific, prioritized steps to address failed checklist items
- Professional Context: How each checklist item relates to industry expectations and reader engagement
- Genre-Specific Guidance: Checklist evaluations tailored to your screenplay's genre requirements
- Industry Insights: Professional standards, archetype considerations, and commercial viability factors
Professional Checklist Categories
Character Introduction evaluates against industry-standard criteria organized into five strategic categories:
- Core Goals & First Impressions: Ensures early introduction, memorable impact, reader engagement, and genre alignment
- Character Revelation: Validates core essence communication, revealing actions, flaw establishment, and dialogue effectiveness
- Narrative and Plot Function: Confirms plot advancement, conflict setup, and information/mystery balance
- Common Pitfalls to Avoid: Identifies and prevents typical amateur mistakes like physical description lists and clichéd scenarios
- Formatting and Clarity: Ensures proper screenplay formatting standards and character name clarity
Introduction Effectiveness Levels
- Exceptional (85-100): Industry-standard character introduction that immediately engages readers
- Professional (70-84): Solid introduction with clear character identity and engagement
- Developing (50-69): Basic introduction present but needs refinement for maximum impact
- Amateur (0-49): Introduction lacks essential elements and requires significant development
When to Use Character Introduction
- First Draft Review: Evaluate how effectively you've introduced key characters
- Character Development: Ensure character introductions match their story importance
- Revision Planning: Identify which character introductions need the most attention
- Professional Polish: Perfect character introductions before submissions
- Reader Engagement: Ensure characters make strong first impressions
- Story Structure: Verify character introductions support overall narrative flow
Pro Tips for Effective Character Introductions
- Start with Action: Show characters doing something that reveals personality
- Avoid Physical Descriptions: Focus on behavior and choices over appearance
- Create Immediate Stakes: Give characters something to want or fear in their first scene
- Use Contrast: Show gaps between how characters see themselves vs. reality
- Plant Story Seeds: Introduction moments should connect to character's larger arc
- Consider Reader Experience: First impressions matter for audience investment
AI-Powered Context Menu Assistant
For quick character introduction improvements while writing, Character Introduction is also available as a context-sensitive AI assistant:
How to Use the Context Menu
- Right-click on any CHARACTER line in your screenplay
- Hover over "Generation" in the context menu
- Select "Character Introduction"
- Receive immediate AI-generated character introduction alternatives
- Click any suggestion to replace your current character line
Strategic Framework Integration
The context menu Character Introduction feature implements a comprehensive 5-step strategic framework for professional character introductions:
- Step 1 - Define Core Essence: AI identifies the character's defining personality trait, internal conflict (desire vs. fear), and most significant flaw
- Step 2 - Find Characteristic Moment: Creates dramatized scenarios that force the character to reveal their core essence through action
- Step 3 - Select Introduction Techniques: Layers multiple approaches including action (show don't tell), dialogue (impactful first lines), environment (character-defining settings), and reputation (others discussing them first)
- Step 4 - Decide on Pacing: Determines whether a high-impact entrance or slow burn reveal serves the story better
- Step 5 - Write with Precision: Focuses on concise, evocative language with selective physical details that imply deeper character truth
Context-Aware Suggestions
The AI context menu feature leverages your complete project setup for personalized recommendations:
- Movie Concept Integration: Considers your genre, themes, and story archetype
- Character Roster Analysis: Uses existing character profiles and relationships
- Theme Structure Alignment: Ensures introductions support your thematic premise
- Location Awareness: Incorporates your established settings and environments
- Plot Board Integration: Aligns with your story beats and structure
Professional-Quality Alternatives
Each context menu session generates 2-4 complete character introduction alternatives that:
- Implement professional character introduction best practices
- Are immediately usable as screenplay replacements
- Include analysis explaining the strategic approach taken
- Consider your specific story context and character development needs
- Apply the 5-step strategic framework for maximum impact
When to Use Context Menu vs. Full Tool
- Use Context Menu For: Quick improvements while writing, immediate alternatives, rapid iteration on character lines
- Use Full Tool For: Comprehensive analysis of existing introductions, detailed checklists, PDF reports, systematic evaluation of all characters
Integration with Other Tools
Character Introduction works seamlessly with NoosphereWriter's character development ecosystem:
- Characters System: Automatically analyzes characters from Script → Characters roster
- Character Crucible: Use introduction insights to design better moral dilemmas
- Character Interview: Discover voice and mannerisms to improve introduction dialogue
- Inner World Explorer: Align introduction analysis with psychological insights
- Movie Concept: Ensures character introductions support genre and story archetype
- Theme Structure: Aligns character introductions with thematic questions
- Screenwriting Coach: Provides character introduction lessons based on analysis
Export and Documentation
Character Introduction analysis can be exported as comprehensive PDF reports including:
- Executive Summary: Overall score, effectiveness level, and key recommendations
- Character Assessment: First appearance details, strengths, weaknesses, and professional insights
- Complete Checklist Results: All 21 checklist items with pass/fail status and detailed analysis
- Priority Recommendations: Categorized action items with priority levels and rationale
- Industry Context: Genre expectations, archetype analysis, and marketability factors
- Professional Formatting: Clean, professional layout suitable for development notes and collaboration
Insert Symbol
Add special characters and symbols to your screenplay.
Common Symbols
- © - Copyright symbol
- ® - Registered trademark
- ™ - Trademark
- … - Ellipsis
- — - Em dash
- – - En dash
Using Insert Symbol
- Go to
Tools → Insert Symbol - Browse categories or search
- Click to insert at cursor position
Scene Lab
AI-powered scene rewriting tool that generates alternative versions of your scenes based on specific creative directions. Scene Lab helps you explore different possibilities for your story without losing your original work.
How to Access Scene Lab
- Right-click on any Scene Heading line in your screenplay
- Hover over "Generation" in the context menu
- Select "Scene Lab"
- The Scene Lab dialog opens with your scene content pre-loaded
Scene Lab Features
Creative Directions
Choose from preset directions or create your own:
- Make it Funnier: Enhances comedic elements and timing
- Increase Tension: Heightens conflict and stakes
- More Emotional: Deepens character feelings and reactions
- Show Don't Tell: Converts exposition into visual action
- Noir Style: Applies moody, atmospheric description and dialogue
- Custom: Type any specific instruction (e.g., "Write it like a Wes Anderson movie")
Working with Alternatives
- Generate: Create up to 3 different versions at once
- Compare: View original and new versions side-by-side
- Select: Choose the version you like best
- Replace: One-click replacement of your scene in the editor
Best Practices
- Use for scenes that feel flat or "off"
- Experiment with radically different tones to find new angles
- Combine elements from different generated versions
- Always review generated content for consistency with your story's voice
Dialogue Lab
AI-powered dialogue refinement tool that helps you polish character voices, improve subtext, and fix common dialogue issues.
How to Access Dialogue Lab
- Right-click on any Character Name or Dialogue line
- Hover over "Generation" in the context menu
- Select "Dialogue Lab"
Dialogue Lab Functions
- Make Subtextual: Hides meaning beneath the surface
- Differentiate Voice: Makes the character sound more unique
- Shorten/Punch Up: Removes fluff and sharpens the lines
- Period/Genre Style: Adapts speech patterns to specific eras or genres
Using Dialogue Lab
- Select the dialogue you want to improve
- Choose a refinement option
- Review the AI suggestions
- Apply the best option to your script
Action Lab
AI-powered action line enhancer that transforms passive description into active, cinematic writing.
How to Access Action Lab
- Right-click on any Action line
- Hover over "Generation" in the context menu
- Select "Action Lab"
Action Lab Capabilities
- Active Voice: Converts passive phrasing to active verbs
- Visual Impact: Enhances imagery and descriptive power
- Conciseness: Trims wordy descriptions
- Pacing: Adjusts sentence rhythm for better flow
Tips
- Use for "blocky" paragraphs of action
- Great for fight scenes or chase sequences
- Helps eliminate "we see" and "we hear" camera directions
Heighten Conflict
AI-powered conflict escalation tool that analyzes your scenes and provides professional storytelling techniques to increase tension, stakes, and dramatic engagement.
How to Access Heighten Conflict
- Right-click on any Scene Heading line in your screenplay
- Hover over "Generation" in the context menu
- Select "Heighten Conflict"
Conflict Techniques
- Character Conflicting Goals: Ensure characters want mutually exclusive things
- Introduce Obstacles: Add external barriers or complications
- Raise the Stakes: Make consequences of failure explicit
- Add Time Pressure: Create deadlines
- Employ Subtext: Layer hidden agendas
- Dramatic Irony: Reveal info to audience that characters don't know
Using Suggestions
- Review the AI's analysis of your scene's current conflict
- Consider the suggested escalation strategies
- Apply techniques that fit your story's tone
Scene Rescue
AI-powered "Scene Doctor" that diagnoses stalled scenes by checking for the 4 essential dramatic beats and offering specific fixes to get the story moving again.
How to Access Scene Rescue
- Right-click on any Scene Heading line in your screenplay
- Hover over "Generation" in the context menu
- Select "Scene Rescue"
The 4-Beat Diagnosis
Scene Rescue analyzes your scene against a rigid dramatic structure to identify exactly where the momentum is breaking:
- Disagreement: Is there an initial conflict, refusal, or opposing goal?
- Discussion: Do the characters argue, negotiate, or process this conflict?
- Decision: Does a character make a distinct choice or realization?
- Action: Does that decision lead to a physical action or new direction?
Suggested Fix
Based on the missing beat, the tool provides:
- Diagnosis: A concise explanation of why the scene feels stuck.
- Rationale: The reasoning behind the suggested fix.
- Content: A precise, Fountain-formatted screenplay snippet to insert into your script.
Using the Fix
- Copy Suggestion: Copies only the clean screenplay text to your clipboard.
- Enhance Scene: Automatically inserts the suggested content directly into your editor.
Suggest Scene Axe
AI-powered tool that generates "Axes" – physical objects, environmental features, or third parties – to externalize scene subtext and conflict.
How to Access Scene Axe
- Right-click on any Scene Heading line in your screenplay
- Hover over "Generation" in the context menu
- Select "Suggest Scene Axe"
What is a Scene Axe?
A "Scene Axe" is a tangible element introduced into a scene that forces characters to deal with their underlying conflict physically rather than just verbally. It makes subtext visible.
Features
- Subtext Analysis: AI analyzes the scene to identify the core underlying tension.
- 3 Suggestion Types:
- Prop: An object characters interact with (e.g., a loaded gun, a broken watch).
- Environment: A feature of the setting (e.g., a leaking roof, sweltering heat).
- Third Party: A minor character who interrupts or observes (e.g., a nosy waiter, a crying baby).
- Action Beats: Specific suggestions for how characters can interact with the Axe.
Using Suggestions
- Copy to Clipboard: Copy the suggestion text to use manually.
- Add Note: Insert the suggestion as a structured note directly into your scene for future reference.
Research
AI-powered research tool that provides factual information about selected text using Google Search grounding. Perfect for screenwriters who need quick background information on historical events, locations, terminology, or cultural references.
How to Access Research
- Select any text in your screenplay (a word, name, place, or phrase)
- Right-click to open the context menu
- Hover over "Lookup"
- Select "Research"
What You Get
The Research tool provides a concise, structured response:
- Summary: A 2-3 sentence factual overview
- Key Facts: Three bullet points with the most important information
- Context: Cultural or historical context relevant to screenwriting
Best Uses for Screenwriters
- Historical Accuracy: Verify dates, events, and period-specific details
- Location Research: Learn about cities, landmarks, or settings
- Cultural References: Understand cultural context for characters and dialogue
- Technical Terms: Get quick definitions for specialized vocabulary
- Real People: Quick background on historical figures you're referencing
Tips
- Use for quick fact-checking while writing, not deep research
- Results are grounded in Google Search for accuracy
- Great for verifying details mentioned in dialogue or action lines
- Pair with the Anachronism Detective tool for period pieces
Title Page
Create a professional title page for your screenplay with all required information.
Title Page Elements
- Title: Your screenplay's title
- Author: "Written by" credit
- Based on: Source material credit (if applicable)
- Contact: Your contact information
- Draft Date: Current draft date
- Copyright: Copyright notice
Formatting
The title page is automatically formatted according to industry standards:
- Title centered and in caps
- Credits properly spaced
- Contact info in bottom left or right
Movie Concept
Define and organize the core creative elements of your screenplay project using our comprehensive 4-tab system.
Core Concept Tab
Establish the fundamental elements of your story:
- Movie Idea: Describe your core movie concept in a few sentences
- Genres: Select primary and secondary genres from our comprehensive list
- Protagonist + Goal + Obstacle: Break down your concept into the three essential story building blocks
- Logline: One-to-two sentence summary of your movie's plot
- AI Enhancement: Use AI expansion buttons to generate professional suggestions for each element
Analyze Premise Feature
The Analyze Premise tool acts as a "Ruthless Hollywood Script Doctor," validating your core concept against 7 key questions to ensure structural integrity and marketability.
- Diagnostic Report: Provides an overall Health Score (High/Medium/Low) and pass/fail/warning status for each key question.
- 7 Key Questions: analyzes clarity, stakes, conflict, originality, theme, structural integrity, and emotional connection.
- Actionable Feedback: Offers specific, constructive "Fix" suggestions for any identified weaknesses.
- Workflow:
- Fill in the **Protagonist + Goal + Obstacle** and **Logline** fields.
- Click the **Analyze Premise** button.
- Review the report and use the suggestions to refine your concept.
Story Structure Tab
Define your screenplay's structural framework:
- Story Archetype: Choose from 22 proven story patterns (Hero's Journey, Buddy Love, etc.)
- Compatibility Feedback: Get real-time suggestions for genre-archetype combinations
- Detailed Information: Each archetype includes descriptions, key characteristics, and examples
Stakes Tab
Define what's at risk - what characters and audiences have to lose if the protagonist fails:
- Custom Stakes Input: Add your own stakes descriptions
- 8 Predefined Categories: Choose from common types of stakes:
- Life itself (humanity's survival to individual lives)
- Justice (for crimes and prevention of future crimes)
- Freedom (escape from terrible situations)
- Family/Way of Life (protecting what one holds dear)
- Love/Partnership (finding happiness with ideal partner)
- Professional Future (deserved career advancement)
- Life-Changing Prize (achievement that transforms identity)
- Happiness (chance at decent life being threatened)
- Interactive Selection: Click any category to add it, or use the input field for custom stakes
- Multiple Stakes: Add up to 10 different stakes for complex, multi-layered stories
- AI Stakes Generation: Generate compelling stakes scenarios based on your movie concept
- Examples & Tooltips: Each category includes detailed descriptions and movie examples
Themes Tab
Explore the deeper meanings and universal truths your story examines:
- Custom Themes: Add themes like "redemption," "family bonds," or "justice"
- AI Theme Generation: Generate meaningful themes based on your movie concept and context
- Theme Management: Add, remove, and organize multiple themes with badge-style interface
- Integration: Themes integrate with other NoosphereWriter features like Theme Structure
Idea Generation Tools
The Movie Concept dialog acts as a central hub for ideation, incorporating powerful tools to spark your creativity:
Brainstorming & Public Domain
Generate fresh concepts using 15 unique techniques or adapt classic public domain stories. Features include:
- 15 Creative Techniques: Explore methods like "What If", "X Meets Y", "Irony", and "Genre Blending" to create original concepts.
- Public Domain Adaptation: Select from over 30 classic stories (e.g., Dracula, Sherlock Holmes) and apply 9 adaptation strategies to create modern retellings.
- Random Inspiration: Use the "Random" technique to combine unexpected elements and genres.
Idea Lab
An interactive mixing canvas that lets you combine specific ingredients to generate unique concepts:
- Ingredients: Mix Characters, Locations, Themes, and Situations.
- The Engine: Drag ingredients into slots and choose a generation mode (Combine, What If, Hangover Test).
- Custom Instructions: Guide the AI with specific tone or constraint requests.
AI-Powered Features
Each tab includes AI enhancement capabilities:
- Context-Aware Suggestions: AI considers all your existing concept elements for relevant recommendations
- Professional Quality: Generate industry-standard loglines, stakes, and thematic elements
- Iterative Refinement: Generate multiple variations and select the best options
- Integration: AI suggestions work seamlessly with your existing concept data
Best Practices
- Start with Movie Idea: A clear concept helps AI generate better suggestions for other elements
- Define Stakes Early: Strong stakes create emotional investment and drive story tension
- Layer Multiple Stakes: Complex stories often put multiple things at risk simultaneously
- Test Compatibility: Use the archetype feedback to ensure your genre and structure work well together
- Iterate with AI: Don't settle for first suggestions - generate multiple options and combine the best elements
Theme Structure
Develop your screenplay's thematic framework using Craig Mazin's proven methodology.
The Seven Pillars
- Central Dramatic Argument: The question your story asks
- Thematic Statement: Your answer to that question
- Protagonist's Journey: How they embody the theme
- Antagonist's Role: How they challenge the theme
- Supporting Characters: Different perspectives on theme
- Key Scenes: Moments that explore theme
- Resolution: How theme is ultimately expressed
Character-Theme Integration
Link each character to your theme:
- What does each character believe?
- How do their beliefs conflict?
- How do they change?
- What truth do they discover?
Characters
Manage your screenplay's character roster with detailed profiles and tracking.
Character Profiles
NoosphereWriter provides a comprehensive character development system with 20+ professional character attributes organized into logical phases:
Basic Information
- Name: Character's full name
- Age: Approximate age or range
- Sex/Gender: Character's gender identity
- Role: Protagonist, Antagonist, Supporting
- Archetype: Character's archetypal pattern
- Character Arc: How they transform throughout the story
- Relationships: Connections to other characters
- Description: Detailed personality, background, and physical traits
Core Psychology
- Character Flaw: Internal weakness that creates conflict
- Character Want: What they consciously desire (external goal)
- Character Need: What they actually need for growth (internal goal)
- Character Lie: False belief that holds them back
- Character Ghost: Past trauma, guilt, or unresolved issue
- How Character Sees Themselves: Their self-perception and self-image
- How Others See Them: External perception, often different from self-image
Tactics & Behavior
- Character's Tactics: Methods, strategies, or behaviors used to get what they want
- Behavior Under Pressure: How they react when stressed, afraid, or failing
- Emotional Triggers: Present-day situations that cause disproportionate reactions
Perception Gap
- Defining Contradiction: Memorable contradiction that makes them unique and complex
- Odd Habit: Distinctive quirk or repeated behavior that reveals personality
- Reason for Habit: Origin or psychological reason behind their odd habit
- Meaningful Possessions: Objects they always carry that reveal personality and history
- Symbolic Meaning: Deeper significance of their meaningful possessions
- Counterintuitive Reaction: Surprising responses to extreme stress or danger
- Uncertain Future: How hopes and fears for the future affect present decisions
- Foil (Antagonist): Who represents their inverted version or dark mirror
- Foil (Companion): Who provides qualities they lack as supportive counterpart
- Foil (Mentor): Who shows their potential future as guide or example
Introduction Blueprint
- Opening Line: First memorable dialogue that reveals character and creates impression
- Opening Action: First physical action or behavior that immediately reveals who they are
- Immediate Problem: First conflict that creates dramatic tension and hooks the audience
Character Development Best Practices
NoosphereWriter's phased approach to character development ensures comprehensive character creation:
Phase 1: Tactics & Behavior
Start with how your character acts in the world:
- Tactics: Do they use manipulation, brute force, charm, intellectual superiority, or avoidance? This reveals their true nature.
- Behavior Under Pressure: How they fail, fear responses, and power dynamics reveal character beneath the facade.
- Emotional Triggers: Specific sounds, smells, situations that trigger disproportionate reactions due to their Ghost.
Phase 2: Perception Gap
Develop the contradictions and complexities that make characters memorable:
- Defining Contradiction: Example: A ruthless hitman who enjoys crocheting, or a shy person bold when helping others.
- Odd Habit + Reason: Connect habitual behaviors to their psychological history and Ghost.
- Possessions + Meaning: What they carry reveals personality (worn philosophy book, single bullet, photo of lost loved one).
- Counterintuitive Reaction: Laughing in danger, becoming calm in crisis, focusing on mundane details during tragedy.
- Foil Characters: Define opposing (Antagonist), complementary (Companion), and aspirational (Mentor) versions.
Phase 3: Introduction Blueprint
Plan how to introduce your character memorably:
- Opening Line: Should reveal personality, status, or conflict. Consider how it introduces who they are.
- Opening Action: Physical behavior that immediately shows character and motivations.
- Immediate Problem: First conflict should connect to larger story arc and reveal problem-solving approach.
Integration Tips
- Build Progressively: Start with basic psychology (want, need, flaw, ghost) before adding advanced details
- Connect to Story: Ensure character development serves your movie concept and theme structure
- Use AI Tools: Leverage Character Crucible, Character Interview, and Relationship Illumination for deeper insights
- Test Consistency: Use Continuity Check to verify character behavior remains consistent throughout
AI Character Generation
Generate complete character casts based on your story:
- Define your genre and premise
- Click "Generate Cast with AI"
- Review and customize generated characters
- AI considers archetypal roles and story needs
Import from Script
Automatically extract and import all character names from your current screenplay:
- Open the Characters dialog (Script → Characters)
- Click the "Import from Script" button
- Review the imported character list
- Enhance each character with detailed profiles
How It Works
The Import from Script feature intelligently scans your screenplay and:
- Extracts Character Names: Finds all CHARACTER elements in your screenplay
- Normalizes Names: Removes variations like (V.O.), (CONT'D), and (O.S.)
- Prevents Duplicates: Automatically skips characters that already exist
- Assigns Basic Roles: Sets initial roles (Protagonist/Supporting) based on appearance order
- Creates Profiles: Generates basic character entries ready for enhancement
Import Results
After importing, you'll see helpful feedback:
- First Import: "Successfully added X characters."
- Partial Duplicates: "Successfully added X characters. Skipped Y duplicates."
- All Duplicates: "All X characters already exist in your project."
- No Characters: "No character names found in the current screenplay."
Best Practices
- Import Early: Use this feature after completing your first draft to quickly build your character roster
- Review and Enhance: Imported characters have basic information - add detailed profiles using the form fields
- Check for Variations: Verify that character name variations (like "DOCTOR" vs "DR. SMITH") are handled correctly
- Reimport Safely: You can re-import at any time - duplicates are automatically skipped
- Combine with AI: Use both Import from Script and AI Character Generation for comprehensive character development
Pro Tips
- Format Characters Properly: Ensure your screenplay uses proper CHARACTER formatting for best detection
- Review Minor Characters: Decide which imported characters need full profiles vs. basic tracking
- Update Roles: Adjust the automatically assigned roles (Protagonist/Supporting) to match your story structure
- Use with Other Tools: Imported characters work seamlessly with Character Crucible, Character Interview, and other AI tools
Smart Character Rename
Intelligently rename characters across your entire screenplay while preserving formatting and industry conventions.
How It Works
- Open
Script → Characters - Select a character to edit
- Change the character's Name field
- Click "Save"
- If the name has changed, you'll be prompted to confirm the Smart Rename
Intelligent Context Handling
The Smart Rename feature uses advanced heuristics to ensure changes adhere to screenwriting rules:
- Action Lines: Automatically converts the name to Title Case for standard action descriptions (e.g., "SUSAN walks" becomes "Mary walks"), while preserving ALL CAPS for introductions (e.g., "SUSAN (30)" becomes "MARY (30)").
- Dialogue Formatting: Preserves emphasis and casing within dialogue text:
- Normal speech: "Hello Janice" → "Hello Mary"
- Shouting/Emphasis: "Look out JANICE!" → "Look out MARY!"
- Character Cues: Updates character names above dialogue blocks.
Safety Features
- Confirmation Dialog: You are always asked to confirm before any script-wide changes are applied.
- Transaction-Based: Changes are applied as a single transaction, allowing for clean Undo if needed.
Illuminate Character Facets (Theory of Illumination)
Analyze how different relationships reveal different aspects of your character's personality using AI-powered relationship analysis:
- In the character form, describe your character's relationships
- Click the AI "Illuminate Character Facets" button next to the Relationships field
- AI analyzes how each relationship reveals different character aspects
- Receive insights on character facets, psychological dynamics, and story function
What You Get from Relationship Illumination
For each relationship, the AI provides:
- Character Facet Revealed: What aspect of personality this relationship brings out
- Evidence in Interaction: How this facet manifests in their dynamic
- Psychological Insight: Deeper understanding of the character's inner world
- Contrast with Other Relationships: How this differs from other dynamics
- Story Function: How this relationship serves the character's arc
Theory of Illumination Principles
This feature is based on the storytelling principle that characters reveal different facets of themselves depending on who they're with:
- Different people trigger different emotional responses
- Power dynamics influence which character traits emerge
- The same character can appear confident with one person and vulnerable with another
- Relationships serve as mirrors, reflecting different aspects of character truth
Best Practices for Relationship Illumination
- Detailed Relationship Descriptions: Provide specific dynamics rather than generic descriptions
- Character Psychology First: Complete character flaw, want, need, lie, and ghost for richer analysis
- Multiple Relationship Types: Include family, professional, romantic, and adversarial relationships
- Story Context: Define movie concept and theme structure for genre-appropriate insights
- Use for Scene Writing: Apply insights to show character complexity in different interactions
Character Tracking
- Auto-complete character names while writing
- Track dialogue count per character
- Ensure consistent character voices
- Generate character reports
Locations
Track and manage all locations in your screenplay for production planning.
Location Details
For each location, specify:
- Name: Location identifier
- Type: Interior, Exterior, or Interior/Exterior
- Description: Visual details and setting information
- Address: Physical location or studio address
- Notes: Production notes and requirements
- Atmosphere: Mood and tone of the location
- Props: Required props and set dressing
- Budget: Estimated costs for location usage
- Availability: Shooting windows and restrictions
Import from Script
Automatically extract locations directly from your screenplay's scene headings. This powerful feature saves time and ensures consistency by parsing your existing script content.
How Location Import Works
- Go to
Script → Locationsto open the Location Manager - Click the "Import from Script" button
- Choose your import mode:
- Add New Locations: Keeps existing locations and adds newly found ones
- Replace All Locations: Clears current locations and replaces with script-extracted ones
- Review the imported locations with automatically detected types
- Edit and enhance location details as needed
Smart Scene Heading Analysis
The import feature intelligently analyzes your scene headings to extract:
- Location Names: Parses location identifiers from scene headings
- Interior/Exterior Types: Automatically detects INT., EXT., I/E., and combination formats
- Compound Locations: Handles complex locations like "HIGH SCHOOL - CHEMISTRY LAB"
- Time-of-Day Filtering: Excludes time markers (DAY, NIGHT, CONTINUOUS, LATER) from location names
- Duplicate Detection: Identifies unique locations while preserving different type variations
Supported Scene Heading Formats
The import feature recognizes industry-standard scene heading patterns:
- Standard Format: "INT. COFFEE SHOP - DAY"
- Exterior Format: "EXT. CITY STREET - NIGHT"
- Combined Format: "INT./EXT. CAR - MOVING - DAY"
- Abbreviated Format: "I/E. SPACESHIP - CONTINUOUS"
- Compound Locations: "INT. MUSEUM - RENAISSANCE WING - DAY"
- Vehicle Scenes: "INT. TAXI - MOVING - NIGHT"
Import Benefits
- Time Savings: Instantly populate your location list from existing script content
- Consistency: Ensures location names match exactly what's in your scene headings
- Type Detection: Automatically assigns Interior, Exterior, or Interior/Exterior types
- Duplicate Prevention: Avoids creating duplicate locations while handling type variations
- Production Ready: Creates location entries ready for production planning
Manual Location Management
Add locations manually when needed:
- Click "Add Location" to create new entries
- Edit existing locations by clicking the edit icon
- Delete locations that are no longer used
- Organize locations by type and usage frequency
World-Building Integration
Each location has access to the World-Building feature for generating rich research dossiers:
- Click the World-Building button when adding or editing a location
- Generate sensory details, jargon, daily rhythms, tools, conflict points, and hidden details
- Results automatically populate into the location's Atmosphere, Props, Description, and Notes fields
- Movie Concept and Character data provide additional context for relevant results
AI Location Analysis
The AI assistant can:
- Extract all locations from your script automatically
- Suggest detailed location descriptions
- Identify special production requirements
- Group similar or related locations
- Recommend atmosphere and mood settings
- Suggest props and set dressing requirements
Location Reports
Generate comprehensive location breakdowns showing:
- Complete location inventory with descriptions
- Scene count and page count per location
- Interior/Exterior/Both categorization
- Day/Night distribution analysis
- Production requirements summary
- Budget estimates and availability windows
Production Integration
Your location data integrates seamlessly with:
- Location Reports: Detailed breakdowns for production planning
- Scene Reports: Location context for each scene
- Script Reports: Complete location usage statistics
Best Practices
- Import Early: Use the import feature after writing your first draft to establish your location baseline
- Review and Enhance: After importing, add descriptions, addresses, and production notes
- Maintain Consistency: Keep location names in your script consistent with your location manager
- Update Regularly: Re-import when you add new scenes or locations to your script
- Use Both Modes: Use "Add New" during development and "Replace All" for major script revisions
Tools → Convert Screenplay
The Convert Screenplay feature allows you to rewrite your entire script (or specific sections) using advanced AI, applying new genres, themes, and visual styles while maintaining your core story structure.
Core Directives
Customize how the AI reimagines your script using specific directives:
- Target Genre: Shift the tone to a specific genre (e.g., "Film Noir", "Cyberpunk", "Romantic Comedy").
- Target Audience: Tailor the content for a specific demographic (e.g., "Young Adult", "General Audience").
- Core Theme: Infuse a central message or thematic element throughout the narrative (e.g., "Redemption", "Isolation").
- Visual Style: Define the cinematographic feel (e.g., "Wes Anderson-esque", "Gritty Realism").
Rewrite Rules
Add specific instructions for the AI to follow during the conversion process:
- "Make dialogue more subtextual"
- "Increase the pacing of action sequences"
- "Focus on sensory details"
Writing Styles
Choose the formatting style for the output:
- Match Screenplay: Preserves standard screenplay formatting.
- Vertical Writing: A specialized style that prioritizes pacing and visual clarity. Action lines are broken down into single visual beats, and character names are never orphaned from their actions. This style is ideal for fast-paced, visually driven narratives.
Check Formatting
Validate your screenplay's format compliance with industry standards.
What It Checks
- Empty elements or parentheticals with only "()"
- Character elements not followed by parenthetical or dialogue
- Parenthetical elements not following character or dialogue
- Dialogue elements not following character or parenthetical
- Incorrect element types (e.g., character names in wrong format)
- Proper element formatting and industry standards compliance
Smart Dialog Detection
The format checker includes intelligent dialogue continuation detection that can identify when dialogue appears to be split across multiple elements. When it detects this pattern, it will:
- Recommend combining dialogue logs instead of generic fixes
- Recognize emotional words, reactions, and continuation patterns
- Provide a "Combine with Previous Dialogue" button for easy fixing
- Still offer traditional options like "Change to Action" as alternatives
Using Format Check
- Go to
Tools → Check Formatting - Issues are highlighted in your script
- Click "Next Error" to navigate between issues
- Fix issues or dismiss if intentional
Common Issues
- Orphaned Dialogue: Character name at bottom of page
- Split Parenthetical: Parenthetical broken across pages
- Bad Scene Heading: Incorrect INT./EXT. format
Character Introduction (Script Menu)
Quickly analyze and improve how your characters are introduced in the screenplay. This Script menu version provides fast character introduction analysis.
How to Use
- Go to
Script → Story & Structure → Character Introduction - Select a character from your roster
- View the analysis of their first appearance
- Get recommendations for improvement
Note: For comprehensive character introduction analysis with detailed checklists, PDF export, and context menu generation, see Character Introduction in Tools menu.
Page One Checklist
Professional evaluation tool that assesses your screenplay's opening page(s) against 11 essential principles derived from industry best practices. This analysis helps ensure your opening makes an immediate impact and demonstrates professional-level craft.
How It Works
Page One Checklist evaluates your screenplay's first 1-3 pages against 11 critical principles that separate professional openings from amateur attempts:
- Go to
Script → Story & Structure → Page One Checklist - The tool automatically extracts your first 1-3 pages (up to 20,000 characters)
- Click "Analyze Opening Pages"
- Receive comprehensive principle-by-principle evaluation
- Review pass/fail assessment for each of the 11 principles
- Export detailed analysis as PDF report
The 11 Essential Principles
The checklist evaluates your opening against these fundamental principles:
1. Jump Right In
Begin at the last possible moment before everything changes.
- What It Means: Start your story at the moment of maximum dramatic potential, not minutes, hours, or days before
- Why It Matters: Readers have limited patience; every second counts in the opening
- Professional Example: Breaking Bad - Man in underwear driving RV frantically through desert
- Amateur Mistake: Opening with character waking up, commuting, or going through morning routine
2. Create a Killer Opening Image
Establish a memorable, thematically relevant visual that hooks the reader immediately.
- What It Means: Your first image should be cinematically striking and thematically significant
- Why It Matters: The opening image is your first impression and sets the visual tone
- Professional Example: American Beauty - Rose petals falling in slow motion
- Amateur Mistake: Generic establishing shots that could belong to any story
3. Show, Don't Tell - Who, What, Where
Establish fundamental story information through action and visual storytelling, not exposition.
- What It Means: Reader should understand protagonist, their world, and the situation through behavior and context
- Why It Matters: Cinematic storytelling reveals character through action, not description
- Professional Example: The Social Network - Rapid-fire dialogue reveals character intelligence and social awkwardness simultaneously
- Amateur Mistake: Character descriptions that read like résumés or lengthy exposition blocks
4. Introduce a Compelling Protagonist
Present a main character who is interesting, active, and worth following for 2 hours.
- What It Means: Your protagonist must be introduced with distinctive behavior, voice, or circumstances
- Why It Matters: Readers decide within pages whether they care about the protagonist
- Professional Example: The Devil Wears Prada - Andy's idealism and naivety established through her first interaction with Miranda's world
- Amateur Mistake: Generic "everyman" characters with no distinctive traits or personality
5. Establish Tone Immediately
Make clear from page one whether this is comedy, drama, thriller, or hybrid genre.
- What It Means: Writing style, pacing, and content should signal genre and tone from the first paragraph
- Why It Matters: Tonal confusion breaks reader trust and creates false expectations
- Professional Example: Deadpool - Fourth-wall-breaking narration establishes irreverent comedy tone instantly
- Amateur Mistake: Opening that feels like a different genre than the actual story
6. Promise the Genre and Deliver
Opening must contain the DNA of your genre and suggest what kind of story this will be.
- What It Means: Genre conventions should be present or cleverly subverted from the start
- Why It Matters: Genre promises set reader expectations that the entire script must fulfill
- Professional Example: Get Out - Opening abduction immediately establishes horror/thriller genre despite seemingly normal setup
- Amateur Mistake: Generic opening that could belong to any genre, revealing nothing about story type
7. Create Immediate Questions
Raise compelling mysteries or questions that demand answers and pull reader forward.
- What It Means: Opening should create dramatic questions that can only be answered by continuing
- Why It Matters: Curiosity is the engine that keeps readers turning pages
- Professional Example: Memento - Man with no short-term memory hunting someone raises immediate questions about both past and present
- Amateur Mistake: Opening that answers all questions or raises none
8. Demonstrate Professional Craft
Show mastery of screenplay format, structure, pacing, and visual storytelling technique.
- What It Means: Writing should demonstrate knowledge of professional screenplay conventions and craft
- Why It Matters: Amateur formatting, style, or structure signals inexperience instantly
- Professional Example: Crisp action lines, economical description, proper scene headings, active voice throughout
- Amateur Mistake: Camera directions, excessive description, passive voice, incorrect formatting
9. Avoid Common Opening Mistakes
Steer clear of clichéd openings that instantly signal amateur writing.
- What It Means: Avoid alarm clocks, dream sequences, voiceover exposition, mundane routines
- Why It Matters: Common opening mistakes trigger instant "pass" responses from industry readers
- Professional Example: Openings that feel fresh and original while still establishing necessary information
- Amateur Mistake: "Character wakes up to alarm clock" or "It was all a dream" openings
10. Make Every Line Count
Each word, sentence, and paragraph must earn its place through purpose and impact.
- What It Means: No filler, no wasted space, no self-indulgent description
- Why It Matters: Readers evaluate efficiency and craft through economy of language
- Professional Example: The Social Network screenplay - Every line of dialogue serves multiple purposes simultaneously
- Amateur Mistake: Purple prose, redundant description, or over-explaining visual elements
11. Create a Sense of Urgency
Establish forward momentum and make reader feel compelled to keep reading immediately.
- What It Means: Opening should create pressure, tension, or momentum that demands continuation
- Why It Matters: Without urgency, reader has no reason to keep turning pages
- Professional Example: Gravity - Opening space disaster creates immediate life-or-death urgency
- Amateur Mistake: Leisurely, meandering openings with no forward drive or pressure
Analysis Interface
The Page One Checklist tool provides a comprehensive tabbed interface with actionable insights:
Summary Tab
- Overall Assessment: Professional evaluation of opening quality
- Score: X out of 11 principles passed
- Key Strengths: What's working well in your opening
- Priority Improvements: Most important areas to address
- Quick Overview: At-a-glance understanding of opening effectiveness
Checklist Tab
- All 11 Principles: Complete checklist with pass/fail indicators
- Detailed Evaluation: Specific analysis of how your opening addresses each principle
- Pass/Fail Status: Clear indicators showing which principles need work
- Principle Descriptions: Quick reference for what each principle means
- Professional Context: Understanding why each principle matters
Strengths Tab
- What's Working: Detailed breakdown of effective elements in your opening
- Passed Principles: Which checklist items your opening successfully addresses
- Strong Points: Specific examples of professional-level execution
- Build on Success: How to leverage your strengths throughout the screenplay
Recommendations Tab
- Priority Actions: Most important improvements to make first
- Failed Principles: Which checklist items need addressing
- Specific Guidance: Concrete suggestions for strengthening your opening
- Implementation Strategies: How to apply recommendations without losing what works
- Next Steps: Clear action plan for revision
When to Use Page One Checklist
- First Draft Completion: Evaluate if your opening meets professional standards
- Before Cliché Opening Analysis: Get foundational assessment before deeper diagnostic
- Revision Planning: Identify which principles need the most attention
- Pre-Submission: Ensure opening demonstrates professional craft before sending to industry
- Contest Preparation: Verify opening addresses all essential principles
- Query Package Prep: Polish first pages to professional standard
- Rewrite Strategy: Determine whether opening needs tweaking or complete overhaul
Professional Context
Why page one matters: Industry professionals make initial judgments about a screenplay's quality within the first page. The opening must simultaneously:
- Demonstrate professional writing craft
- Establish genre and tone clearly
- Introduce a compelling protagonist
- Create immediate engagement and curiosity
- Promise the kind of story that follows
- Avoid amateur mistakes and clichés
The page one reality: While the entire screenplay matters, most industry readers form their initial impression in the first 60 seconds of reading. A weak page one doesn't necessarily mean rejection, but it creates an uphill battle for the rest of the script. A strong page one creates positive momentum and reader goodwill.
Key Diagnostic Principles
- First Impressions Are Permanent: Your opening is the only chance to make a first impression
- Every Element Matters: Format, word choice, pacing, and content all signal professionalism
- Genre Promises Must Be Kept: Opening establishes a contract with reader that entire script must honor
- Active Over Passive: Opening should demonstrate active storytelling, not passive description
- Visual Thinking: Screenplay openings must think cinematically, not literarily
- Economy is Craft: Professional writing uses minimum words for maximum impact
- Urgency Creates Engagement: Forward momentum is essential from line one
Integration with Other Tools
Page One Checklist works seamlessly with other NoosphereWriter features:
- Cliché Opening: Use Page One Checklist for foundational assessment, then Cliché Opening for detailed diagnostic
- First 10 Pages: Page One establishes foundation that First 10 Pages builds upon
- Character Introduction: Verify protagonist introduction meets checklist standards
- Readability: Ensure page one reads smoothly and professionally
- Common Flaws: Broader screenplay issues that may start on page one
- Pacing Heat-Map: Visual representation of opening momentum
Export and Documentation
Export your Page One Checklist analysis as a professional PDF report including:
- Executive Summary: Overall assessment, score, and key findings
- Complete Checklist: All 11 principles with pass/fail status
- Detailed Evaluation: Specific analysis for each principle
- Strengths Analysis: What's working well in your opening
- Priority Recommendations: Actionable improvement plan
- Professional Formatting: Clean layout suitable for development notes
Smart Caching
The analysis includes intelligent caching to improve performance:
- Content-Based Caching: Re-analyzes only when first pages actually change
- Instant Results: Cached analyses display immediately on reopening
- Automatic Invalidation: Cache clears when screenplay content changes
- Session Persistence: Results persist across dialog open/close cycles
Common Questions
- "Do I need to pass all 11 principles?" - Not necessarily, but each failed principle represents a weakness. Professional openings typically pass 9-11 principles.
- "What if famous scripts fail some principles?" - They may, but established writers have more creative freedom. Emerging writers need to demonstrate mastery before breaking rules.
- "Should I fix everything at once?" - No, prioritize the most critical failures first, typically: compelling protagonist, tone establishment, and avoiding common mistakes.
- "How many pages does this analyze?" - First 1-3 pages (up to 20,000 characters), as page one principles apply to the immediate opening.
Workflow Recommendation
Optimal revision sequence for opening pages:
- Page One Checklist: Foundational assessment of essential principles
- Cliché Opening Analysis: Identify and eliminate trust-breaking choices
- Readability: Ensure smooth, professional writing style
- Character Introduction: Verify compelling character first appearances
- First 10 Pages Analysis: Comprehensive evaluation of overall opening quality
- Pacing Heat-Map: Fine-tune rhythm and momentum
- Final Polish: Line-by-line refinement of language and clarity
This sequence ensures you're building on a solid foundation and addressing issues in order of importance.
Cliché Opening Analysis
Professional diagnostic tool that identifies cliché openings and trust-breaking choices in your screenplay's first 10 pages. Based on comprehensive industry diagnostic notes, this analysis helps you avoid common opening mistakes that instantly signal amateur writing.
How It Works
Cliché Opening Analysis evaluates your screenplay against professional diagnostic criteria covering four critical categories:
- Go to
Script → Story & Structure → Cliché Opening - The tool automatically extracts your first 10 pages
- Click "Analyze for Clichés"
- Receive comprehensive diagnostic evaluation
- Review detected clichés with severity ratings and page locations
- Export detailed analysis as PDF report
Four Diagnostic Categories
The analysis identifies issues across four major categories based on professional diagnostic frameworks:
1. Foundational Failures (Trust-Breakers)
Critical issues that immediately break reader trust and signal amateur writing:
- Dream Sequences: Opening with "it was all a dream" wastes emotional investment
- Alarm Clock Openings: Character waking up is the most overused opening in amateur scripts
- Prophecy/Voiceover: Telling instead of showing undermines cinematic storytelling
- Flashback Openings: Starting in past tense confuses chronology and momentum
- Freeze-Frame Narration: "You're probably wondering how I got here" is overdone
- News Report Exposition: Using TV/radio to deliver backstory is lazy storytelling
2. Sins of Stasis (Boring Openings)
Passive openings that fail to create forward momentum:
- Establishing Shots Only: Empty cinematography without character or conflict
- Normal Day Routines: Mundane daily activities without dramatic purpose
- Passive Protagonist: Main character observing instead of acting
- Delayed Inciting Incident: Waiting too long to introduce story conflict
- Atmosphere Over Story: Prioritizing mood at the expense of narrative drive
3. Sins of Clumsiness (Craft Issues)
Technical execution problems that reveal lack of professional polish:
- Over-Description: Excessive visual detail that slows reading pace
- On-the-Nose Dialogue: Characters stating subtext explicitly
- Forced Backstory: Awkward exposition dumped into early dialogue
- Camera Direction: Including shots/angles that directors should determine
- Character Labels: Describing characters by occupation instead of behavior
- Purple Prose: Overly flowery or literary writing style
4. Subtle Killers (Advanced Issues)
Sophisticated problems that undermine otherwise competent writing:
- False Promises: Opening tone that doesn't match the actual story
- Generic Imagery: Visual choices that could apply to any similar story
- Unclear Stakes: Reader doesn't understand what matters or why
- Missing Voice: Writing that sounds like every other script in the pile
- Derivative Openings: Copying famous openings without adding originality
Analysis Interface
The Cliché Opening tool provides a comprehensive tabbed interface with actionable insights:
Summary Tab
- Total Clichés Detected: Count of all identified issues
- Severity Breakdown: Critical, warning, and minor issues categorized
- Category Distribution: Visual breakdown across four diagnostic categories
- Overall Assessment: Professional evaluation of opening quality
- Priority Actions: Most important fixes to address first
Detections Tab
- Detailed Findings: Complete list of all detected clichés
- Severity Indicators: Color-coded severity levels (Critical/Warning/Minor)
- Page Locations: Exact page numbers and scene references
- Scene Navigation: Click to jump directly to problematic scenes in editor
- Narrative Flaws: Why each cliché undermines the story
- Corrective Strategies: Specific guidance for fixing each issue
- Examples: Concrete examples for better understanding
Principles Tab
- Core Opening Principles: Assessment of three fundamental requirements
- Immediate Engagement: Does the opening grab attention instantly?
- Clear Direction: Is the story's trajectory obvious and compelling?
- Professional Execution: Does the writing demonstrate craft mastery?
- Detailed Evaluation: In-depth analysis of each principle
- Improvement Guidance: Specific recommendations for strengthening principles
Quick Fixes Tab
- Category-Organized Solutions: Fixes grouped by diagnostic category
- Actionable Recommendations: Clear, concrete steps to eliminate clichés
- Priority Ordering: Most important fixes listed first
- Alternative Approaches: Creative solutions for common problems
- Implementation Guidance: How to apply fixes without losing story essence
Severity Levels
Each detected cliché is rated by severity to help prioritize revisions:
- Critical (Red): Trust-breaking issues that readers immediately recognize as amateur. These must be addressed before submission.
- Warning (Orange): Problematic choices that weaken the opening and should be reconsidered or improved.
- Minor (Yellow): Subtle issues that may not derail the opening but represent missed opportunities for stronger writing.
Scene Navigation Integration
Click any detection's page reference to instantly navigate to that scene in the editor:
- Instant Navigation: Jump directly to problematic scenes
- Context Preservation: See the full scene context around the issue
- Efficient Revision: Fix issues without manually searching for them
- Dialog Integration: Analysis dialog stays open while editing
When to Use Cliché Opening Analysis
- Before First 10 Pages Analysis: Clean up obvious clichés before detailed evaluation
- After First Draft: Identify trust-breaking choices early in the revision process
- Pre-Submission Review: Ensure opening doesn't contain amateur signals
- Competition Preparation: Polish opening to stand out in screenplay contests
- Query Package Prep: Make sample pages as professional as possible
- Rewrite Planning: Prioritize which opening elements need complete rethinking
Professional Context
Why cliché openings matter: Industry readers evaluate dozens of scripts weekly and develop pattern recognition for amateur writing. Cliché openings trigger immediate "pass" responses because they signal a writer who:
- Hasn't studied professional screenwriting craft
- Doesn't understand what makes openings cinematically compelling
- Lacks awareness of industry standards and reader expectations
- May have similar issues throughout the entire screenplay
The first 10 pages paradox: Your opening needs to feel fresh and original while simultaneously establishing genre, tone, character, conflict, and stakes. Clichés are shortcuts that sacrifice originality for familiarity, but professional openings find creative ways to deliver all necessary information without resorting to overused devices.
Key Diagnostic Principles
- Show, Don't Tell: Reveal character and story through action, not exposition
- Active Protagonists: Main character must drive action, not passively observe
- Immediate Stakes: Reader must understand what matters and why, quickly
- Original Execution: Even familiar genres need fresh presentation
- Economy of Style: Every line must earn its place on the page
- Trust Your Reader: Don't over-explain; engage their active participation
- Tonal Consistency: Opening must authentically represent the story to follow
Integration with Other Tools
Cliché Opening Analysis works seamlessly with other NoosphereWriter features:
- First 10 Pages: Use cliché analysis first, then evaluate overall opening quality
- Common Flaws: Broader screenplay issues that may extend beyond the opening
- Readability: Ensure smooth reading experience after fixing clichés
- Character Introduction: Verify character first appearances aren't clichéd
- Theme Structure: Ensure opening introduces thematic elements effectively
- Pacing Heat-Map: Visual representation of opening momentum
Export and Documentation
Export your Cliché Opening analysis as a professional PDF report including:
- Executive Summary: Total clichés, severity breakdown, overall assessment
- Detailed Detections: Complete list with page locations and narrative flaws
- Core Principles Evaluation: Assessment of fundamental opening requirements
- Corrective Strategies: Specific guidance for fixing each detected cliché
- Priority Recommendations: Actionable improvement plan organized by urgency
- Professional Formatting: Clean layout suitable for development notes
Smart Caching
The analysis includes intelligent caching to improve performance:
- Content-Based Caching: Re-analyzes only when first 10 pages actually change
- Instant Results: Cached analyses display immediately on reopening
- Automatic Invalidation: Cache clears when screenplay content changes
- Session Persistence: Results persist across dialog open/close cycles
Common Misconceptions
- "But successful movies use these openings!" - Famous films earned the right to use clichés through other strengths. Unproduced writers can't afford the same risks.
- "It's subversive/meta usage!" - Subversion only works when readers trust you've earned it, which first-time writers haven't yet demonstrated.
- "Readers should judge the whole script!" - They will, but only if the opening doesn't immediately signal amateur work.
- "I'm putting a fresh spin on it!" - The burden of proof is much higher when starting from a clichéd foundation.
Workflow Recommendation
Optimal revision sequence for opening pages:
- Cliché Opening Analysis: Identify and eliminate trust-breaking choices
- Readability: Ensure smooth, professional writing style
- Character Introduction: Verify compelling character first appearances
- First 10 Pages Analysis: Comprehensive evaluation of overall opening quality
- Pacing Heat-Map: Fine-tune rhythm and momentum
- Final Polish: Line-by-line refinement of language and clarity
This sequence ensures you're building on a solid foundation rather than polishing clichéd material.
First 10 Pages Analysis
Professional evaluation of your screenplay's opening pages using industry-standard criteria. The first 10 pages are critical for engaging readers, establishing your story world, and demonstrating professional writing ability.
How It Works
First 10 Pages Analysis evaluates your screenplay's opening against professional standards used by industry readers:
- Go to
Script → Story & Structure → First 10 Pages - The tool automatically extracts your first 10 pages
- Click "Analyze First 10 Pages"
- Receive comprehensive professional evaluation
- Review detailed assessment across multiple categories
- Export analysis as PDF report
Professional Evaluation Framework
The analysis evaluates your opening across four critical categories that determine reader engagement:
1. Technical Execution & Professionalism
- Professional Formatting: Industry-standard screenplay format and presentation
- Clear Scene Description: Concise, visual action lines that paint clear pictures
- Dialogue Quality: Natural, character-specific voices without exposition dumps
- Pacing & Flow: Appropriate rhythm for genre and story type
- Page Economy: Efficient use of page space without overwriting
2. Protagonist & Character Introduction
- Clear Protagonist Identification: Reader knows who to follow
- Compelling Character Introduction: Memorable first impression
- Character Goals & Motivations: What the protagonist wants
- Emotional Connection: Reasons to care about the character
- Unique Voice: Distinctive personality and perspective
3. Narrative Foundation & The Hook
- Opening Image: Powerful first impression that sets tone
- Genre Establishment: Clear genre signals and expectations
- Story Questions: Compelling mysteries that demand answers
- Conflict Introduction: Central tension or problem emerging
- Narrative Momentum: Forward movement and escalation
4. World-Building & Thematic Depth
- World Establishment: Clear sense of time, place, and rules
- Atmospheric Tone: Consistent mood and feeling
- Thematic Introduction: Hints at deeper meaning and themes
- Visual Storytelling: Show don't tell approach
- Unique Elements: Fresh perspective or original concepts
The Page 11 Test
The analysis includes the critical "Page 11 Test" - a key industry benchmark that asks: "After reading the first 10 pages, do I want to read page 11?"
What Makes Readers Want Page 11
- Unanswered Questions: Mysteries that demand resolution
- Character Investment: Caring about what happens to the protagonist
- Escalating Stakes: Sense that something important is at risk
- Professional Execution: Confidence in the writer's ability
- Fresh Voice: Unique perspective worth experiencing
Analysis Interface
The First 10 Pages tool provides a comprehensive tabbed interface with detailed insights:
Assessment Tab
- Overall Score: 0-100 professional evaluation score
- Effectiveness Level: Exceptional/Good/Developing/Needs Work
- Key Strengths: What's working well in your opening
- Critical Weaknesses: Priority areas for improvement
- Opening Image Analysis: Evaluation of your first scene
- Page 11 Test Result: Pass/Needs Work with detailed reasoning
Framework Parts Tab
- Category Scores: Individual ratings for each evaluation category
- Detailed Checklist: Pass/fail on specific professional criteria
- Analysis Details: In-depth explanation for each evaluation point
- Missing Elements: What's absent from your opening
Recommendations Tab
- Priority Improvements: Most critical fixes needed
- Category-Specific Suggestions: Targeted advice for each framework part
- Professional Standards: How to meet industry expectations
- Next Steps: Actionable revision strategy
Page 11 Test Tab
- Pass/Fail Result: Clear verdict on the Page 11 Test
- Detailed Reasoning: Comprehensive explanation of the assessment
- Reader Psychology: What makes readers continue or stop
- Industry Context: Why the Page 11 Test matters professionally
- Improvement Strategy: How to pass the test on revision
Effectiveness Levels
Your opening pages are rated on a professional scale:
- Exceptional (85-100): Industry-ready opening that demands attention
- Good (70-84): Solid professional opening with minor improvements needed
- Developing (50-69): Shows promise but needs significant strengthening
- Needs Work (0-49): Requires major revision to meet professional standards
When to Use First 10 Pages Analysis
- Before Submission: Ensure your opening meets professional standards
- After First Draft: Evaluate if your opening effectively launches the story
- During Revision: Focus improvements where they matter most
- Competition Prep: Polish your opening for contests and queries
- Reader Testing: Understand how industry readers will react
Professional Tips for Strong Openings
- Start with Conflict: Begin in the middle of action or tension
- Establish Voice Immediately: Your unique perspective should be clear from page 1
- Show Character Through Action: Reveal personality through choices, not description
- Create Visual Interest: Paint compelling pictures that directors can see
- Plant Questions: Give readers mysteries they must see resolved
- Trust Your Reader: Don't over-explain; let them engage actively
- Economy Matters: Every line should earn its place on the page
Integration with Other Tools
First 10 Pages Analysis works seamlessly with other NoosphereWriter features:
- Character Introduction: Detailed analysis of character first appearances
- Pacing Heat-Map: Visual representation of your opening's rhythm
- Common Flaws: Identify and fix typical opening mistakes
- Readability: Ensure smooth reading experience
- Theme Structure: Verify thematic elements are introduced effectively
- Coverage Report: Get complete professional screenplay evaluation
Export and Documentation
Export your First 10 Pages analysis as a professional PDF report including:
- Executive Summary: Overall score and key findings
- Detailed Assessment: Complete evaluation across all categories
- Page 11 Test Results: Pass/fail with comprehensive reasoning
- Framework Scores: Individual ratings for each evaluation area
- Priority Recommendations: Actionable improvement strategy
- Professional Formatting: Clean layout for development notes
Understanding Industry Standards
The First 10 Pages Analysis is based on how professional readers evaluate screenplays:
- First Impressions Matter: Readers often decide within 10 pages whether to continue
- Professional Polish: Technical execution signals your experience level
- Story Promise: Your opening makes implicit promises about the story to come
- Reader Engagement: Industry readers have limited time and many scripts to evaluate
- Competition Reality: Your opening competes with thousands of other scripts
💡 Industry Insight
Professional screenplay readers typically receive 20-50 scripts per week to evaluate. With this volume, they've developed the ability to assess a script's potential within the first 10 pages. The Page 11 Test isn't arbitrary - it reflects the reality of how scripts are evaluated in the industry. A compelling opening that passes this test dramatically increases your chances of getting a full read and positive coverage.
Movie Ending
Analyze your screenplay's conclusion against a proven 7-point framework to ensure a satisfying and thematically resonant ending.
How It Works
The Movie Ending tool evaluates the final pages of your script (typically the last 5-10 pages) to assess how well they resolve the story's setup and deliver a powerful payoff:
- Go to
Script → Story & Structure → Movie Ending - The tool automatically extracts the ending scenes
- Click "Analyze Ending"
- Review the assessment of Setup Pillars and Payoff Steps
- Export a detailed PDF report
The 7-Point Framework
The analysis is based on two key phases:
Phase 1: Setup Pillars
Ensures the ending effectively addresses the core elements established at the beginning:
- External Goal: Does the protagonist achieve or fail their conscious objective?
- Internal Flaw: Is the protagonist's fatal flaw addressed or overcome?
- Thematic Question: Does the ending provide a definitive answer to the story's central philosophical question?
Phase 2: Payoff Steps
Evaluates the structural beats of the climax and resolution:
- The Final Test: The ultimate challenge that forces the protagonist to prove their growth.
- Point of No Return: The moment where the protagonist commits fully, burning bridges to the past.
- The Choice: A defining decision that proves the protagonist has changed (or failed to change).
- The Transformation: The final state of the protagonist, contrasting with who they were at the start.
Features
- Pass/Fail Assessment: Clear evaluation for each of the 7 principles.
- Detailed Feedback: Specific insights on why a principle passed or failed.
- Recommendations: Actionable advice to strengthen weak areas.
- Scene Navigation: Jump directly to relevant scenes in your script.
- PDF Export: Save the analysis for offline review or sharing.
Plot Templates
Compare your screenplay against established plot structure templates to identify missing story beats and strengthen your narrative architecture. This AI-powered tool maps your scenes to classic storytelling frameworks and provides actionable insights for structural improvement.
How It Works
Plot Templates analysis evaluates your screenplay against proven story structures used by successful films:
- Go to
Script → Story & Structure → Plot Templates - Select a plot template from the dropdown (e.g., 15-Beat Blueprint, Hero's Journey)
- Click "Analyze Screenplay" to start the AI analysis
- Review the comprehensive structural analysis
- Explore mapped beats and missing elements by expanding act sections
- Export the complete analysis as a PDF report
Available Templates
Choose from industry-standard story structures:
- 15-Beat Blueprint: Blake Snyder's Save the Cat structure with precise beat timing
- Three-Act Structure: Classic beginning, middle, and end with plot points
- Hero's Journey: Joseph Campbell's monomyth for transformational stories
- Five-Act Structure: Shakespearean dramatic structure for complex narratives
- Seven-Act Structure: Television and episodic storytelling framework
- Dan Harmon's Story Circle: Simplified hero's journey for character-driven stories
- Fichtean Curve: Crisis-driven structure with escalating tension
- Save the Cat: Genre-specific beat sheets for different story types
Analysis Components
Coverage Summary
- Coverage Percentage: How much of the template your screenplay fulfills
- Mapped Beats: Template beats successfully found in your script
- Missing Beats: Critical story elements not yet present
- Structural Alignment: Overall assessment (Excellent/Good/Fair/Poor)
Acts Analysis
Detailed breakdown by act showing:
- Expected vs Actual Beats: What the template requires vs what you have
- Completeness Percentage: How fully each act is developed
- Mapped Scenes: Your scenes that correspond to template beats
- Missing Elements: Beats needed to complete each act
- Structural Notes: Act-specific observations and suggestions
Beat Mapping
For each template beat found in your screenplay:
- Template Beat: Name and description of the structural element
- Your Scene: Scene number, heading, and content that matches
- Confidence Level: How well your scene fulfills the beat (High/Medium/Low)
- Alignment Notes: Specific observations about the match
- Click to Navigate: Jump directly to the scene in your screenplay
Missing Beats Analysis
For beats not found in your screenplay:
- Beat Description: What story purpose this beat serves
- Importance Level: Critical, Important, or Beneficial
- Suggested Placement: Where in your script to add this beat
- Implementation Suggestions: Specific ideas for incorporating the beat
Structural Analysis Features
Pacing Analysis
- Pacing Assessment: How well your story rhythm follows the template
- Timing Issues: Beats that occur too early or too late
- Flow Suggestions: How to improve story momentum
Strengths and Weaknesses
- Structural Strengths: What your screenplay does well structurally
- Structural Weaknesses: Areas needing improvement
- Key Missing Elements: Most important beats to add
Recommendations
- Priority Actions: Most important structural fixes
- Beat-Specific Advice: How to strengthen existing beats
- Scene Suggestions: Ideas for new scenes to fill gaps
- Revision Strategy: Order of operations for improvements
Interactive Features
- Expandable Acts: Click act headers to view detailed beat information
- Scene Navigation: Click any mapped scene to jump to it in the editor
- Auto-Expansion: Acts with missing beats automatically expand
- Confidence Indicators: Color-coded badges show mapping strength
- Importance Badges: Visual priority levels for missing beats
When to Use Plot Templates
- Story Development: Ensure your narrative has all essential elements
- Structural Revision: Identify and fix pacing problems
- Genre Alignment: Match genre expectations with appropriate templates
- Coverage Preparation: Anticipate reader expectations for structure
- Learning Tool: Understand how successful films use these structures
Best Practices
- Choose the Right Template: Select based on your genre and story type
- Don't Force It: Templates are guides, not rigid rules
- Focus on Missing Critical Beats: Prioritize "Critical" importance items
- Maintain Your Voice: Add beats while preserving your unique style
- Iterate Analysis: Re-run after revisions to track improvement
Integration with Other Tools
Plot Templates analysis complements other NoosphereWriter features:
- Plot Board: Visualize your structure with the same templates
- Pacing Heat-Map: See how structure affects story rhythm
- Coverage Report: Get professional assessment of structure
- Scene Optimizer: Improve individual scenes within the structure
- Theme Structure: Ensure themes align with plot beats
Export Options
Export your Plot Templates analysis as a comprehensive PDF including:
- Executive Summary: Coverage percentage and alignment assessment
- Acts Breakdown: Detailed analysis of each act with beats
- Mapped Beats: Complete list of found template elements
- Missing Beats: Prioritized list with implementation guidance
- Structural Analysis: Strengths, weaknesses, and recommendations
- Visual Progress: Charts showing coverage and completeness
Understanding Template Analysis
Important considerations when using Plot Templates:
- Templates as Tools: They reveal structure but don't replace creativity
- Flexibility Matters: Great films often bend or break template "rules"
- Context Sensitive: AI considers your genre and style when mapping
- Confidence Levels: Not all matches are perfect - review medium/low confidence mappings
- Evolution Friendly: Your structure can evolve beyond initial templates
💡 Pro Tip
Start with 15-Beat Blueprint for contemporary commercial screenplays, Hero's Journey for adventure/fantasy, or Three-Act Structure for character dramas. Run multiple templates to see which best fits your story's natural shape. Remember, templates are meant to support your vision, not constrain it. Use them to identify structural opportunities while maintaining your unique voice and story intentions.
Continuity Check
AI-powered analysis to detect timeline inconsistencies, character errors, and plot holes.
What It Analyzes
- Timeline Consistency: Day/night progression, time references
- Character Continuity: Names, relationships, presence in scenes
- Plot Logic: Story cause-and-effect, setups and payoffs
- Prop Tracking: Important objects and their locations
- Location Logic: Geographic consistency
Severity Levels
- 🔴 High: Major continuity errors
- 🟡 Medium: Potential issues to review
- 🔵 Low: Minor suggestions
Using Continuity Check
- Go to
Script → Story & Structure → Continuity Check - AI analyzes your entire screenplay
- Review issues by category
- Click any issue to jump to that scene
- Export report as PDF
World-building Dossier
Comprehensive AI-powered analysis of your screenplay's world using the Five Pillars of World-Building framework. Extract every detail that defines your story world, identify gaps, and discover opportunities for deeper world-building.
The Five Pillars Framework
The dossier organizes world-building elements into five comprehensive categories:
I. Physical Realm
- Cosmology & Astronomy: Planets, suns, moons, celestial events, night sky appearance
- Geography & Geology: Continents, oceans, mountains, biomes, climate, weather patterns, natural resources
- Flora & Fauna: Plants, animals, ecosystem food chains, domesticated species, medicinal/poisonous plants
II. Societal Construct
- Government & Politics: Government form, rulers, political factions, legal system, law enforcement
- Economy & Commerce: Economic system, currency, wealth distribution, class systems, major industries
- Factions & Organizations: Military structure, corporations, guilds, criminal syndicates, secret societies
III. Cultural Fabric
- History & Lore: Timeline of major events, creation myths, wars, disasters, discoveries, legendary figures
- Religion & Mythology: Major religions, gods/deities, core beliefs, sacred texts, worship practices
- Language & Communication: Primary languages, dialects, slang, colloquialisms, written language
- Daily Life & Customs: Family structure, marriage/birth/death customs, gender roles, foods, clothing, entertainment
IV. Rules of Reality
- Physics & Natural Laws: Does physics mirror reality? Gravity differences? Unique physical principles?
- Technology & Science: Tech level, common tools/devices, transportation, communication, medical science
- Magic & Metaphysics: Does magic exist? Source, rules, limitations, costs, types, societal view
V. Inhabitants
- Races & Species: Sentient species, physical traits, lifespans, unique abilities, origins, cultural norms
- Key Character Dossiers: Main characters' backstory connections to world history, motivations shaped by culture
What The Analysis Provides
- Extracted Elements: Every detail mentioned in your screenplay, organized by pillar and category
- Scene References: Each element references the specific scene where it appears (e.g., "Scene 5")
- Completeness Score: 0-100% score based on how thoroughly your world is defined
- Gaps Identified: Categories that need more development for a richer world
- Consistency Issues: Contradictions or conflicts between different scenes
Using World-building Dossier
- Go to
Script → Story & Structure → World-building Dossier - AI analyzes your entire screenplay using the Five Pillars framework
- Review the completeness score and total elements found
- Expand each pillar to see extracted details organized by category
- Review "Gaps Identified" to see where your world needs more development
- Check "Consistency Issues" to find potential contradictions
- Export complete dossier as PDF for production reference
Best Practices
- Run After Major Revisions: Generate a new dossier after significant screenplay changes
- Use for Production Bible: Export the PDF as reference material for production teams
- Address Gaps Strategically: Not every category needs development - focus on what serves your story
- Check Consistency Early: Catching contradictions early prevents larger continuity issues
- Reference Scene Numbers: Use the scene references to quickly locate and enhance world-building moments
When to Use World-building Dossier
- Fantasy/Sci-Fi Projects: Essential for stories with complex invented worlds
- Period Pieces: Verify historical and cultural details are consistently portrayed
- Pre-Production Planning: Create comprehensive production bibles for art departments
- Series Development: Establish consistent world rules across multiple episodes/films
- World Expansion: Identify opportunities to deepen your story world organically
Reverse Outline
AI-powered scene-by-scene structural analysis that extracts your screenplay's skeleton to diagnose structural issues. Includes action summary, character beats, and value changes for each scene.
Key Insight: A reverse outline strips away dialogue and description to reveal your story's narrative architecture. By examining each scene's purpose and value change, you can identify pacing issues, redundant scenes, and structural weaknesses before they become entrenched problems.
What It Analyzes
The Reverse Outline examines your screenplay and generates:
- Scene-by-Scene Breakdown: Each scene analyzed for its narrative function
- Action Summary: What physically happens in each scene ("The Plot")
- Character Beat: Character development moments ("The Arc")
- Value Change: Emotional/dramatic shift from beginning to end of scene (e.g., "Security (+) → Insecurity (-)")
- Structural Function: Where the scene fits in classic story structure (Catalyst, Midpoint, etc.)
- Scene Purpose: Classification of what the scene accomplishes (Plot Advancement, Character Development, Exposition, etc.)
- Flagged Scenes: Potential problem areas requiring attention
Understanding Value Changes
Value changes indicate the dramatic shift within a scene. Professional screenwriters use this technique to ensure every scene moves the story forward:
- Positive to Negative: Hope → Despair, Trust → Betrayal, Safety → Danger
- Negative to Positive: Fear → Courage, Isolation → Connection, Failure → Success
- Neutral to Charged: Calm → Tension, Ordinary → Extraordinary
Scenes without clear value changes often indicate structural issues that need attention.
Structure Analysis
The tool provides act-level analysis including:
- Act Length Distribution: Percentage breakdown of Acts One, Two, and Three
- Pacing Issues: Areas where structure may be unbalanced
- Missing Beats: Key story beats not clearly present
- Structure Notes: Overall observations about your screenplay's architecture
Scene Purpose Categories
Each scene is classified into one of these narrative purposes:
- Plot Advancement: Moves the story forward with new events or information
- Character Development: Deepens understanding of characters
- World Building: Establishes setting, rules, or atmosphere
- Exposition: Delivers necessary background information
- Conflict Escalation: Raises stakes or intensifies obstacles
- Emotional Beat: Creates specific emotional response
- Setup/Payoff: Plants or delivers on narrative promises
- Transition: Connects between major sequences
- Unclear: Purpose not immediately evident (potential problem)
Redundancies Detection
The analysis identifies potential scene redundancies:
- Scenes serving the same narrative purpose
- Similar dialogue patterns across scenes
- Repeated information delivery
- Suggestions for consolidation or differentiation
How to Use Reverse Outline
- Access: Go to Script → Story & Structure → Reverse Outline
- Analyze: Click "Analyze Screenplay" to process your script
- Review Summary: Check total scenes, flagged scenes, and completeness score
- Explore Scenes: Expand scene sections to see detailed breakdowns
- Check Structure: Review the Structure Analysis section for act balance
- Address Issues: Focus on flagged scenes and scenes with "Unclear" purposes
- Export: Generate a PDF report for offline review or collaboration
Interpreting the Completeness Score
The completeness score (0-100) indicates how well-structured your screenplay appears:
- 85-100: Excellent structure with clear scene purposes throughout
- 70-84: Good structure with minor areas for improvement
- 50-69: Moderate structural issues requiring attention
- Below 50: Significant structural concerns to address
PDF Export
Generate a comprehensive PDF report including:
- Summary statistics and completeness score
- Complete scene-by-scene breakdown
- Value changes for each scene
- Flagged scenes with explanations
- Structure analysis with act breakdowns
- Redundancy observations
When to Use Reverse Outline
- First Draft Diagnosis: Identify structural issues before major rewrites
- Pacing Problems: Find scenes that slow momentum or lack purpose
- Act Balance: Ensure proper weight distribution across your story
- Pre-Revision Planning: Create a roadmap for structural improvements
- Collaboration: Share structural overview with collaborators or coverage readers
Causality Inspector
A diagnostic tool that analyzes scene transitions to distinguish between episodic plotting ("And Then") and causal plotting ("Therefore" / "But"). Ideally, scenes should be causally linked to create narrative momentum.
Narrative Principle: According to Trey Parker and Matt Stone (and Aristotle), stories are boring if the beats are connected by "And then." They are engaging if the beats are connected by "Therefore" or "But."
Transition Types
- 🔗 Therefore (Causal): The previous scene causes this scene to happen. (High narrative drive)
- ↔️ But (Conflict): The previous scene's goal is blocked, forcing a new direction. (High narrative drive)
- ⏸️ Meanwhile (Parallel): A shift to a parallel storyline. (Neutral)
- ⏱️ And Then (Episodic): Something happens next, but not necessarily because of the previous scene. (Weak narrative drive)
How to Use
- Access: Go to
Script → Story & Structure → Causality Inspector. - Analyze: Click "Analyze Script". Returns a list of scene pairs (A → B).
- Review: Expand any pair to see the AI's reasoning for the transition classification.
- Filter: Toggle "Show Weak Links Only" to identify "And Then" transitions that need tightening.
Features
- Causality Score: A percentage indicating how strong the causal chain is.
- Episodic Drift: A count of non-causal transitions ("And Then").
- Fix Suggestions: For weak links, the AI offers suggestions on how to rewrite the transition to be causal.
- PDF Export: Download a report of the analysis.
- Privacy: Analysis is cached locally to minimize API usage.
Escalation Monitor
A diagnostic tool that tracks the "Global Danger Gradient" across your screenplay to detect "Premature De-escalation" - a common issue where stakes inadvertently drop in the latter half of a script.
Narrative Principle: True escalation isn't "more explosions." It's the protagonist's options shrinking while the consequences of failure expand. Each turning point should raise the stakes such that the climax contains the highest danger level.
The Problem It Solves
Writers often front-load danger. After a strong Midpoint crisis, scenes can relax into logistical planning or "gathering allies" that accidentally lowers tension. This tool identifies where your danger gradient plateaus or dips when it should be climbing.
How It Works
The Escalation Monitor analyzes your screenplay at key structural landmarks:
- 10% (Inciting Incident): Where stakes are first introduced
- 25% (End of Act 1): Complication that locks the protagonist in
- 50% (Midpoint): Point of no return or major revelation
- 75% (End of Act 2): All is lost / lowest point
- 90% (Climax): Maximum danger - should be the highest score
How to Use
- Access: Go to
Script → Story & Structure → Escalation Monitor. - Analyze: Click "Analyze Escalation". The AI evaluates danger levels at each landmark.
- Review Chart: The Danger Gradient chart shows your actual danger curve vs. the ideal rising action.
- Check Comparisons: Section comparison cards show whether each pair escalates properly (PASS/FAIL).
- Fix Issues: Expand failed comparisons for reasoning and fix suggestions.
Features
- Escalation Score: A percentage (0-100%) indicating overall escalation health.
- Trend Status: Overall assessment - "Healthy Climb", "Plateau Detected", or "Critical De-escalation".
- Danger Gradient Chart: Visual line chart comparing your danger curve to ideal rising action.
- Section Comparisons:
- Act 1 → Midpoint
- Midpoint → End of Act 2
- Climax supremacy check
- De-escalation Issues: Specific problem areas with intensity drop percentages.
- Fix Suggestions: AI recommendations for increasing tension in weak areas.
- PDF Export: Download the complete analysis report.
- Privacy: Analysis is cached locally to minimize API usage.
Interpreting Results
- Green (75%+): Strong escalation pattern - stakes rise appropriately
- Yellow (50-74%): Some plateau areas detected - review comparisons
- Red (<50%): Significant de-escalation issues - urgent attention needed
Cliché and Trope Identifier
AI-powered analysis to identify overused story elements, predictable plot devices, and derivative content. Get specific suggestions for fresh, original alternatives that maintain story integrity while increasing audience surprise.
What It Analyzes
- Story Structure Clichés:
- "Chosen One" narratives without fresh twists
- Love triangles as primary conflict drivers
- Mentor death as character motivation
- Deus ex machina resolutions
- Hero's journey without innovation
- Character Archetype Clichés:
- Manic pixie dream girls
- Wise old mentors with cryptic advice
- Evil corporations as faceless antagonists
- Perfect villains without depth
- Strong female characters that are just male characters with different pronouns
- Dialogue Clichés:
- One-liners at inappropriate dramatic moments
- Exposition speeches disguised as conversation
- Genre-specific jargon ("We've got company!", "It's quiet... too quiet")
- Characters stating themes directly
- Plot Device Clichés:
- MacGuffins with no thematic relevance
- Convenient coincidences driving plot
- Misunderstandings that could be resolved with one conversation
- Technology that works exactly when needed
- Visual Clichés:
- Slow-motion explosions without emotional context
- Rain during emotional confrontations
- Dutch angles for "edginess"
- Flashbacks as exposition delivery
- Theme Treatment Clichés:
- Heavy-handed symbolism with no subtlety
- Obvious moral lessons stated directly
- Redemption arcs that feel unearned
- "Power of love" solving complex problems
Originality Assessment
- Originality Score: 0-100 rating for overall creativity
- Creativity Levels:
- 🔴 Derivative: Heavy reliance on overused elements
- 🟡 Conventional: Some clichés but functional story
- 🟢 Fresh: Original approach with minor clichés
- ✨ Highly Original: Innovative storytelling throughout
- Creative Alternatives: Specific suggestions for each identified cliché
- Industry Insights: Professional perspective on marketability impact
Using Cliché and Trope Identifier
- Go to
Script → Craft & Style → Cliché and Trope Identifier - Click "Analyze for Clichés and Tropes"
- AI analyzes your screenplay for derivative content
- Review originality summary and creativity level
- Explore issues by category (click to expand details)
- Read creative alternatives for each identified cliché
- Jump to specific scenes using navigation links
- Focus on priority recommendations for maximum impact
- Export comprehensive report as PDF
Understanding Results
- Priority Recommendations: High-impact changes ranked by importance
- Issues by Category: Detailed breakdown with specific examples
- Creative Suggestions: Fresh approaches that maintain story function
- Unique Strengths: Original elements already working well
- Scene Navigation: Click any scene reference to jump directly to that location
Best Practices
- Focus on High-Priority Issues: Address critical clichés first for maximum originality improvement
- Maintain Story Integrity: Use suggested alternatives that serve your story goals
- Consider Genre Expectations: Some "clichés" may be necessary genre conventions
- Preserve Your Voice: Adapt suggestions to fit your unique writing style
- Test with Fresh Eyes: Re-analyze after making changes to measure improvement
💡 Pro Tip
The most effective originality improvements often come from subverting audience expectations while maintaining emotional truth. Focus on suggestions that surprise readers while staying true to your characters and themes.
Common Flaws Report
Identifies frequent screenplay issues and provides specific suggestions for improvement.
Categories Analyzed
- Dialogue Issues:
- On-the-nose dialogue
- Excessive exposition
- Repetitive speech patterns
- Unnatural conversations
- Action Line Problems:
- Overwritten descriptions
- Camera directions
- Unfilmable elements
- Passive voice overuse
- Structure Issues:
- Pacing problems
- Scene length imbalances
- Missing conflict
- Weak openings/endings
Improvement Suggestions
Each identified flaw includes:
- Specific location in script
- Explanation of the issue
- Concrete improvement suggestion
- Example of better approach
Readability
AI-powered analysis that simulates the table read experience to identify text that disrupts smooth reading flow.
What It Analyzes
- Action Lines:
- Overly long sentences that leave readers breathless
- Convoluted descriptions requiring re-reading
- Passive voice that weakens impact
- Dense technical language
- Dialogue:
- Robotic speech patterns lacking natural flow
- Missing contractions in casual conversation
- On-the-nose exposition without subtext
- Overly formal or stilted language
- Repetitive Language:
- Overused words and phrases
- Repeated sentence structures
- Monotonous rhythm patterns
- Limited vocabulary usage
- Flow Issues:
- Awkward transitions between scenes
- Inconsistent pacing
- Jarring tonal shifts
- Reader fatigue triggers
Understanding the Analysis
- Readability Score: 0-100 scale measuring overall reading ease
- 90-100: Excellent - Flows effortlessly
- 80-89: Good - Minor improvements possible
- 70-79: Fair - Notable issues to address
- 60-69: Poor - Significant revision needed
- Below 60: Critical - Major rewrite recommended
- Severity Levels:
- 🔴 Critical: Major readability barriers
- 🟡 Warning: Noticeable flow disruptions
- ⚪ Minor: Small refinements suggested
Using Readability Analysis
- Go to
Script → Craft & Style → Readability - Click "Analyze Readability" to start the AI analysis
- Review your overall readability score and level
- Check the severity breakdown (Critical/Warning/Minor)
- Expand each category to see specific issues
- Click "→ Go to Scene X" to jump directly to problems
- Export a PDF report for detailed review
Table Read Benefits
This analysis specifically helps prepare for table reads by:
- Ensuring actors can deliver lines naturally
- Preventing stumbling over complex action lines
- Maintaining audience engagement throughout
- Creating smooth narrative flow
- Reducing the need for on-the-fly rewrites
Improvement Tips
- For Action Lines: Break sentences at 25-30 words, use active voice, focus on what the camera sees
- For Dialogue: Read aloud, use contractions naturally, layer in subtext, match character voice
- For Repetition: Vary sentence structure, expand vocabulary, use pronouns effectively
- For Flow: Ensure smooth transitions, maintain consistent tone, balance pacing
On-the-Nose Detector
AI-powered analysis that identifies dialogue where characters explicitly state emotions, intentions, or information without subtext, helping you write more engaging and professional dialogue.
What It Analyzes
- Emotion Stating:
- Characters directly stating their emotions ("I'm angry", "I feel sad")
- Explicit emotional declarations without nuance
- Telling feelings instead of showing through behavior
- Lack of emotional subtext in dialogue
- Motivation Explaining:
- Characters announcing their goals and motivations
- Direct statements of intent ("I want revenge")
- Explicit declaration of character objectives
- Missing opportunity for audience inference
- Backstory Dumping:
- Unnatural exposition through dialogue
- "As you know" style information dumps
- Characters stating shared knowledge
- Forced exposition that disrupts conversation flow
- Theme Announcing:
- Characters explicitly stating the story's theme
- Direct moral or lesson declarations
- Obvious thematic statements ("The lesson here is...")
- Removing subtlety from thematic elements
- Intent Declaring:
- Characters announcing what they're about to do
- Telegraphing actions before performing them
- Removing dramatic tension through pre-announcement
- Stating plans instead of revealing through action
Understanding the Analysis
- Subtext Score: 0-100 scale measuring how well your dialogue uses subtext
- 91-100: Excellent - Rich subtext throughout
- 71-90: Good - Mostly subtle with minor on-the-nose moments
- 41-70: Fair - Mix of subtle and explicit dialogue
- 0-40: Poor - Heavy reliance on explicit statements
- Severity Levels:
- 🔴 Critical: Dialogue that would never be spoken naturally, completely lacks subtext
- 🟡 Warning: On-the-nose but could work with strong performance, moderately explicit
- ⚪ Minor: Slightly too direct, easy to fix with subtle rewording
Using On-the-Nose Detector
- Go to
Script → Craft & Style → On-the-Nose Detector - Click "Analyze Dialogue" to start the AI analysis
- Review your overall subtext score and level
- Check the severity breakdown (Critical/Warning/Minor)
- Expand each category to see specific dialogue issues
- Review the Subtext Alternatives provided for each issue (2-3 suggestions per problem)
- Click "→ Go to Scene X" to jump directly to the dialogue
- Click "Regenerate" to re-analyze with fresh AI perspective
- Export a PDF report for detailed review
Why Subtext Matters
On-the-nose dialogue is considered one of the most fundamental weaknesses in screenwriting because:
- Unrealistic: People rarely state emotions or intentions directly in real conversations
- Dramatically Flat: Removes tension and mystery from character interactions
- Unengaging: Doesn't give audiences the satisfaction of inferring meaning
- Amateur Signal: Immediately marks a script as written by an inexperienced writer
- Performance Limiting: Doesn't give actors room to bring depth to the character
- Emotionally Shallow: Tells instead of shows, reducing emotional impact
Improvement Strategies
- For Emotion Stating:
- Show emotion through actions, tone, or physical reactions instead of stating it
- Use sharp, defensive, or evasive dialogue to imply emotional states
- Let silence, pauses, or what's NOT said reveal feelings
- Example: Instead of "I'm angry at you" → "[Slams door] We're done talking."
- For Motivation Explaining:
- Reveal motivations through character choices and actions
- Use hints, implications, and subtle foreshadowing
- Let the audience piece together what drives the character
- Example: Instead of "I want revenge" → "[Studies photo] Everyone pays eventually."
- For Backstory Dumping:
- Avoid "as you know" and similar exposition phrases
- Reveal backstory through conflict or emotional moments
- Only include backstory when it creates present-moment tension
- Example: Instead of "As you know, we've been partners for 5 years" → "Five years. Can you believe it?"
- For Theme Announcing:
- Let the story demonstrate the theme through character arcs
- Never have characters state the moral or lesson explicitly
- Trust the audience to understand the thematic elements
- Example: Instead of "The lesson is that family comes first" → "They were there when no one else was."
- For Intent Declaring:
- Show intent through preparation, body language, or hints
- Build suspense by revealing plans through action, not dialogue
- Use sudden action instead of pre-announcement
- Example: Instead of "I'm going to kill you" → "[Pulls weapon silently]"
Professional Dialogue Techniques
- Iceberg Principle: What's said is only 10% of what's meant - the real meaning is below the surface
- Evasion and Deflection: Characters avoid direct answers, revealing discomfort or hidden agendas
- Contradiction: Words say one thing, actions or tone say another
- Implication: Meaning is suggested through context, not stated directly
- Silence and Pauses: What's NOT said can be more powerful than dialogue
- Indirect Expression: Characters talk around subjects rather than addressing them head-on
Working with Subtext Alternatives
Each on-the-nose issue includes 2-3 alternative dialogue suggestions that demonstrate:
- How to imply the same meaning without stating it directly
- Different approaches (action-based, tone-based, indirect statement)
- Ways to maintain character voice while adding subtext
- Techniques for creating dramatic tension through implication
Note: These alternatives are starting points for your own creativity, not prescriptive rewrites. Adapt them to your character's unique voice and the specific dramatic context.
Unfilmables
AI-powered analysis that identifies content that cannot be filmed or heard by the audience, helping you create production-ready screenplays.
What It Analyzes
- Internal Thoughts & Emotions:
- Character internal monologue and thoughts
- Unspoken feelings and emotions
- Mental realizations and epiphanies
- Memory flashbacks described in text
- Un-visualized Backstory:
- Character history told rather than shown
- Past events described in action lines
- Exposition about previous relationships
- Context that exists only in narration
- Abstract Descriptions:
- Literary language too abstract for cameras
- Metaphorical descriptions of emotions
- Concepts that cannot be visualized
- Prose-style writing unsuitable for film
Understanding the Analysis
- Filmability Score: 0-100 scale measuring how well your script translates to
screen
- 90-100: Excellent - Highly filmable content
- 80-89: Good - Minor unfilmable elements
- 70-79: Fair - Some content needs revision
- 60-69: Poor - Significant unfilmable content
- Below 60: Critical - Major revision needed
- Severity Levels:
- 🔴 Critical: Content impossible to film
- 🟡 Warning: Difficult to convey visually
- ⚪ Minor: Could be improved for clarity
Using Unfilmables Analysis
- Go to
Script → Craft & Style → Unfilmables - Click "Analyze Filmability" to start the AI analysis
- Review your overall filmability score and level
- Check the severity breakdown (Critical/Warning/Minor)
- Expand each category to see specific issues
- Click "→ Go to Scene X" to jump directly to problems
- Use suggested fixes to improve filmability
- Export a PDF report for production teams
Production Benefits
This analysis specifically helps prepare for production by:
- Ensuring all content can be captured on camera
- Preventing costly script revisions during filming
- Creating clear direction for actors and crew
- Identifying scenes that need visual storytelling
- Helping directors translate story to screen
Common Issues Found
- Character Thoughts: "She remembered her childhood" → Show through actions or dialogue
- Abstract Emotions: "His soul felt heavy" → Use visual metaphors or behavior
- Exposition Dumps: Backstory in action lines → Reveal through scenes
- Literary Style: Prose descriptions → Concrete, visual actions
Improvement Strategies
- Show Don't Tell: Convert internal states to external actions
- Visual Storytelling: Use props, settings, and behavior to convey meaning
- Dialogue Integration: Move exposition into character conversations
- Concrete Language: Replace abstract concepts with specific, filmable actions
Scene Navigation
Click any issue to jump directly to that location in your script. The analysis provides scene references in the format "Scene X: LOCATION" for easy navigation and production coordination.
PDF Export
Generate comprehensive reports including:
- Executive summary with filmability score
- Complete issue breakdown by category
- Scene-specific problem locations
- Suggested improvements for each issue
- Production-ready format for department sharing
Exposition Flagger
The Exposition Flagger helps you identify and fix clumsy exposition, often referred to as "Maid and Butler" dialogue. It detects instances where characters tell each other things they already know, which can break the audience's suspension of disbelief.
What It Detects
- Maid and Butler Dialogue: Characters explaining facts they both know to force-feed information to the audience (e.g., "As you know, you're my brother...").
- Relationship Stating: Characters explicitly stating their relationship (e.g., "Since we are married...").
- Fact Dumping: Characters reciting technical or historical facts they both know.
- Forced Recap: Characters summarizing recent events they both witnessed.
How to Use It
- Go to
Script → Craft & Style → Exposition Flagger. - The AI will analyze your script and flag potential issues.
- Review the flagged dialogue. The tool provides:
- Explanation: Why the dialogue feels forced.
- "Show, Don't Tell" Alternatives: Suggestions to reveal the information through subtext, conflict, or action.
- Use the suggestions to rewrite the dialogue and improve naturalism.
Anachronism Detective
The Anachronism Detective helps you maintain historical accuracy and internal consistency within your screenplay. It analyzes your script to identify elements that may be out of place for the setting or contradict your established world rules.
Modes
- Historical Accuracy: Checks for anachronisms in a specific time period and location (e.g., "New York, 1920"). It flags technology, language, or objects that didn't exist yet.
- World-Building Consistency: Checks for contradictions based on your custom world rules (e.g., "Mars Colony 2050, no paper allowed"). It ensures your story adheres to its own internal logic.
Using the Detective
- Go to
Script → Craft & Style → Anachronism Detective. - Select your mode: Historical or World-Building.
- For Historical: Enter the Year (e.g., 1890) and Location (e.g., London).
- For World-Building: Enter your World Context (e.g., "Steampunk universe where electricity is banned").
- Click Run Analysis.
Understanding Results
The analysis provides an Authenticity Score and a breakdown of issues categorized by severity:
- Critical: Major contradictions or impossible elements.
- Warning: Plausible but unlikely elements, or minor inconsistencies.
- Nitpick: Very minor details or linguistic anachronisms.
Each issue includes a description, context, and a "Locate" button to jump to the specific scene in your script.
Exporting Reports
You can export a detailed PDF report of the findings by clicking the Export PDF button. This report includes the score, settings, and a full list of detected issues.
Red Teaming
The Red Teaming feature simulates a high-stakes studio development meeting. Instead of generic feedback, it subjects your screenplay to three distinct, often conflicting adversarial personas to stress-test your work from every angle.
The Studio Simulation
Your script is analyzed in parallel by three AI agents, each with a specific agenda:
- 🕴️ The Suit (Marketability): Focuses purely on commercial viability, audience demographics, pacing, and trailer moments. They want a hit.
- 🎨 The Auteur (Artistry): Focuses on theme, subtext, character depth, and originality. They want a masterpiece.
- 📋 The Producer (Feasibility): Focuses on budget, logistics, and production realities. They want to know if it can actually be filmed.
The Showrunner's Verdict
After the agents argue, the system synthesizes their feedback into a Showrunner's Verdict—a strategic plan to balance these conflicting demands. It highlights:
- Active Conflicts: Specific scenes where Artistry clashes with Budget, or Marketing clashes with Tone.
- Winning Strategy: A actionable path forward to satisfy all stakeholders.
New in v2.0
- Chunking Support: Automatically handles large screenplays by splitting them into chunks, analyzing them in parallel, and synthesizing the results.
- PDF Export: Download a beautifully formatted "Red Teaming Report" to share with collaborators.
- Regenerate: One-click re-simulation to test your edits against the Studio Team.
Using Red Teaming
- Go to
Script → Craft & Style → Red Teaming. - Click Analyze Script to assemble the "Studio Team".
- Review the Executive Summary scores from the Suit, Auteur, and Producer.
- Check the Showrunner's Verdict for a synthesized strategy to resolve conflicts.
- Click Export PDF to save a permanent record of the feedback.
- After making edits to your script, click Regenerate in the dialog header to see if you've won over the room.
Tip: Don't run Red Teaming too early. It is most effective when you have a complete draft and are ready for the "kill your darlings" phase of professional revision.
Audience Simulator
The Audience Simulator uses cognitive modeling to predict how different types of viewers will experience your story in real-time. Unlike static reports, it simulates the dynamic flow of attention, memory load, and emotional engagement scene by scene.
Audience Personas
Test your screenplay against three distinct viewer archetypes:
- 🍿 Popcorn Viewer: Craves novelty, fast pacing, and clear emotional stakes. They possess average attention spans and will "change the channel" if bored.
- 🧠 Deep Reader: Values logical consistency, complex plot mechanics, and lore. They track every detail and will flag continuity errors or plot holes others miss.
- ⚡ Hardened Critic: Highly cynical and resistant to clichés. They punish unoriginal tropes severely but reward genuine subversion and thematic depth.
Simulation Metrics
The simulator tracks three core cognitive signals:
- Attention: The viewer's raw engagement level. Drops when pacing drags or confusion spikes.
- Cognitive Load: How hard the viewer's brain is working to track characters and plot threads. High load without payoff leads to exhaustion.
- Empathy: The emotional connection to the protagonist's goals and struggles.
Churn Points
The system identifies specific "Churn Points"—moments where a significant portion of the audience is likely to stop watching/reading. Each point includes:
- The Trigger: What caused the disengagement (e.g., "Logic Overload", "Cliche Fatigue").
- The Fix: Actionable advice to repair the scene and retain the audience.
Using the Simulator
- Go to
Tools → Validation & Cleaning → Audience Simulator(or search via Command Palette). - Click Generate Simulation to model the audience response.
- Switch between Personas to see how different segments react.
- Click on any scene in the chart to jump directly to that moment in the editor.
- Use Export PDF to save a comprehensive report of the findings.
Cinematic Language
AI-powered analysis that evaluates how well your screenplay uses the visual and auditory language of cinema, ensuring your script maximizes the medium's storytelling potential.
Six Core Principles Analyzed
I. Visual Storytelling
- Show Don't Tell:
- External actions revealing internal states
- Visual metaphors instead of exposition
- Character behavior showing emotion
- Externalization:
- Making invisible conflicts visible
- Physical manifestations of abstract concepts
- Symbolic objects representing themes
- Subtext:
- What's unsaid beneath dialogue
- Actions contradicting words
- Meaningful silences and pauses
II. Mise-en-scène
- Setting & Props:
- Locations that reinforce theme
- Symbolic objects advancing story
- Environmental storytelling
- Lighting & Color:
- Mood through lighting descriptions
- Color palette supporting tone
- Visual atmosphere creation
- Staging & Blocking:
- Character positioning revealing relationships
- Physical distance showing emotional distance
- Movement patterns creating meaning
III. Cinematography
- Framing & Composition:
- Suggested camera angles enhancing drama
- Visual focus directing audience attention
- Compositional balance and tension
- Point of View:
- Perspective choices revealing character
- Subjective camera moments
- Visual POV shifts
- Dynamic Movement:
- Action and motion in scenes
- Camera movement suggestions
- Visual energy and rhythm
IV. Editing & Rhythm
- Pacing:
- Scene length variation
- Beat timing and rhythm
- Narrative momentum
- Condensation:
- Economical storytelling
- Eliminating redundancy
- Every scene earning its place
- Scene Entry/Exit:
- Starting scenes late
- Ending scenes early
- In medias res openings
V. Sound Design
- Sound Cues:
- Off-screen sounds creating atmosphere
- Diegetic sound advancing story
- Audio foreshadowing
- Silence & Music:
- Strategic use of quiet moments
- Music suggestions for tone
- Sound/silence contrast
- Dialogue Quality:
- Naturalistic vs. stylized speech
- Subtext in conversations
- Silence speaking louder than words
VI. Screenplay Mechanics
- Action Line Economy:
- Concise, visual descriptions
- Active voice and strong verbs
- White space and readability
- Parenthetical Usage:
- Minimal, only when necessary
- Trusting director and actor
- Avoiding over-direction
- Conflict Focus:
- Dramatic tension in every scene
- Opposing forces colliding
- Stakes clear and present
Understanding the Analysis
- Cinematic Score: 0-100 scale measuring cinematic language mastery
- 90-100: Excellent - Masterful use of cinema language
- 80-89: Good - Strong cinematic storytelling
- 70-79: Fair - Adequate, room for improvement
- 60-69: Poor - Needs significant cinematic enhancement
- Below 60: Critical - Major revision needed
- Cinematic Level:
- 🏆 Excellent: Professional mastery of cinema
- ✅ Good: Solid understanding
- ⚠️ Fair: Basic competence
- ❌ Poor: Needs fundamental work
- Severity Levels:
- 🔴 Critical: Major missed opportunities
- 🟡 Warning: Could be more cinematic
- ⚪ Minor: Small improvements possible
Using Cinematic Language Analysis
- Go to
Script → Craft & Style → Cinematic Language - Click "Analyze Cinematic Language" to start the AI analysis
- Review your overall cinematic score and level
- Check the severity breakdown (Critical/Warning/Minor)
- Explore issues organized by the six principles
- Click "→ Go to Scene X" to jump directly to each issue
- Read suggested improvements and implementation strategies
- Review overall recommendations prioritized by impact
- Export a PDF report for script revision planning
Why Cinematic Language Matters
Film is a visual and auditory medium. This analysis helps you:
- Leverage the full power of cinema rather than just dialogue
- Create memorable, visceral storytelling experiences
- Trust your audience to understand subtext
- Provide directors with rich material to interpret
- Ensure your script reads like a movie, not a novel
- Maximize emotional impact through technique
Common Issues Found
- Over-reliance on dialogue: Characters explaining instead of showing
- Missing visual details: Generic action lines lacking specificity
- Telling emotions: "She is sad" instead of showing crying, slumped posture
- Static scenes: No movement, blocking, or visual interest
- Ignoring sound: Missing opportunities for ambient audio storytelling
- Verbose action: Novelistic prose instead of clean, visual description
Improvement Strategies
- For Visual Storytelling: Convert telling to showing, add visual metaphors, use behavior
- For Mise-en-scène: Specify meaningful settings, use symbolic props, describe staging
- For Cinematography: Suggest important angles, create visual POV moments, add movement
- For Editing/Rhythm: Vary scene length, start late/end early, maintain momentum
- For Sound Design: Add ambient sounds, use silence strategically, enhance dialogue subtext
- For Mechanics: Tighten action lines, minimize parentheticals, ensure conflict
Scene Navigation
Click any issue to jump directly to that scene in your screenplay. Each issue includes the scene reference, exact problematic content, detailed explanation, and specific suggested improvement.
PDF Export
Generate comprehensive cinematic language reports including:
- Executive summary with cinematic score and level
- Complete breakdown by six core principles
- Scene-specific issue locations with context
- Prioritized recommendations by impact
- Identified strengths to maintain
- Professional format for revision planning
Strengths Recognition
The analysis also identifies what you're doing well cinematically, helping you understand your unique voice and maintain your screenplay's strongest elements during revision.
Cadence Analyzer
AI-powered analysis that examines your screenplay's dramatic tension, stakes escalation, urgency, and narrative momentum to identify "flatlines"—sequences where tension plateaus and engagement fades.
What It Analyzes
The Cadence Analyzer evaluates your screenplay scene-by-scene to identify four critical pacing issues:
- Tension Flatlines:
- Sequences where tension plateaus for 2+ consecutive scenes
- Static conflict with no escalation
- Predictable outcomes that reduce suspense
- Passive scenes where protagonist makes no progress
- Tension plateau where stakes remain unchanged
- Stakes Static:
- Unchanged stakes across multiple scenes
- Low or abstract consequences
- No risk escalation as story progresses
- Missing personal stakes for the protagonist
- Consequences that don't increase in severity
- Urgency Missing:
- No time pressure forcing immediate action
- Missing deadlines or ticking clocks
- Characters passively waiting instead of acting
- "We'll deal with this later" moments
- Delayed action that reduces momentum
- Momentum Loss:
- Narrative stalls after major scenes
- Weak transitions between story beats
- Anticlimactic moments that deflate tension
- Energy drops following victories or reveals
- False victories that don't trigger new problems
Understanding the Analysis
- Cadence Score: 0-100 scale measuring dramatic tension and pacing
- 90-100: Excellent - Strong tension escalation throughout
- 75-89: Good - Solid pacing with minor flat spots
- 50-74: Fair - Several sequences need tension boost
- Below 50: Poor - Significant cadence issues affecting engagement
- Tension Level:
- 🟢 Excellent: Tension builds consistently, stakes escalate effectively
- 🔵 Good: Strong narrative momentum with occasional plateaus
- 🟡 Fair: Multiple flatlines reduce dramatic impact
- 🔴 Poor: Static tension and stakes throughout
- Severity Levels:
- 🔴 Critical: Flatlines spanning 3+ scenes that significantly harm engagement
- 🟡 Warning: 2-scene plateaus that could benefit from escalation
- ⚪ Minor: Isolated moments lacking urgency or stakes
Using Cadence Analyzer
- Go to
Script → Optimization → Cadence - Click "Analyze Cadence" to start the AI analysis
- Review your cadence score and tension level
- Check the severity breakdown (Critical/Warning/Minor)
- Expand each category to see specific tension/stakes issues
- Click on any issue to jump directly to that scene
- Review suggested techniques for boosting tension
- Export a PDF report for revision planning
The Eight Tension-Boosting Techniques
When the Cadence Analyzer identifies flatlines or static stakes, it references these proven dramatic techniques for escalation:
1. Introduce Time Pressure (The Ticking Clock)
This is one of the most direct ways to create urgency. By imposing a deadline, you force characters to act immediately. The consequences of running out of time must be made clear and significant to the audience.
Example: A bomb set to explode or a ransom that must be paid by midnight creates instant tension.
Application: Look for scenes where characters can delay action indefinitely. Add a specific time constraint that forces immediate decisions.
2. Unleash an Antagonist Countermove
A passive villain leads to a static story. A flatline can be shattered when the antagonist makes a proactive and intelligent countermove that directly complicates the hero's plan or raises the stakes. This creates a dynamic push-pull that prevents stagnation.
Ask yourself: "What could the opposing force do right now to make things worse for the protagonist?"
Application: In sequences where tension plateaus, have the antagonist discover the hero's plan, strike preemptively, or reveal a hidden advantage.
3. Impose a Moral Dilemma
Escalate the emotional and psychological tension by forcing your protagonist into a no-win choice. A moral dilemma is a situation where any available option violates a core personal value, forcing the character to decide what they are willing to sacrifice.
Shift: The tension shifts from "Will they succeed?" to "What will this choice cost them?"
Application: When stakes feel abstract, create a choice that forces the protagonist to compromise their values or betray someone they care about.
4. Use Reversals and Surprises
A reversal is a powerful tool that upends audience expectations and turns the story on its head. If a scene is playing out predictably, inject a twist that changes everything.
Examples:
- A trusted ally is revealed to be a traitor
- A clue incriminates a friend instead of a suspect
- An escape route leads directly into a trap
Application: In predictable sequences, subvert expectations with reveals that complicate the protagonist's situation.
5. Force a Hard Decision
Corner your protagonist in a situation where they cannot have it all and must make a difficult choice under pressure. This is not always about morality but can be strategic or personal.
Example: Having to choose which of two allies to save when there isn't time to save both.
Application: The lack of a safe, easy option immediately amplifies the conflict. Remove the middle ground.
6. Create a False Victory
Allow your characters to achieve a goal, giving the audience a moment of relief, only to reveal that their success has triggered a new, more dangerous problem.
Example: The heroes retrieve the sought-after item, but it turns out to be a decoy that activates a trap.
Application: This "win, then oh-no" cadence is highly effective at maintaining momentum. Every success should carry a hidden cost or complication.
7. Narrow the Options
Systematically strip away the protagonist's resources, allies, or escape routes. By eliminating their safety nets, you funnel them into a tighter, more desperate corner.
Effect: As their options dwindle, the risk associated with each remaining choice increases, heightening the tension.
Application: Have the protagonist lose backup plans, communication devices, trusted allies, or safe havens. Make each loss meaningful.
8. Raise the Personal Stakes
A scene can feel flat if the consequences are too abstract. Make the conflict intensely personal by putting something or someone the protagonist deeply cares about in direct jeopardy.
Example: A city-wide threat becomes far more compelling when the hero's own family is in the blast radius.
Application: This reminds the audience why the conflict matters on a human level. Connect abstract threats to specific people or values the protagonist holds dear.
Understanding "Flatlines"
A flatline is a sequence of 2-3+ scenes where stakes and urgency remain static. These are dangerous narrative lulls where audience engagement fades because conflict has stalled. The Cadence Analyzer specifically identifies these patterns by tracking:
- Conflict/Goal: What does the protagonist want in each scene? What obstacle stands in their way?
- Stakes: What is at risk? Have the stakes been raised, lowered, or remained the same compared to the previous scene?
- Urgency: Is there time-sensitive pressure forcing action NOW? Any deadlines or ticking clocks?
When these elements remain unchanged across consecutive scenes, tension flatlines and the story loses momentum.
Cadence Benefits
Analyzing and improving cadence creates more engaging screenplays by:
- Identifying specific sequences where tension plateaus
- Revealing where stakes fail to escalate
- Highlighting missing urgency and time pressure
- Pinpointing momentum loss after major beats
- Providing scene-specific techniques for escalation
- Ensuring consistent dramatic engagement throughout
Context-Aware Analysis
The Cadence Analyzer uses your project context for targeted suggestions:
- Genre: Applies genre-appropriate tension patterns (thriller ticking clocks vs. drama emotional escalation)
- Character Arcs: References character relationships and arcs for personal stakes analysis
- Theme Structure: Considers your story's thematic framework when identifying meaningful escalation
- Plot Board: Uses your story structure to identify where tension should naturally escalate
Actionable Issue Details
Each cadence issue includes:
- Scene Location: Exact scene reference for quick navigation
- Issue Type: Specific flatline pattern (static conflict, no escalation, missing deadline, etc.)
- Explanation: Why this sequence creates a flatline and which technique to apply
- Original Text: The problematic sequence for reference
- Suggested Fix: Specific technique from the eight boosting strategies
- Examples: Current version vs. improved version showing escalation
PDF Export
Export a comprehensive cadence report including:
- Overall cadence score and tension level
- Scene-by-scene issue breakdown
- Specific technique recommendations
- Issue locations with context
- Before/after examples
- Identified strengths to maintain
- Professional format for revision planning
Strengths Recognition
The analysis also identifies what you're doing well with pacing and tension, helping you understand your unique voice and maintain your screenplay's strongest dramatic elements during revision.
When to Use Cadence Analyzer
- After First Draft: Identify major tension flatlines before detailed revision
- Mid-Revision: Check if your escalation attempts are working
- Before Table Read: Ensure consistent engagement throughout
- After Feedback: Address specific "boring" or "slow" notes with targeted techniques
- Before Production: Final verification that dramatic tension builds effectively
Integration with Other Tools
Cadence analysis works seamlessly with your existing workflow:
- Scene Optimizer: Use Cadence to identify where to add tension, Scene Optimizer to identify what to cut
- Character Voice: Personal stakes techniques reference character relationships and arcs
- Theme Excavation: Moral dilemma techniques tie to your thematic framework
- Plot Board: Tension escalation aligns with your story structure beats
Chunked Processing
For screenplays over 50KB, Cadence Analyzer automatically uses chunked processing:
- Splits screenplay into manageable sections
- Analyzes each section with full context
- Aggregates results across all chunks
- Maintains scene number references throughout
- Tracks tension arc across the entire screenplay
This ensures comprehensive analysis regardless of screenplay length while maintaining accuracy and performance.
Scene Optimizer
AI-powered analysis that identifies unnecessary scenes, repetitive dialogue, redundant descriptions, and pacing issues to make your screenplay more efficient and impactful.
What It Analyzes
- Unnecessary Scenes:
- Scenes that serve no story purpose
- Redundant scenes that repeat information
- Mergeable scenes that can be combined
- Scene padding that slows narrative momentum
- Filler content that doesn't advance plot or character
- Repetitive Dialogue:
- Characters saying the same information multiple times
- Circular conversations that don't progress
- Redundant exposition in dialogue
- Similar dialogue exchanges across scenes
- Verbose dialogue that could be streamlined
- Redundant Descriptions:
- Repeated action descriptions
- Over-description of simple actions
- Unnecessary detail in action lines
- Redundant character business
- Verbose action lines that could be simplified
- Pacing Issues:
- Scenes that drag and slow momentum
- Rushed transitions between scenes
- Loss of narrative momentum
- Scene length problems affecting flow
- Narrative drag that affects engagement
Understanding the Analysis
- Optimization Score: 0-100 scale measuring script efficiency
- 90-100: Excellent - Highly efficient screenplay
- 80-89: Good - Minor optimization opportunities
- 70-79: Fair - Some scenes need tightening
- 60-69: Poor - Significant optimization needed
- Below 60: Critical - Major revision required
- Efficiency Level:
- 🟢 Excellent: Script is lean and impactful
- 🔵 Good: Well-structured with minor issues
- 🟡 Fair: Needs tightening in several areas
- 🔴 Poor: Requires significant optimization
- Severity Levels:
- 🔴 Critical: Scenes that significantly harm pacing
- 🟡 Warning: Elements that could be improved
- ⚪ Minor: Small optimizations for better flow
Using Scene Optimizer
- Go to
Script → Optimization → Scene Optimizer - Click "Analyze Scene Efficiency" to start the AI analysis
- Review your optimization score and efficiency level
- Check the severity breakdown (Critical/Warning/Minor)
- Expand each category to see specific optimization opportunities
- Click on any issue to jump directly to that scene
- Review recommendations for improving script efficiency
- Export a PDF report for production planning
Optimization Benefits
Scene optimization helps create more engaging screenplays by:
- Eliminating scenes that don't serve the story
- Tightening dialogue for better pacing
- Reducing redundant descriptions and actions
- Improving overall narrative momentum
- Creating more impactful, focused storytelling
- Helping maintain audience engagement
Common Issues Found
- Redundant Scenes: Two scenes showing the same character trait → Combine or cut one
- Repeated Information: Character explains backstory multiple times → Choose most impactful moment
- Verbose Action: "She slowly walks across the room" → "She crosses the room"
- Circular Dialogue: Characters discussing same topic without progression → Focus conversation
Optimization Strategies
- Scene Purpose: Every scene must advance plot or reveal character
- Dialogue Efficiency: Each line should serve multiple purposes
- Action Economy: Use concise, visual descriptions
- Narrative Flow: Maintain momentum through tight pacing
- Character Revelation: Show character through conflict, not exposition
Context-Aware Analysis
The Scene Optimizer uses your project context for targeted suggestions:
- Movie Concept: Considers your genre and theme for relevant optimization
- Character Data: Understands character arcs for better scene evaluation
- Plot Structure: Uses your story beats to assess scene necessity
- Theme Integration: Ensures optimizations support thematic elements
Scene Navigation
Click any optimization issue to jump directly to that location in your script. The analysis provides scene references and specific line locations for precise editing.
PDF Export
Generate detailed optimization reports including:
- Executive summary with optimization score
- Category breakdown of all identified issues
- Specific scene locations and recommendations
- Optimization strategies tailored to your script
- Production-ready format for development discussions
Working with Recommendations
The Scene Optimizer provides actionable recommendations prioritized by impact:
- High Priority: Critical changes that significantly improve pacing
- Medium Priority: Important optimizations for better flow
- Low Priority: Minor tweaks for polish
Best Practices
- Run analysis after completing your first draft
- Focus on high-priority issues first
- Consider the cumulative effect of multiple small optimizations
- Preserve essential character moments and thematic beats
- Re-run analysis after major revisions to track improvement
Final Polish
AI-powered dialogue and parenthetical analysis that ensures your screenplay is ready for production by identifying and fixing common dialogue issues.
What It Analyzes
- Overuse of Parentheticals:
- Redundant parentheticals that repeat dialogue emotion
- Excessive acting directions
- Unnecessary mood indicators
- Micro-directing through parentheticals
- Micro-Directing:
- Overly specific acting instructions
- Camera angle suggestions in dialogue
- Detailed emotional expressions
- Performance directions that limit actor interpretation
- Character Voice Issues:
- Indistinct character speech patterns
- Characters that sound too similar
- Missing unique vocal characteristics
- Inconsistent character vocabulary
- On-the-Nose Dialogue:
- Characters stating emotions directly
- Exposition without subtext
- Overly literal conversations
- Missing dramatic irony
Understanding the Analysis
- Polish Score: 0-100 scale measuring dialogue and parenthetical quality
- 90-100: Excellent - Production-ready dialogue
- 80-89: Good - Minor refinements needed
- 70-79: Fair - Notable issues to address
- 60-69: Poor - Significant revision required
- Below 60: Critical - Major dialogue rewrite needed
- Severity Levels:
- 🔴 Critical: Issues that significantly impact production
- 🟡 Warning: Problems that should be addressed
- ⚪ Minor: Small improvements that enhance quality
Using Final Polish Analysis
- Go to
Script → Optimization → Final Polish - Click "Analyze Final Polish" to start the AI analysis
- Review your overall polish score and level
- Check the severity breakdown (Critical/Warning/Minor)
- Expand each category to see specific issues
- Click "Go to Scene" to jump directly to problems
- Use the copy buttons to copy current text or suggested fixes
- Export a PDF report for reference during rewrites
Key Features
- Scene Navigation: Click any issue to jump directly to that location in your script
- Copy Assistance: Copy current text or suggested improvements with one click
- Context Awareness: Analysis considers your movie concept, theme, and characters
- Chunked Processing: Handles large screenplays by analyzing in manageable sections
- Professional Reports: Export comprehensive PDF reports with all findings
Production Benefits
Final Polish analysis specifically helps prepare for production by:
- Ensuring actors can deliver natural, believable dialogue
- Removing micro-directing that limits performance choices
- Creating distinct, memorable character voices
- Eliminating parentheticals that slow down reads
- Improving dialogue flow for table reads
- Identifying script elements that may cause production delays
Understanding the Feedback
Each identified issue includes:
- Location: Specific scene reference for easy navigation
- Current Text: The problematic dialogue or parenthetical
- Suggested Fix: Concrete improvement recommendation
- Explanation: Why the change improves the script
- Industry Context: Professional standards and best practices
Common Issues Found
- Redundant Parentheticals: "(angrily)" when dialogue already shows anger
- Micro-Directing: "(with a slight pause, then smiling)" - too specific for actors
- Character Voice: All characters speaking with same vocabulary/rhythm
- On-the-Nose: "I'm so angry!" instead of showing anger through subtext
Best Practices for Dialogue
- Trust Your Actors: Avoid over-directing performances
- Show Don't Tell: Let dialogue reveal emotion through subtext
- Unique Voices: Give each character distinct speech patterns
- Natural Flow: Write dialogue that sounds conversational when read aloud
- Less is More: Use parentheticals sparingly and only when essential
Integration with Other Tools
Final Polish works seamlessly with your existing workflow:
- Considers character profiles from your Characters section
- References movie concept and theme structure for context
- Complements Readability and Common Flaws analyses
- Integrates with scene navigation and commenting systems
Large Screenplay Support
For screenplays over 50KB, Final Polish automatically uses chunked processing:
- Breaks screenplay into manageable sections
- Maintains analysis quality across all chunks
- Provides progress tracking during analysis
- Consolidates results into unified report
- Ensures no content is missed or duplicated
PDF Export Features
Generate comprehensive reports including:
- Executive summary with polish score and recommendations
- Complete issue breakdown by category and severity
- Scene-specific problem locations with examples
- Before/after text comparisons
- Detailed explanations for each suggested improvement
- Professional format suitable for sharing with collaborators
When to Use Final Polish
- Before Table Reads: Ensure smooth dialogue delivery
- Pre-Production: Eliminate potential on-set confusion
- After Major Rewrites: Check dialogue consistency
- Before Submissions: Professional-quality dialogue polish
- Collaboration Reviews: Standardize dialogue quality
Table Read
Generate AI-powered table reads of your screenplay with professional-quality voices using Google Cloud Text-to-Speech technology. Perfect for hearing your dialogue performed before production.
Setup Requirements
To use Table Read, you'll need a Google Cloud Text-to-Speech API key:
- Visit the Google Cloud Text-to-Speech page
- Create a Google Cloud project and enable the Text-to-Speech API
- Generate an API key with Text-to-Speech permissions
- In NoosphereWriter, go to
Settings → Text-to-Speech - Enter your API key and enable the service
Voice Selection Features
- Automatic Character Detection: Identifies all speaking characters in your screenplay
- Smart Voice Matching: Suggests appropriate voices based on character gender and role
- 50+ Professional Voices: Access to Google's premium Chirp HD voice collection
- Voice Preview: Test each voice before generating the full table read
- Custom Assignments: Manually assign specific voices to each character
Audio Generation Process
- Go to
Production → Pre-Production → Table Read - Review detected characters and their assigned voices
- Click preview buttons to test voice selections
- Adjust voice assignments as needed
- Click "Generate Table Read" to create the audio
- Use playback controls to listen to your screenplay
- Download the complete audio file for offline use
What Gets Voiced
- Scene Headings: Narrated with a professional, neutral voice (Iapetus)
- Action Lines: Read by the narrator to provide scene context
- Character Dialogue: Spoken by the assigned character voices
- Parentheticals: Integrated naturally into dialogue delivery
- Transitions: Announced by the narrator for scene flow
Audio Controls
- Play/Pause: Start and stop playback at any time
- Progress Tracking: Visual indicator of current position
- Scene Navigation: Jump to specific scenes or dialogue
- Volume Control: Adjust playback volume
- Download Option: Save the complete table read as an MP3 file
Voice Quality Features
- Chirp HD Technology: Google's highest-quality neural voices
- Natural Delivery: Advanced prosody and emotion recognition
- Consistent Performance: Reliable voice characteristics throughout
- Professional Quality: Studio-grade audio output at 24kHz
- Character Distinction: Clear vocal differences between characters
Production Benefits
Table Read helps your production process by:
- Dialogue Testing: Hear how lines sound when spoken aloud
- Pacing Review: Identify scenes that drag or rush
- Character Voice Development: Inspire actors with vocal direction
- Script Timing: Estimate actual performance duration
- Remote Collaboration: Share table reads with distributed teams
- Investor Presentations: Engaging script demos for funding pitches
Character Voice Assignments
The system automatically suggests voices based on:
- Character Gender: Male/female voice matching from character data
- Age Appropriateness: Young adult, mature, and senior vocal qualities
- Role Importance: Distinctive voices for main characters
- Conflict Avoidance: Ensures different characters have distinct voices
- Professional Standards: All voices suitable for industry presentations
Best Practices
- Clean Scripts: Ensure proper formatting for best voice recognition
- Character Consistency: Use consistent character names throughout
- Preview First: Test voice assignments before full generation
- Save Audio: Download important table reads for future reference
- Share Thoughtfully: Consider voice rights when sharing with third parties
Integration with Other Features
Table Read works seamlessly with:
- Character Profiles: Uses character data for voice matching
- Scene Navigation: Jump to specific scenes during playback
- Google Drive Sync: Character data syncs across devices
- Export Functions: Include table read notes in script exports
When to Generate Table Reads
- First Draft Complete: Initial script review and dialogue testing
- Before Pitch Meetings: Engaging presentation material
- Pre-Production Planning: Timing and pacing assessment
- Actor Auditions: Reference material for character voices
- Remote Collaboration: Share script experience with distant partners
Privacy and Usage
- Your API Key: Stored encrypted in browser local storage only
- Script Privacy: Your screenplay text is sent only to Google's TTS service
- No Server Storage: Audio files are generated client-side
- Local Caching: Generated audio stored in browser cache for replay
- Commercial Use: Follow Google Cloud TTS terms for commercial projects
Troubleshooting
- No Audio Generated: Check API key configuration in Settings
- Poor Voice Quality: Ensure stable internet connection
- Missing Characters: Verify character names are properly formatted
- Playback Issues: Clear browser cache and regenerate audio
- Download Problems: Check browser permissions for file downloads
Shot List
Generate professional industry-standard shot lists for your screenplay using AI-powered analysis. Creates production-ready shot lists that match the format used by 1st ADs, DPs, and professional production teams.
Overview
The Shot List feature transforms your written screenplay into a detailed visual production plan using industry-standard formatting. Using expert cinematography knowledge and a systematic 5-step process, it analyzes each scene to create comprehensive shot breakdowns with all the technical specifications production teams need.
Industry-Standard Format
Shot lists follow the professional production worksheet format used in film and television, including all fields required for:
- 1st Assistant Director: Setup numbers for scheduling and crew coordination
- Director of Photography: Lens specifications, equipment requirements, and technical notes
- Sound Department: Recording requirements (dialogue, MOS, playback, wild track)
- Script Supervisor: Continuity notes and shot dependencies
- Production Designer: VFX requirements and special elements
How It Works
The AI follows a proven 5-step cinematographic process for each scene:
- Analyze the Core Drama: Identifies the emotional beats, conflicts, and story objectives
- Visualize the Space and Blocking: Maps character movements and spatial relationships
- Identify Key Visual Moments: Pinpoints crucial story beats that need specific coverage
- Select Appropriate Shots: Chooses optimal shot types, angles, equipment, and camera movements
- Assemble the Shot List: Creates a production-ready sequence with complete technical specifications
Cinematographer's Toolkit Integration
Each shot recommendation draws from professional cinematography knowledge including:
- Shot Types: From extreme wide establishing shots to extreme close-ups
- Camera Angles: Eye level, high angle, low angle, bird's eye, worm's eye
- Framing Options: Wide, medium, close-up, extreme variations
- Camera Movements: Static, pan, tilt, dolly, crane, steadicam, handheld
- Equipment Types: Tripod, handheld, dolly, steadicam, crane, drone
- Lens Selection: Standardized focal lengths (e.g., 28mm, 35mm, 50mm, 85mm)
- Sound Recording: Dialogue, MOS, playback, wild track
- Transitions: Cut, fade, dissolve, wipe, match cut, jump cut
Using Shot List
- Go to
Production → Shot Planning → Shot List - The system automatically analyzes your entire screenplay
- Review the generated shot list in the interactive table with industry-standard columns:
- Shot #: Shot number in final edit sequence
- Setup #: Camera setup position (e.g., "1A", "1B", "2A") for 1st AD scheduling
- Shot Type: Camera distance (Wide Shot, Medium Shot, Close Up, etc.)
- Characters: Which characters appear in the shot
- Lens: Focal length specification (e.g., "35mm", "85mm")
- Equipment: Required camera support (Tripod, Dolly, Crane, Steadicam, etc.)
- Movement: Camera movement type (Static, Pan, Tilt, Push In, etc.)
- Sound: Recording requirements (Dialogue, MOS, Playback, Wild Track)
- Duration: Estimated shot duration in seconds
- Content: Action description and dialogue
- Notes: Department-specific notes organized by role
- View structured notes organized by department:
- Director Notes: Performance direction, timing, emotional intent
- DP Notes: Lighting, camera technical specifications
- Continuity Notes: Script supervisor tracking, shot dependencies
- VFX Notes: Special effects, post-production requirements
- General Notes: Other production information
- Export results as CSV or PDF for production use
Shot List Output
Each generated shot list includes complete production specifications:
- Executive Summary: Total scenes, shots, average shots per scene, and total estimated duration
- Scene-by-Scene Breakdown: Detailed shot lists organized by scene
- Complete Shot Details:
- Shot Number: Sequential numbering for final edit
- Setup Number: Camera position grouping for efficient shooting
- Shot Type: Camera distance (Establishing, Wide, Medium, Close Up, etc.)
- Camera Angle: Vertical positioning (Eye Level, High Angle, Low Angle, etc.)
- Lens Specification: Standardized focal length (e.g., "35mm", "85mm")
- Equipment Required: Camera support system needed
- Camera Movement: Movement type and direction
- Sound Recording: Audio recording requirements
- Estimated Duration: Calculated shot length based on content
- Character Action: What happens in the shot
- Dialogue: Lines spoken in the shot
- Location Details: Setting and spatial information
- Structured Notes: Department-specific production information
- Production-Ready Format: Industry-standard terminology and organization
Context-Aware Analysis
Shot List generation considers your screenplay's context for more accurate recommendations:
- Movie Concept: Genre and theme influence shot selection
- Character Profiles: Character relationships affect coverage choices
- Theme Structure: Thematic elements guide visual emphasis
- Location Details: Setting information impacts shot possibilities
Large Screenplay Support
For screenplays over 50,000 characters, the system automatically uses chunked processing:
- Scene-Based Chunking: Maintains story continuity
- Rate-Limited Processing: Respects API limits with 2-second delays
- Progress Tracking: Real-time status updates during processing
- Comprehensive Results: Aggregated shot lists with summary statistics
Export Options
- CSV Export: Tab-separated format perfect for spreadsheet applications with all
16 industry-standard columns:
- Scene, Shot #, Setup #, Description, Shot Size, Angle, Movement
- Lens (mm), Equipment, Sound, Duration (s)
- Director Notes, DP Notes, Continuity, VFX, General Notes
- PDF Export: Professional formatted document including:
- Shot headers with setup numbers and technical specifications
- Complete technical specs line (Lens | Equipment | Movement | Sound | Duration)
- Characters, location, action description, and dialogue
- Structured notes organized by department
- Production-Ready: Industry-standard formatting matching professional production worksheets
- Department-Specific: Organized information for 1st AD, DP, Sound, Script Supervisor, and VFX teams
- Shareable: Easy distribution to all production departments and crew heads
Production Benefits
Shot List helps your production process by:
- Pre-Production Planning: Complete technical specifications before cameras roll
- 1st AD Scheduling: Setup numbers enable efficient shooting order and crew coordination
- Director Preparation: Visual roadmap with performance notes for each scene
- Cinematographer Collaboration: Equipment and lens specifications for technical planning
- Equipment Planning: Know exactly what camera support is needed (dolly, crane, steadicam, etc.)
- Sound Department Coordination: Clear recording requirements for every shot
- Budget Estimation: Equipment needs and duration estimates for accurate scheduling
- Crew Communication: Department-specific notes for all production roles
- Script Supervisor Support: Continuity notes and shot dependencies tracked
- Storyboard Foundation: Technical details inform detailed visual planning
Intelligent Technical Specifications
The system automatically infers technical requirements based on creative choices:
- Equipment Inference: Camera movements automatically determine equipment needs:
- Dolly, Push In, Truck movements → Dolly track required
- Crane Up/Down → Crane or jib needed
- Handheld, Shake → Handheld operation
- Smooth tracking shots → Steadicam recommended
- Static or simple pan/tilt → Tripod sufficient
- Duration Calculation: Shot length estimated based on content:
- Dialogue length (150 words per minute average speaking rate)
- Shot type (close-ups typically 2-3s, establishing shots 6-8s)
- Action complexity (longer descriptions = more time needed)
- Sound Recording: Automatically determined by shot content:
- Shots with dialogue → Dialogue recording required
- Extreme close-ups → Wild track for ambient sound
- Shots without dialogue → MOS (Motor Only Sync - silent take)
- Lens Selection: Appropriate focal lengths for shot types:
- Wide/establishing shots → 28mm or 35mm
- Standard coverage → 50mm
- Close-ups and portraits → 85mm
- Setup Grouping: Shots with similar camera positions share setup numbers for efficient shooting order
Integration with Other Features
Shot List works seamlessly with:
- Character Profiles: Uses character data for coverage decisions
- Location Manager: Considers setting details for shot selection
- Theme Structure: Aligns visual choices with thematic elements
- Script Breakdown: References breakdown data for prop and wardrobe continuity
- Storyboard Generation: Shot lists serve as foundation for visual storyboards
- Google Drive Sync: Shot lists sync across devices
When to Generate Shot Lists
- Pre-Production: Essential step before filming begins
- Director Prep: Visual planning with performance notes for scene execution
- Cinematographer Meetings: Discussion foundation with technical specifications
- Production Meetings: Department coordination with setup numbers and notes
- Budget Planning: Equipment needs and duration estimates for cost analysis
- Equipment Rental: Specific list of camera support equipment needed (dolly, crane, steadicam)
- Storyboard Planning: Technical details inform detailed visual planning
- Schedule Creation: Setup numbers and durations for accurate call sheets
- Sound Department Prep: Recording requirements for each shot
Professional Guidelines
- Starting Point: Shot lists are professional suggestions, not rigid requirements
- Creative Flexibility: Directors should adapt recommendations to their vision
- Production Reality: Consider budget, time, and location constraints when modifying
- Collaboration Tool: Use shot lists to facilitate creative discussions between departments
- Department Communication: Structured notes help each department understand their requirements
- Iterative Process: Refine shot lists through pre-production development and tech scouts
- Technical Verification: Always verify equipment availability and location feasibility
Privacy and Usage
- Your API Key: Stored encrypted in browser local storage only
- Script Privacy: Your screenplay content is processed only for shot analysis
- No Server Storage: Shot lists are generated and stored locally
- Professional Use: Generated shot lists are suitable for commercial productions
- Export Freedom: Download and use shot lists in any production workflow
Troubleshooting
- No Shot List Generated: Check API key configuration in AI Assistant Settings
- Incomplete Analysis: Ensure screenplay has proper scene formatting
- Processing Errors: Verify stable internet connection for large screenplays
- Export Issues: Check browser permissions for file downloads
- Performance: Large screenplays may take several minutes to process
Storyboard
Transform your screenplay into professional-quality visual storyboards using advanced AI image generation. Create cinematic visual previews that help directors, cinematographers, and production teams visualize scenes before filming.
Overview
The Storyboard feature uses a sophisticated two-stage generation process combining shot list analysis with high-quality image generation. First, it creates consistent character and location assets, then composes them into storyboard panels that maintain visual continuity throughout your entire screenplay.
How It Works
The storyboard generation follows a professional two-stage process:
- Asset Generation: Creates high-quality character and location assets using Imagen 4, ensuring visual consistency across all panels
- Panel Composition: Composes individual storyboard panels using Nano Banana, combining assets with proper framing and cinematography
- Smart Caching: Reuses generated assets across multiple panels for consistency and faster generation
- Progressive Generation: Creates panels scene by scene with real-time progress updates
Three-Tab Workflow
The storyboard interface is organized into three main tabs:
- Shot Selection: Choose which scenes and shots to visualize from your shot list
- Assets: View and manage generated character and location reference images
- Results: Review your completed storyboard panels and export to PDF
Using Storyboard
- Go to
Production → Shot Planning → Storyboard - The system automatically generates a shot list for your screenplay
- In the Shot Selection tab:
- Review the generated shots organized by scene
- Select individual shots or entire scenes to visualize
- Click "Generate Storyboard" to begin the process
- Monitor progress through two phases:
- Phase 1: Asset generation (characters, locations, props)
- Phase 2: Panel composition (combining assets into storyboard frames)
- Review results in the Results tab and export as PDF
Asset Management
The Assets tab provides powerful control over visual consistency:
- Character Assets: Reference sheets showing main characters with consistent appearance, clothing, and accessories
- Location Assets: Environmental backgrounds for interior and exterior settings
- Smart Caching: Assets are automatically reused across panels for visual consistency
- Asset Regeneration: Clear and regenerate assets when character or location data changes
- Rich Data Integration: Uses detailed character and location information from Script menus
Advanced Features
- Over the Shoulder Shots: Specialized handling for OTS shots that properly show characters from behind
- Character Consistency: Maintains accessories like glasses, hats, and distinctive clothing across panels
- Spatial Coherence: Advanced occlusion rules ensure characters sit properly in furniture without clipping through structures, with realistic depth layering
- Location Extraction: Automatically parses scene headings to identify locations, including compound locations
- Professional Style: Black and white line drawing style suitable for production use
- Cinematographer Integration: Works with shot list data for proper framing, camera angles, and camera movements
- Camera Movement Visualization: Each panel displays the camera movement (static, pan, dolly, push in, etc.) for production reference
Shot Selection Features
- Scene-Level Selection: Select all shots in a scene with one click
- Individual Shot Control: Choose specific shots for targeted visualization
- Shot Details: Each shot shows type, camera angle, camera movement, action, and character information
- Camera Specifications: Displays shot type (close-up, medium, wide), camera angle (straight on, down shot, up shot), and camera movement (static, pan, dolly, push in, etc.)
- Smart Filtering: Focus on key dramatic moments or specific scenes
- Batch Processing: Generate multiple panels efficiently with progress tracking
Asset Regeneration
When you update character profiles or location details in the Script menus:
- Go to the Assets tab
- Click "Clear Assets" to remove cached character and location images
- Confirm the action in the dialog
- Return to Shot Selection and generate fresh storyboards
- New assets will incorporate your updated character and location information
Over the Shoulder Shot Handling
The system includes specialized processing for Over the Shoulder (OTS) shots:
- Automatic Detection: Identifies OTS shots from camera angle information
- Proper Framing: Shows foreground character from behind looking toward the subject
- Relaxed Requirements: Doesn't enforce facial accessories (glasses, etc.) for back-facing characters
- Cinematic Composition: Maintains proper OTS framing conventions
Export and Sharing
- PDF Export: Professional-quality PDF suitable for production teams
- Panel Organization: Storyboards organized by scene with clear labeling
- Complete Shot Information: Each panel includes shot type, camera angle, camera movement, characters, and action description
- Production Ready: Industry-standard format for pre-production planning with full cinematography specifications
- High Resolution: Generated images maintain quality for presentation
- Shareable: Easy distribution to directors, cinematographers, and department heads
Integration with Script Data
Storyboard generation leverages comprehensive script data:
- Character Profiles: Uses character descriptions, relationships, and physical details
- Location Manager: Incorporates location descriptions, props, and atmosphere notes
- Scene Analysis: Considers dialogue, action, and dramatic context
- Movie Concept: Adapts visual style to genre and tone
- Theme Structure: Aligns visual choices with thematic elements
Production Benefits
Storyboards enhance your production workflow by providing:
- Visual Clarity: Clear visual reference for complex scenes
- Director Preparation: Pre-visualization for shot planning
- Crew Communication: Shared visual language across departments
- Problem Identification: Spot potential blocking or staging issues early
- Client Presentations: Professional visuals for pitch meetings
- Budget Planning: Visual complexity assessment for cost estimation
- Schedule Optimization: Better understanding of shot requirements
Output Specifications
- Aspect Ratio: 16:9 widescreen format suitable for film production
- Style: Black and white line drawings in professional storyboard style
- Resolution: High-resolution images suitable for presentation and print
Recent Enhancements
- Camera Movement Integration: Shot list now includes structured camera movement data (static, pan, dolly, push in, etc.) displayed with each panel
- Enhanced Spatial Coherence: Advanced occlusion rules prevent characters from sitting through furniture structures like chair frames
- Improved Depth Layering: Characters properly positioned between furniture elements with realistic front/back relationships
- Furniture-Specific Handling: Specialized processing for beach chairs, office chairs, cockpits, and desks ensures realistic character placement
- PDF Export Enhancement: Camera angle and movement information now included in exported storyboard PDFs
- Text-Free Panels: Improved prompting eliminates dialogue overlays and subtitle-like text from visual compositions
Best Practices
- Start Small: Begin with key scenes to test the visual style
- Update Script Data: Ensure character and location profiles are detailed
- Review Assets: Check generated assets before creating multiple panels
- Selective Generation: Focus on complex scenes that benefit from visualization
- Iterative Process: Generate, review, and refine as needed
When to Use Storyboards
- Pre-Production: Visual planning for complex scenes
- Director Meetings: Communicate vision to department heads
- Client Pitches: Visual presentation of key scenes
- Action Sequences: Complex choreography and staging
- VFX Planning: Visual effects integration planning
- Location Scouting: Reference for desired visual compositions
- Budget Meetings: Visual complexity assessment
Troubleshooting
- Assets Not Generating: Check API key configuration and internet connection
- Inconsistent Characters: Use "Clear Assets" to regenerate with updated character data
- Wrong Locations: Verify scene headings use standard format (INT./EXT. LOCATION - TIME)
- Generation Failures: Large batches may require multiple attempts due to rate limits
- Export Issues: Check browser permissions for PDF downloads
- Performance: Generation time depends on number of selected shots and asset complexity
Privacy and Data Usage
- Your API Key: Stored encrypted in browser local storage only
- Script Privacy: Screenplay content processed only for storyboard generation
- Image Generation: Generated images are created specifically for your project
- No Server Storage: Storyboards generated and stored locally in your browser
- Professional Use: Generated storyboards suitable for commercial productions
- Export Freedom: Download and use storyboards in any production workflow
Staging & Blocking
Professional scene staging and blocking visualizer using a 2D canvas interface. Plan actor movements, camera positions, and set piece placements with precise control for every shot in your screenplay.
Overview
The Staging & Blocking feature provides a visual workspace where you can plan the physical choreography of your scenes. Using an intuitive 2D top-down canvas, you can position characters, place cameras with field-of-view visualization, add props and set pieces, and map out movement paths—all integrated with your Shot List data for shot-by-shot precision.
How It Works
Staging & Blocking uses a shot-based approach integrated with your Shot List:
- Scene Selection: Choose a scene from your screenplay to stage
- Shot List Integration: Automatically loads shots from your Shot List for the selected scene
- Shot-by-Shot Staging: Create independent staging diagrams for each shot (setup) with unique token positions
- Token Placement: Add characters, cameras, and props to the canvas with visual representations
- Canvas Controls: Use grid snapping, zoom, pan, and rotation controls for precise positioning
- PDF Export: Generate professional staging documents with diagrams for production teams
Three Types of Tokens
The canvas supports three types of staging elements:
- Character Tokens (Blue): Represent actors with directional facing, character levels (standing, sitting, kneeling, lying), and power dynamics visualization
- Camera Tokens (Red): Represent camera positions with field-of-view cones, lens types (wide, medium, tight), and rotation control
- Prop Tokens (Green): Represent set pieces, furniture, and interactive props with static or interactive designations
Using Staging & Blocking
- Go to
Production → Shot Planning → Staging & Blocking - In the Select Scene tab:
- Choose a scene from your screenplay
- The system automatically loads Shot List data for that scene
- Select a specific shot (setup) to stage
- In the Stage Design tab:
- Add character tokens using the "Add Character" button
- Add camera tokens using the "Add Camera" button
- Add prop tokens using the "Add Prop" button
- Click tokens to select and modify their properties
- Drag tokens on the canvas to reposition them
- Add staging notes specific to each shot
- Export your staging diagrams as PDF for production distribution
Character Token Features
Character tokens provide detailed actor positioning controls:
- Character Levels: Standing, sitting, kneeling, or lying positions for power dynamics visualization
- Facing Direction: 360-degree rotation control to show which direction the character faces
- Visual Scaling: Automatic size adjustment based on character level (sitting characters appear smaller)
- Character Integration: Links to Character data from Script menu for reference
- Color Coding: Blue coloring for easy identification on the canvas
- Name Labels: Character names displayed on each token
Camera Token Features
Camera tokens visualize shot framing and coverage:
- Field of View Cone: Visual representation of what the camera sees based on lens type
- Lens Types: Wide (75° FOV), medium (50° FOV), or tight (30° FOV) lens settings
- Rotation Control: 360-degree rotation to aim the camera at subjects
- Camera Labels: Custom labels like "A-Cam", "B-Cam", or "Shot 1A"
- Shot List Integration: Camera type and angle from Shot List metadata
- Color Coding: Red coloring for easy identification on the canvas
Prop Token Features
Prop tokens represent set pieces and interactive objects:
- Static vs Interactive: Distinguish between set dressing and hero props
- Prop Categories: Hand props, personal items, set pieces, and hero props
- Spatial Roles: Define furniture, obstacles, or interactive elements
- Prop Library Integration: Links to Prop Library data when available
- Color Coding: Green for interactive props, gray for static set pieces
- Scale Control: Adjust size to represent different prop dimensions
Canvas Controls
The staging canvas provides professional-grade positioning tools:
- Grid System: Configurable grid with adjustable cell size for precise placement
- Snap to Grid: Toggle grid snapping for aligned positioning or freeform placement
- Zoom Control: Zoom in/out to work at different detail levels
- Pan Control: Pan the canvas to focus on different areas of the stage
- Show/Hide Grid: Toggle grid visibility for cleaner export diagrams
- Independent Settings: Each shot has its own canvas settings (zoom, pan, grid)
Shot-Based Staging Architecture
Unlike traditional stage plotting, this system uses shot-based staging for maximum precision:
- Shot List Integration: Each shot from your Shot List gets its own staging diagram
- Independent Canvas State: Token positions, camera placement, and canvas settings are unique per shot
- Setup Numbers: Supports multiple setups per scene (1A, 1B, 2A, etc.)
- Shot Metadata: Displays shot type, camera angle, and camera movement for each shot
- Sequential Workflow: Move through shots in sequence to plan coverage systematically
PDF Export Features
Export professional staging documents for your production team:
- Title Page: Includes script title, total scenes, and staged shots count
- Scene Organization: Scenes sorted numerically with proper page breaks
- Shot Details: Each shot includes panel number, setup number, shot type, camera angle, and camera movement
- Canvas Diagrams: High-resolution canvas images showing token positions (2x resolution for print quality)
- Token Lists: Lists of characters, cameras, and props for each shot
- Staging Notes: Shot-specific and scene-level notes included
- Summary Page: Overview with scene breakdown and staging statistics
- Optional Diagrams: Choose to include or exclude canvas images in the export
Integration with Other Features
Staging & Blocking works seamlessly with other production tools:
- Shot List: Automatically loads shot data including type, angle, and movement
- Characters: Access character data from Script → Characters for reference
- Locations: Reference location information from Script → Locations
- Location Design: Import static props and set pieces from location designs
- Prop Library: Reference prop data from Production → Design System → Prop Library
- Creative Breakdown: Use scene breakdown data for character and prop context
Data Persistence
Your staging work is automatically saved and managed:
- Auto-Save: Staging data automatically saved to browser local storage
- Script-Specific Storage: Each screenplay maintains its own staging data
- Timestamped Changes: Last edited timestamps track when each shot was modified
- No Server Upload: All data stored locally in your browser for privacy
Workflow Example
Typical workflow for staging a scene:
- Open Staging & Blocking and select Scene 5
- Shot List shows 6 shots for this scene (setups 1A through 3B)
- Select Shot 1A (wide establishing shot):
- Add camera token, position it for wide angle coverage
- Set lens to "wide" for 75° field of view
- Add two character tokens at their starting positions
- Set both characters to "standing" level
- Add desk and chair prop tokens from location design
- Add staging note: "Both characters enter frame from stage right"
- Move to Shot 1B (over-the-shoulder on Character A):
- Reposition camera token for OTS framing
- Set lens to "medium" for 50° field of view
- Rotate Character A to face Character B
- Update staging note: "A listens while B delivers exposition"
- Continue through remaining shots, building coverage
- Export PDF with diagrams for director and AD review
Production Benefits
Staging & Blocking enhances your pre-production workflow:
- Visual Communication: Clear diagrams for director-DP collaboration
- Coverage Planning: Ensure complete scene coverage with no gaps
- Blocking Preparation: Pre-plan actor movements and marks
- Continuity Reference: Visual record for matching shots during filming
- Efficient Shooting: Optimize camera setups and lighting transitions
- Problem Detection: Identify staging conflicts before the shoot day
- Crew Briefing: Share diagrams with camera, grip, and lighting teams
Best Practices
- Start with Master Shots: Establish overall geography before coverage
- Use Shot List First: Generate Shot List before staging for complete shot data
- Consistent Scale: Maintain token scale proportions for spatial accuracy
- Clear Labels: Use descriptive camera labels (A-Cam, B-Cam, etc.)
- Stage Key Scenes: Focus on complex blocking and action sequences
- Add Context Notes: Use staging notes to clarify actor motivations
- Export with Diagrams: Include canvas images for visual reference
Character Level Reference
Understanding character levels for power dynamics:
- Standing: Full height, dominant position, visual scale 1.0
- Sitting: Reduced height, neutral position, visual scale 0.75
- Kneeling: Low position, submissive or searching, visual scale 0.5
- Lying: Prone position, vulnerable or deceased, visual scale 0.3
Camera Lens Reference
Understanding lens types and their field of view:
- Wide Lens: 75° FOV, equivalent to 35mm lens, shows broad environment
- Medium Lens: 50° FOV, equivalent to 50mm lens, natural perspective
- Tight Lens: 30° FOV, equivalent to 85mm lens, compressed depth, close-ups
When to Use Staging & Blocking
- Complex Action: Fight scenes, chase sequences, large group movements
- Emotional Choreography: Scenes where physical distance reflects emotional state
- Coverage Planning: Ensure you have all angles for proper editing
- Location Scouting: Reference diagrams for space requirements
- Director Prep: Visual planning before rehearsals
- Production Meetings: Share staging plans with department heads
- Multi-Camera Shoots: Plan simultaneous camera positions
Troubleshooting
- No Shots Appearing: Generate Shot List first (Production → Shot Planning → Shot List)
- Canvas Too Small: Increase grid width/height in canvas settings
- Tokens Not Snapping: Toggle "Snap to Grid" in canvas settings
- PDF Missing Diagrams: Ensure "Include Canvas Images" is checked during export
- Token Positioning Reset: Each shot has independent token positions—verify you're on the correct shot
- Export Not Working: Check browser permissions for PDF downloads
Privacy and Data Storage
- Local Storage Only: All staging data stored in browser local storage
- No Cloud Sync: Staging diagrams never uploaded to external servers
- Script-Specific Keys: Staging data organized by script title
- Canvas Privacy: PDF exports generated locally without external rendering
Logistical Breakdown
Industry-standard production breakdown analysis following 1st Assistant Director conventions. Generate comprehensive scene breakdowns with cast, props, wardrobe, vehicles, stunts, visual effects, and detailed visual descriptions for production planning.
Two-Phase Generation Process
The Logistical Breakdown feature uses an advanced two-phase AI generation system to create complete production breakdowns:
- Phase 1 - Standard Breakdown: Analyzes screenplay for all production elements following industry-standard categories
- Phase 2 - Visual Descriptions: Generates detailed visual profiles for characters and locations
- Scene-by-Scene Processing: Progressive generation with real-time updates for each scene
- Smart Caching: Results saved locally for instant access without regeneration
- Production-Ready Output: Professional formatting suitable for department distribution
Logistical Breakdown Categories
Every scene breakdown includes these industry-standard production elements:
- Cast: Speaking and non-speaking characters for talent scheduling
- Extras: Featured extras and atmosphere players with estimated counts
- Props: Hand props, personal props, set props, and hero props with character associations
- Set Dressing: Environmental items and background elements
- Wardrobe: Costume requirements per character with scene-specific details
- Makeup & Hair: Special makeup effects, prosthetics, and hair styling needs
- Vehicles & Animals: Picture vehicles, stunt vehicles, and animal talent
- Stunts: Stunt requirements with safety considerations
- Special Effects (SFX): Practical effects, pyrotechnics, and mechanical effects
- Visual Effects (VFX): Digital effects, green screen, and post-production needs
- Sound: Diegetic sound effects and special audio requirements
- Special Equipment: Cameras, cranes, dollies, and specialty gear
- Production Notes: Scheduling concerns, safety notes, and departmental coordination
Visual Descriptions Architecture
Phase 2 generates detailed visual profiles using a two-tier system:
Persistent Character Traits
- Physical Appearance: Build, height, distinguishing features
- Age: Approximate age or age range
- Personality: Core character traits and demeanor
- Signature Wardrobe: Typical costume style across the script
- Characteristic Mannerisms: Recurring behaviors and gestures
- First Appearance Propagation: Traits from character's first scene used for later appearances
Scene-Specific Character State
- Emotional State: How the character feels in this particular scene
- Physical Condition: Current health, energy level, injuries
- Scene Wardrobe: Specific costume for this scene (if different from signature)
Persistent Location Traits
- General Atmosphere: Overall feeling and tone of the space
- Architectural Style: Design period, materials, construction type
- INT/EXT Classification: Interior or exterior designation
Scene-Specific Location State
- Scene Lighting: Natural light, time of day, artificial lighting for this scene
- Scene Atmosphere: Weather, environmental conditions in this moment
- Scene Mood: How the location feels in this particular scene
Key Visual Moments
- Important Actions: Critical visual beats that drive the story
- Significant Props: Objects featured prominently in the scene
- Visual Storytelling: Non-dialogue moments that convey meaning
How to Use the Logistical Breakdown Feature
- Open the Dialog: Click "Logistical Breakdown" in the Production menu
- Start Generation: Click "Start Breakdown" to begin the two-phase analysis
- Progress bar shows real-time status
- Scene-by-scene updates display as processing completes
- Generation continues in background if dialog closed
- Review Results: Switch between tabs to explore breakdown data
- Summary Tab: Overall statistics and production totals
- Scene-by-Scene Tab: Complete breakdown for each scene
- Expand individual scenes to view full details
- Visual descriptions shown when available
- Regenerate: Click "Regenerate" to create fresh breakdown with updated screenplay
- Export: Download as PDF for production use
Summary View
The Summary tab provides production-level overview:
- Total Scenes: Complete scene count from screenplay
- Total Pages: Estimated page count
- Unique Cast: All speaking characters requiring talent contracts
- Unique Locations: All shooting locations for scouting and budgeting
- Production Totals: Aggregate counts for props, vehicles, animals, stunts, VFX shots, SFX needs
- Visual Completion Rate: Percentage of scenes with detailed visual descriptions
- Processing Information: Generation timestamp, AI model used, processing method, total time
Scene-by-Scene View
Each scene breakdown includes:
- Scene Header: Number, slug line, page count
- Synopsis: Brief scene description
- Production Elements: All 13 breakdown categories with detailed items
- Visual Descriptions: Character and location profiles (when Phase 2 completed)
- Expandable Interface: Click scene headers to expand/collapse full details
Export Options
PDF Export
- Professional Formatting: Industry-standard breakdown sheet layout
- Complete Data: All breakdown categories and visual descriptions
- Department Ready: Suitable for distribution to production departments
- Print Quality: Formatted for physical printing and binder storage
- Metadata: Script title, generation date, page numbers
Integration with Production Pipeline
Breakdown data powers other production features:
- Storyboard Generation: Visual descriptions provide character and location details for AI image generation
- Trailer Creation: Character profiles and key visual moments inform trailer shot composition
- Shot List Enhancement: Props, wardrobe, and production elements reference breakdown data
- Character Consistency: First appearance traits propagate to all later scenes for visual consistency
- Location Profiles: Persistent location architecture maintains visual continuity
Smart Caching System
- Automatic Storage: Completed breakdowns saved to browser localStorage
- Instant Loading: Previously generated breakdowns appear immediately on dialog open
- Per-Script Storage: Each screenplay maintains separate breakdown cache
- Regeneration Available: Clear cache and regenerate with updated screenplay content
Best Practices
- Scene Heading Format: Use standard format (INT./EXT. LOCATION - TIME) for accurate location extraction
- Complete Screenplay: Generate breakdown on finished draft for comprehensive results
- Review and Supplement: AI-generated breakdowns provide excellent foundation; add manual notes for specific requirements
- Regenerate After Revisions: Significant screenplay changes should trigger fresh breakdown generation
- Export for Collaboration: Share PDF with department heads for production planning
- Visual Descriptions for Storyboards: Phase 2 completion recommended before generating storyboards
- Character Consistency: Review first appearance descriptions carefully as they propagate to later scenes
Progressive Generation Details
Understanding the two-phase process:
Phase 1: Standard Breakdown (Required)
- Processes scenes sequentially with progress updates
- Extracts all 13 breakdown categories per scene
- Generates summary statistics and production totals
- Typically completes in 30-90 seconds depending on screenplay length
- Results immediately viewable in Summary and Scene-by-Scene tabs
Phase 2: Visual Descriptions (Optional, Recommended)
- Begins automatically after Phase 1 completion
- Generates detailed character and location profiles
- Separates persistent traits from scene-specific state
- Takes additional 30-60 seconds beyond Phase 1
- Critical for high-quality storyboard and trailer generation
- Visual completion rate shown in Summary tab
Understanding Breakdown Categories
Cast
- Speaking Characters: Characters with dialogue requiring SAG-AFTRA contracts
- Non-Speaking Characters: Named characters without dialogue in specific scenes
Props
- Hand Props: Items actors directly handle or manipulate
- Personal Props: Items associated with specific characters (watches, phones, keys)
- Set Props: Functional items on set (furniture, appliances)
- Hero Props: Featured prominently, may require multiples or special construction
Stunts
- Stunt description with safety requirements
- Performer type (stunt double, professional driver, etc.)
- Safety considerations and equipment needs
Visual Effects (VFX)
- Digital effects requiring post-production
- Green screen and compositing needs
- CG characters, environments, or elements
- Enhancement effects (set extensions, sky replacements)
Special Effects (SFX)
- Practical effects achieved on-set
- Pyrotechnics and explosions
- Mechanical effects (rain, wind, fog)
- Practical prop effects
Privacy
- Your Data: Screenplay content and breakdown results never leave your browser without explicit export
- API Key Security: Your API key stored encrypted locally, never transmitted except to Google AI
Troubleshooting
- Generation Fails: Check API key configuration in AI Assistant settings
- Incomplete Results: Try regenerating; occasional AI parsing issues may occur
- Missing Visual Descriptions: Ensure Phase 2 completed (check progress bar reached 100%)
- Incorrect Elements: Verify scene heading format matches industry standard
- Slow Generation: Long screenplays (100+ pages) may take several minutes
- Export Issues: Check browser popup blocker and download permissions
- Cache Issues: Click "Regenerate" to clear cache and create fresh breakdown
- Dialog Closed During Generation: Safe to close; generation continues in background
- Parse Errors: AI uses 4-tier repair strategy to recover from malformed responses
Production Workflow Example
- Complete Screenplay: Finish your script in the editor
- Generate Breakdown: Run both Phase 1 and Phase 2 for complete analysis
- Export PDF: Share with department heads (Props, Wardrobe, Locations, etc.)
- Generate Storyboards: Visual descriptions power character and location consistency
- Create Shot List: Reference breakdown for production elements per shot
- Update as Needed: Regenerate breakdown after script revisions
Visual Themes
Establish the visual identity and color language for your production. Visual Themes is the foundation of your design system, creating a cohesive aesthetic that guides all visual decisions from pre-production through post-production.
What are Visual Themes?
Visual Themes define the aesthetic DNA of your project:
- Color Palette: Primary, secondary, and accent colors that establish your visual signature
- Visual Style Language: Descriptive aesthetic approach (e.g., "Industrial decay meets sci-fi minimalism")
- Mood Descriptors: Emotional qualities that guide visual choices (dark, tense, warm, futuristic, etc.)
- Designer Notes: Additional guidance for production design, cinematography, and post-production teams
Why Use Visual Themes?
Visual Themes provide critical benefits throughout production:
- Consistency: Ensures cohesive visual language across all departments
- Communication: Common visual vocabulary for directors, cinematographers, production designers, and VFX teams
- Efficiency: Pre-established aesthetic decisions accelerate on-set choices
- Quality: Professional-level visual planning elevates production value
- Budget Optimization: Clear visual direction prevents costly on-set revisions
How to Create Visual Themes
- Open Visual Themes: Go to
Production → Design System → Visual Themes - AI Generation (Recommended):
- Complete your Movie Concept first (provides genre, tone, and story context)
- Click "Generate Visual Themes" to create AI-assisted theme based on your concept
- AI analyzes your logline, genre, and tone to suggest appropriate visual language
- Manual Creation:
- Enter a descriptive Theme Name (e.g., "Cyberpunk Noir," "Warm Nostalgia")
- Define your Visual Style Language with specific aesthetic descriptors
- Build your Color Palette using hex codes or color picker
- Select Mood Descriptors from common options or add custom ones
- Add Designer Notes with additional context and references
- Save:
- Click "Save Themes" to persist to browser storage
Color Palette Management
Build comprehensive color palettes organized by role:
- Primary Colors: Dominant palette (typically 2-3 colors) - establishes overall
tone
- Example: Dark blues and grays for sci-fi thriller
- Example: Warm earth tones for period Western
- Secondary Colors: Supporting palette (2-3 colors) - adds visual complexity
- Complements primary colors without overwhelming
- Often used for locations, wardrobe details, or time-of-day shifts
- Accent Colors: Highlight palette (1-3 colors) - draws attention to key elements
- High-contrast colors for focal points
- Emotional emphasis (danger, hope, mystery)
- Character-specific signature colors
Adding Colors
- Click the color picker to select colors visually
- Colors are added individually - click multiple times to add multiple colors
- Each color displays as a swatch with its hex code
- Remove colors by clicking the X button on the swatch
Mood Descriptors
Select emotional qualities that capture your visual aesthetic:
- 20 Common Moods: Quick-select from industry-standard descriptors
- Atmosphere: gritty, pristine, claustrophobic, expansive
- Temperature: warm, cold
- Style: industrial, organic, minimalist, ornate
- Temporal: futuristic, decaying
- Tone: romantic, melancholic, tense, mysterious, ominous, cheerful, dark, bright
- AI-Generated Moods: Additional descriptors from AI theme generation appear first
- Toggle Selection: Click mood badges to add/remove from your theme
Sensory Influences (The Vibe Check)
Define your production's unique "vibe" using non-film sensory references. The Sensory Influence Aggregator translates abstract sensory inputs into concrete cinematographic visual instructions.
Sensory Input Categories
- 🎵 Music/Audio: Sound references that evoke specific moods and energy
- Examples: "David Bowie", "Industrial Techno", "Silence", "Jazz"
- Effect: Translates to camera rhythm, editing pace, atmospheric density
- 🍲 Cuisine/Taste: Flavor profiles that suggest visual intensity
- Examples: "Spicy Szechuan", "Stale Coffee", "Cotton Candy", "Bitter Espresso"
- Effect: Translates to color saturation, contrast levels, texture emphasis
- 🎨 Art/Texture: Visual art references and tactile qualities
- Examples: "Oil Painting", "Rusted Metal", "Velvet", "Watercolor"
- Effect: Translates to surface detail, material palette, lighting approach
- 🏛️ Architecture/Place: Spatial and structural references
- Examples: "Brutalist", "Overgrown Garden", "Art Deco", "Gothic Cathedral"
- Effect: Translates to framing geometry, shadow patterns, spatial composition
How to Use Sensory Influences
- Add Sensory Tags: Type a reference in any category and press Enter or click +
- Add multiple tags to each category for layered vibe definition
- Click X on any tag to remove it
- Generate Visual Style: Click "Generate Visual Style from Senses"
- AI synthesizes all sensory inputs into cinematographic instructions
- Visual Style Language field is updated with specific guidance
- Mood Descriptors are merged with AI-suggested moods
- Color palette suggestions added to accent colors
- Refine Results: Manually adjust the generated content as needed
Synesthesia Transformation Examples
The AI "Synesthesia Engine" uses transformation rules to translate sensory inputs:
- Spicy/Hot: → High contrast, saturated warm colors, close-up emphasis, sweating textures
- Industrial Techno: → Cold lighting, rhythmic editing, metallic surfaces, sharp geometric framing
- Soft Jazz: → Smoky atmosphere, shallow depth of field, warm practicals, soft focus
- Silence: → Stark minimalism, negative space, still camera, desaturated palette
- Brutalist: → Strong geometric shadows, cold concrete textures, wide angles, sparse framing
- Oil Painting: → Rich textures, visible brushstroke-like detail, classical composition, saturated colors
- Cotton Candy: → Pastel saturation, soft lighting, dreamy bokeh, rounded shapes
- Velvet: → Deep saturation, luxurious tactile quality, dramatic shadows, intimate framing
Integration Benefits
- Look Book: Sensory influences are included in image generation prompts for consistent vibe across all visuals
- Storyboard: Panel compositions reflect the synthesized aesthetic
- Communication: Non-film references help communicate visual intent to collaborators who may not have formal cinematography training
Visual Style Language
Describe your overall aesthetic approach in concrete, evocative terms:
- Be Specific: "Blade Runner meets art deco elegance" > "futuristic"
- Reference Architecture: "Brutalist concrete with neon accents"
- Combine Influences: "80s synth-wave aesthetic meets noir lighting"
- Include Texture: "Weathered industrial textures with organic decay"
- Consider Lighting: "High-contrast chiaroscuro with practical light sources"
AI-Assisted Generation
Generate professional visual themes automatically based on your Movie Concept:
- Context-Aware: Analyzes your logline, genre, and tone to create appropriate aesthetic
- Genre-Appropriate: Different approaches for sci-fi, horror, romance, thriller, etc.
- Comprehensive Output: Generates complete theme including:
- Thematic name
- 3-color primary palette
- Secondary and accent color suggestions
- Multiple mood descriptors
- Detailed visual style description
- Editable Results: AI-generated themes serve as starting points - refine all elements
Integration with Production Pipeline
Visual Themes power other production features and inform AI-generated content:
- Location Design: Each location can reference the primary theme or custom
location-specific themes
- Theme mood descriptors inform AI-generated environmental storytelling
- Visual style language guides set evolution suggestions
- Color palette influences set dressing and prop recommendations
- Character Styling: Character wardrobes and appearances align with theme palette
- Prop Library: Props inherit theme colors for consistency
- Storyboard Generation: AI uses theme colors and mood in visual composition
- Trailer Generation: Color grading and visual effects reference theme palette
Production Benefits
Visual Themes enhance every stage of production:
- Pre-Production:
- Production design references for set decoration and construction
- Wardrobe department color palette for costume design
- Lighting department mood and atmosphere guidance
- VFX team color references for post-production
- AI-Powered Location Design: Theme mood descriptors and visual style inform environmental storytelling, set evolution, and prop classification suggestions
- Production:
- On-set color references for quick decision-making
- Consistent visual language across shooting days
- Director and DP alignment on aesthetic approach
- Post-Production:
- Color grading reference for consistent look
- VFX integration with established palette
- Title design and graphics coordination
Best Practices
- Start Early: Establish visual themes in pre-production before location scouting
- Create Before Location Design: Visual themes inform AI-generated environmental storytelling, set evolution, and prop narratives in Location Design
- Test Against Story: Ensure visual choices support narrative and emotional beats
- Consider Genre: Horror needs different palette than romantic comedy
- Think Practically: Can your locations and budget support your visual choices?
- Use Descriptive Moods: Specific mood descriptors produce better AI-generated location storytelling suggestions
- Collaborate: Share themes with DP, production designer, and wardrobe early
- Stay Flexible: Themes guide decisions but shouldn't prevent creative opportunities
- Document Evolution: Export versions as themes develop through pre-production
When to Create Visual Themes
- After Movie Concept: Once genre, tone, and story are established
- Before Location Design: Theme mood descriptors and visual style inform AI-generated environmental storytelling and set evolution
- Before Location Scouting: Guide location selection with aesthetic criteria
- Before Casting: Inform character appearance discussions
- Before Storyboarding: Provide visual foundation for shot planning
- Before Production Design Meetings: Establish common visual vocabulary
Example Workflows
Sci-Fi Thriller Example
- Movie Concept: "When AI becomes sentient, humanity must choose between control and coexistence"
- AI Generation: Creates "Decaying Futurism" theme
- Primary: Dark blues (#1a1a2e, #16213e, #0f3460)
- Secondary: Cool grays (#464646, #2c2c2c)
- Accent: Electric cyan (#0ff)
- Moods: dark, futuristic, tense, claustrophobic, industrial
- Style: "Industrial decay meets sci-fi minimalism with brutalist architecture"
- Manual Refinement: Add orange accent (#ff6b35) for human warmth contrast
- Designer Notes: "Contrast sterile AI environments (blues) with warm human spaces (oranges)"
- Impact on Location Design: When generating environmental storytelling for "AI
Command Center" location:
- Theme moods "dark, tense, claustrophobic" inform storytelling tone
- Visual style "industrial decay meets sci-fi minimalism" guides set evolution from pristine to deteriorating
- Color palette (blues/grays) influences prop and set dressing recommendations
Period Drama Example
- Theme Name: "Victorian Elegance"
- Color Palette:
- Primary: Rich burgundy (#800020), forest green (#2d5016), gold (#d4af37)
- Secondary: Cream (#fffdd0), mahogany brown (#c04000)
- Accent: Royal purple (#7851a9)
- Moods: ornate, warm, romantic, elegant, nostalgic
- Visual Style: "Victorian opulence with authentic period textures and natural lighting"
Common Pitfalls to Avoid
- Too Many Colors: Limit total palette to 6-8 colors for cohesion
- Generic Descriptions: "Dark and moody" < "Film noir lighting with venetian blind shadows"
- Ignoring Practical Constraints: Can your locations actually deliver this aesthetic?
- Disconnected from Story: Visual themes should enhance narrative, not distract
- Too Rigid: Themes guide but shouldn't prevent spontaneous creative decisions
Location Design
Define spatial layouts, dimensions, and technical specifications for each filming location. Location Design translates your breakdown's location data into production-ready spatial and technical documentation.
What is Location Design?
Location Design captures the physical, functional, and narrative characteristics of each location:
- Functional Type: Purpose classification (spaceship, cockpit, office, warehouse, etc.)
- Spatial Layout: Physical arrangement and key features with measurements
- Dimensions: Width, depth, height, and shape specifications (in feet)
- Environmental Storytelling: Who lives/works here, how the space defines them, what story it tells (AI-powered)
- Prop Placements: Specific positioning of props within the space (position, spatial role, story relevance, key prop classification)
- Set Arc/Evolution: How the location changes throughout the story (AI-powered)
- Lighting Notes: Natural and artificial lighting sources and characteristics
- Designer Notes: Additional production design guidance and references
Why Use Location Design?
Location Design provides critical benefits for production planning:
- Narrative Context (AI): Environmental storytelling analysis ensures locations support character arcs and story themes
- Set Evolution Planning (AI): Track visual transformations throughout the story for multi-state set planning
- Prop Classification (AI): Distinguish key props from set dressing for budget and quality prioritization
- Pre-Visualization: Clear spatial understanding before scouting or building sets
- Camera Planning: Dimensions inform shot composition and camera placement
- Set Construction: Exact specifications for building practical sets
- Prop Department: Placement guides and narrative context for set dressing and prop positioning
- Lighting Design: Notes inform gaffer and cinematographer planning
- Budget Accuracy: Detailed spatial data and set evolution states enable precise cost estimates
- Location Scouting: Functional requirements and character relationships guide location selection
How to Use Location Design
- Complete Breakdown First: Run Breakdown to generate location data with visual descriptions
- Open Location Design: Go to
Production → Design System → Location Design - Auto-Import (Automatic):
- Locations automatically import from Breakdown on first open
- Hierarchical names preserved (e.g., "The Rust Bucket - Cockpit")
- Props auto-populated with smart defaults based on category
- Functional types extracted from breakdown persistent data
- Select Location: Click a location from the sidebar to edit its design
- Define Spatial Details:
- Functional Type: Classify the location's purpose (auto-populated from breakdown)
- Spatial Layout: Describe the physical arrangement with key features and measurements
- Dimensions: Enter width, depth, height (feet), and shape (rectangular, circular, etc.)
- Place Props:
- Props auto-import from breakdown with intelligent defaults
- Position: Where the prop is located (e.g., "center front," "near character")
- Spatial Role: Layering designation (foreground-interactive, midground-static, background-dressing)
- Notes: Additional placement guidance and visual appearance
- Add Production Notes:
- Lighting Notes: Natural and artificial light sources
- Designer Notes: Additional production design guidance
- Save: Save to browser storage for production planning
Environmental Storytelling (AI-Powered)
Location Design now includes environmental storytelling analysis to answer three critical production design questions:
- Who lives/works here? Which character(s) inhabit or use this space, their relationship to it (ownership, work, temporary)
- How does this space define them? What the spatial layout and prop choices reveal about character personality, values, history, or emotional state
- What story does this space tell? The narrative significance, emotional resonance, and thematic elements the space embodies
AI Generation: Click "Generate Storytelling" to analyze your location using character data, genre context, and spatial layout to produce contextual storytelling insights (2-4 sentences per question).
Benefits of Environmental Storytelling
- Character-Space Connection: Clarifies how locations reflect character psychology and arc
- Production Designer Guidance: Provides specific visual storytelling opportunities
- Set Dressing Direction: Informs prop selection based on character definition
- Genre-Aware Analysis: Considers genre conventions in spatial storytelling
- Thematic Coherence: Ensures locations support overall story themes
Set Arc/Evolution (AI-Powered)
Track how locations transform visually throughout your story:
- Physical Transformation: Damage, deterioration, renovation, or improvement over time
- Atmospheric Shifts: Changes in lighting, temperature, or mood
- Ownership Changes: Control of the space shifting between characters
- Accumulation/Depletion: Objects accumulating or disappearing, clutter building or being cleaned
- Symbolic Evolution: Visual changes reflecting character arcs or story themes
- Temporal Markers: Visual cues showing time passing (wear, weathering, repairs)
AI Generation: Click "Generate Set Evolution" to analyze how your location should change over the story. AI provides 3-5 sentences describing key transformation moments with genre-specific examples (thriller, drama, action, sci-fi, horror).
Production Benefits of Set Evolution
- Multi-State Set Planning: Production design knows which states of the set to build/prepare
- Continuity Planning: Clear timeline of visual changes prevents continuity errors
- Budget Accuracy: Understand full scope of set modifications needed
- Schedule Optimization: Shoot scenes in order of set states to minimize set changes
- VFX Planning: Identify which transformations need practical vs. digital execution
Prop Placement System
Location Design includes an intelligent prop placement system with smart defaults and narrative analysis:
- Hand & Personal Props: Auto-set to "foreground-interactive" near associated characters
- Hero Props: Auto-set to "foreground-interactive" in prominent positions (plot-critical)
- Set Props: Auto-set to "background-dressing" for environmental context
- Spatial Roles:
- Foreground-interactive: Props characters interact with directly
- Midground-static: Props visible but not interactive
- Background-dressing: Environmental set dressing
- Story Relevance (AI-Powered): Each prop can have a narrative significance description explaining how it supports storytelling
- Key Prop Classification (AI-Powered):
- KEY PROP: Plot-critical item that characters interact with, drives story forward, or has symbolic importance (e.g., murder weapon, love letter, MacGuffin)
- SET DRESSING: Environmental detail that establishes atmosphere, character, or world but doesn't drive plot (e.g., books on shelf, posters, decorative items)
AI Generation: Click "Generate Narratives" to analyze ALL props in the location. AI determines each prop's story relevance and classifies it as key prop vs. set dressing based on narrative function.
Key Prop vs. Set Dressing Guidelines
- Key Props Have: Direct plot impact, mentioned in dialogue, held/used by characters, emotional significance, specific irreplaceability
- Set Dressing Has: Background presence, establishes mood/character, worldbuilding function, could be replaced without story impact
- Examples:
- "Wedding ring on nightstand" → KEY PROP if evidence of affair; SET DRESSING if just showing character is married
- "Vintage typewriter" → KEY PROP if character writes crucial letter on it; SET DRESSING if just shows they're a writer
- "Family photo" → KEY PROP if reveals hidden relationship; SET DRESSING if just decoration
Smart Auto-Import Features
Location Design's auto-import system provides intelligent defaults:
- Vehicle Detection: Recognizes vehicle interiors from breakdown (cockpits, bridges)
- Hierarchical Names: Preserves parent-child relationships ("Ship - Room")
- Prop Metadata: Imports full prop data including category, visual appearance, plot significance
- Smart Positioning: Infers prop placement based on category and character association
- Filtered Keywords: Removes generic functional type keywords, keeps descriptive ones
Dimensions and Measurements
Accurate dimensions are critical for production planning:
- Width: Side-to-side measurement (perpendicular to camera)
- Depth: Front-to-back measurement (toward/away from camera)
- Height: Floor-to-ceiling measurement (vertical clearance)
- Shape: Overall geometry (rectangular, circular, irregular, L-shaped, etc.)
- Standard Unit: All measurements in feet for consistency
Production Benefits
Pre-Production
- Location Scouting: Specific requirements guide location selection
- Set Design: Dimensions and layouts inform set construction blueprints
- Budget Estimates: Accurate spatial data enables precise cost projections
- Tech Scouts: Detailed notes guide cinematographer and gaffer planning
Production
- Set Dressing: Prop placement guides ensure consistency across takes
- Camera Planning: Dimensions inform lens choices and camera positions
- Blocking: Spatial layout helps director plan character movement
- Continuity: Documented placements prevent continuity errors
Post-Production
- VFX Planning: Spatial data informs set extensions and CG environments
- Reshoots: Documented layouts enable accurate set reconstruction
Best Practices
- Complete Breakdown First: Location Design depends on breakdown data for auto-import and AI context
- Use AI Features Early: Generate environmental storytelling, set evolution, and prop narratives to guide spatial layout decisions
- Use Exact Measurements: Precise dimensions prevent costly on-set surprises
- Classify Props Correctly: AI-generated key prop classifications help prop department prioritize what needs close-up quality vs. background detail
- Plan Set Evolution States: Use AI-generated set evolution to identify how many versions/states of the set need to be built or prepared
- Document Lighting: Light sources impact cinematography and mood
- Consider Camera Access: Note spatial constraints that affect shot composition
- Reference Real Spaces: Base dimensions on actual rooms when possible for realism
- Update After Changes: Refresh from breakdown after script revisions, then regenerate AI storytelling analysis
- Review AI Suggestions: AI-generated content should be reviewed and edited to match your specific creative vision
When to Create Location Designs
- After Breakdown: Auto-import requires completed breakdown with visual descriptions
- Before Tech Scout: Spatial data guides cinematographer and gaffer planning
- Before Set Construction: Dimensions and layouts inform build specifications
- During Prep: Props and lighting notes guide department planning
- Before Location Scouting: Requirements guide location selection criteria
Example Workflow: Sci-Fi Spaceship Interior
- Complete Breakdown: Generate breakdown with "The Rust Bucket - Cockpit" location
- Auto-Import: Open Location Design, location auto-imports with props
- Select Location: Click "The Rust Bucket - Cockpit" in sidebar
- Review Auto-Populated Data:
- Functional Type: (vehicle_interior cleared - generic keyword)
- Props: Control Panel (set, background-dressing), Captain's Chair (hero, foreground-interactive)
- Add Spatial Layout: "15ft x 8ft cramped cockpit with pilot's chair centered 3ft from main control panel. Curved walls with display panels. Single entry hatch rear-left."
- Enter Dimensions:
- Width: 15 ft, Depth: 8 ft, Height: 7 ft, Shape: rectangular
- Generate Environmental Storytelling (AI): Click "Generate Storytelling" →
- Who lives/works here? "This cockpit is primarily inhabited by the maverick captain and their small crew, serving as their command center and lifeline in the vast galaxy."
- How does this space define them? "The cockpit's cramped yet functional layout reveals a resourceful crew unafraid to improvise. Mismatched panels and personal trinkets speak to daring escapades and pragmatic affection for their aging ship."
- What story does this space tell? "This cockpit tells a story of relentless perseverance against overwhelming odds, evoking the resilience of underdogs fighting for freedom across the cosmos."
- Generate Prop Narratives (AI): Click "Generate Narratives" →
- Control Panel: Story Relevance "Navigation and life support controls that crew depends on for survival," KEY PROP (critical for ship operation)
- Captain's Chair: Story Relevance "Command seat representing captain's authority and burden of leadership," SET DRESSING (establishes character role but not plot-critical)
- Generate Set Evolution (AI): Click "Generate Set Evolution" →
- "Initially pristine and well-maintained, the cockpit accumulates battle damage and jury-rigged repairs over the course of the story. Sparking wires and patched hull plates reflect escalating conflict. By the climax, the space shows visible wear but remains functional, embodying the crew's determination despite mounting challenges."
- Refine Prop Placements:
- Control Panel: Position "forward wall centered," Spatial Role "foreground-interactive"
- Captain's Chair: Position "center, 3ft from control panel," Spatial Role "foreground-interactive"
- Add Lighting Notes: "Overhead LED panels (cool blue), control panel practicals (cyan glow), emergency lighting (red accents)"
- Add Designer Notes: "Inspired by Apollo command module - functional minimalism with worn industrial aesthetic"
- Save: Save to browser storage for production planning
Example Workflow: Contemporary Office
- Complete Breakdown: Generate breakdown with "Corporate Headquarters - Executive Office" location
- Auto-Import: Location imports with props (desk, chairs, laptop, artwork)
- Add Functional Type: "executive office"
- Spatial Layout: "20ft x 15ft corner office with floor-to-ceiling windows on two walls. Mahogany desk centered facing door. Seating area with leather sofa and chairs near windows."
- Dimensions: Width: 20 ft, Depth: 15 ft, Height: 10 ft, Shape: rectangular
- Prop Placements:
- Executive Desk: "center, facing door," foreground-interactive
- Laptop: "desk surface, left side," foreground-interactive
- Artwork: "wall behind desk," background-dressing
- Seating Area: "near windows," midground-static
- Lighting Notes: "Natural light from floor-to-ceiling windows (south and west exposure), recessed ceiling LED (warm white 3000K), desk lamp practical"
- Export: Share with location scout and production designer
Common Pitfalls
- Skipping Breakdown: Auto-import depends on completed breakdown data
- Vague Measurements: Imprecise dimensions lead to on-set problems
- Ignoring Prop Placement: Undocumented placements cause continuity errors
- Missing Lighting Notes: Unplanned lighting causes production delays
- Outdated Data: Failing to refresh after script changes leads to mismatches
Character Styling
Define consistent character appearance, wardrobe, and visual staging across all scenes. Character Styling ensures visual continuity and provides production departments with clear wardrobe and styling specifications.
What is Character Styling?
Character Styling captures the visual identity and staging characteristics of each character:
- Base Appearance: Core wardrobe description and color palette
- Wardrobe Colors: Hex color codes for costume design consistency
- Staging Archetype: Natural positioning in frame (hero, antagonist, supporting, ensemble, background)
- Occupational Styling: Profession-based styling notes (uniform, tools, accessories)
- Consistency Rules: Guidelines for maintaining visual continuity across scenes
- Evolution Notes: How appearance changes throughout the story arc
- Scene Variations: Scene-specific appearance overrides
- Theme Binding: Link character styling to Visual Themes for cohesive palette
Why Use Character Styling?
Character Styling provides critical benefits for production planning:
- Wardrobe Continuity: Prevents costume errors across shooting days
- Department Communication: Clear specifications for wardrobe, hair, and makeup teams
- Budget Planning: Detailed wardrobe requirements enable accurate costume budgets
- Visual Consistency: Maintains character identity throughout production
- Scene Blocking: Staging archetypes guide director and cinematographer positioning
- Color Grading: Wardrobe color palette informs post-production color workflow
- Reshoots: Documented styling enables accurate wardrobe recreation
How to Use Character Styling
- Complete Breakdown First: Run Breakdown to generate character data with visual descriptions
- Open Character Styling: Go to
Production → Design System → Character Styling - Auto-Import (Automatic):
- Characters automatically import from Breakdown on first open
- Persistent characters only (excludes non-speaking roles like "VOICE (O.S.)")
- Base appearance and occupational styling auto-populated from breakdown
- Staging archetypes intelligently inferred from character roles
- Select Character: Click a character from the sidebar to edit their styling
- Define Base Appearance:
- Wardrobe: Core costume description (e.g., "Brown leather jacket, dark pants, worn boots")
- Wardrobe Colors: Add hex color codes for key costume elements
- Occupational Styling: Profession-specific details (e.g., "Pilot uniform with insignia patches")
- Theme Binding: Link to Visual Theme for color palette consistency
- Set Staging Archetype:
- Hero (Center): Protagonist, centered in frame
- Hero (Offset): Protagonist, dynamic positioning
- Antagonist: Oppositional framing to hero
- Supporting: Near protagonist, secondary focus
- Ensemble: Varied positioning, equal importance
- Background: Edge of frame, minimal focus
- Add Consistency Rules: Guidelines for maintaining visual continuity (e.g., "Always wears dog tags," "Hair tied back during action scenes")
- Document Evolution: Note how appearance changes through story (e.g., "Clean uniform → battle-damaged → civilian clothes")
- Save: Save to browser storage for wardrobe planning
Staging Archetypes Explained
Staging archetypes guide how characters naturally position in frame:
Hero (Center)
- Usage: Main protagonist in conventional narratives
- Framing: Centered in frame, command visual attention
- Camera: Often follows, eye-level or slightly below
- Examples: Action heroes, lone protagonists, single-perspective narratives
Hero (Offset)
- Usage: Dynamic protagonists in modern narratives
- Framing: Rule of thirds, dynamic compositions
- Camera: More varied angles, creates visual energy
- Examples: Modern action films, psychological dramas, character studies
Antagonist
- Usage: Primary opposition to protagonist
- Framing: Oppositional to hero (opposite side of frame, contrasting angles)
- Camera: Often high angle (diminish) or low angle (intimidate)
- Examples: Villains, rivals, opposing forces
Supporting
- Usage: Key supporting characters (mentor, sidekick, love interest)
- Framing: Adjacent to protagonist, secondary visual focus
- Camera: Often in two-shots with protagonist
- Examples: Best friend, mentor, romantic partner, trusted ally
Ensemble
- Usage: Ensemble casts with multiple leads
- Framing: Varied positioning, distributed visual weight
- Camera: Wide shots, balanced compositions
- Examples: Heist films, ensemble comedies, team-based narratives
Background
- Usage: Minor characters, extras with names
- Framing: Peripheral placement, environmental presence
- Camera: Rarely featured, provide context
- Examples: Bartender, receptionist, guard, passerby
Smart Auto-Import Features
Character Styling's auto-import system provides intelligent defaults:
- Persistent Character Filtering: Excludes non-persistent characters (VOICE, GUARD #1, etc.)
- Archetype Inference: Intelligently assigns staging archetypes based on role
keywords:
- "protagonist," "hero," "main character" → Hero (Center or Offset)
- "antagonist," "villain," "bad guy" → Antagonist
- "supporting," "sidekick," "mentor" → Supporting
- "ensemble," "team member" → Ensemble
- Appearance Extraction: Pulls wardrobe descriptions from breakdown visual data
- Occupational Styling: Extracts profession-based styling from character occupations
Consistency Rules
Consistency rules prevent continuity errors and guide wardrobe decisions:
- Always Present: Items that appear in every scene (jewelry, accessories, scars)
- Never Changes: Permanent characteristics (hair color, tattoos, physical traits)
- Conditional Rules: Context-dependent guidelines (formal vs casual, work vs home)
- Temporal Rules: Changes over story time (beard growth, injury healing, aging)
Wardrobe Color Palette
Accurate color documentation ensures visual consistency:
- Hex Codes: Precise color specifications for wardrobe department
- Color Grading Reference: Post-production color correction baseline
- Theme Integration: Colors align with overall Visual Themes palette
- Character Differentiation: Distinct palettes help audience track characters
- Symbolic Colors: Color psychology and narrative symbolism
Evolution Notes
Document how character appearance changes throughout the narrative:
- Temporal Changes: Aging, injury recovery, physical transformation
- Status Changes: Promotion, demotion, wealth changes (wardrobe reflects status)
- Emotional Arc: Visual representation of character journey (dark → light colors)
- Story Beats: Appearance tied to plot events (pre-battle → post-battle)
- Act Structure: Different looks for Act I, II, III if narrative requires
Scene Variations
Override base appearance for specific scenes when needed:
- Special Events: Formal events, weddings, funerals
- Flashbacks: Younger version, different era
- Disguises: Undercover, infiltration scenes
- Physical States: Wet, dirty, injured, burned
- Environmental: Winter coat, rain gear, protective equipment
Production Benefits
Pre-Production
- Wardrobe Budget: Detailed specifications enable accurate costume budgets
- Costume Design: Clear guidelines inform wardrobe designer choices
- Actor Fittings: Pre-planned looks streamline fitting process
- Color Palette: Wardrobe colors coordinate with production design and themes
Production
- Continuity: Consistency rules prevent wardrobe errors across shooting days
- Script Supervisor: Evolution notes guide continuity tracking
- Blocking: Staging archetypes guide director and cinematographer positioning
- Wardrobe Changes: Scene variations documented for quick reference
Post-Production
- Color Grading: Wardrobe color palette informs color correction workflow
- VFX: Accurate wardrobe colors for CG character integration
- Reshoots: Documented styling enables exact wardrobe recreation
Best Practices
- Complete Breakdown First: Character Styling depends on breakdown data for auto-import
- Use Hex Colors: Precise color codes prevent ambiguity
- Document Everything: Small details (watch, ring, hat) prevent continuity errors
- Link to Themes: Bind character colors to Visual Themes for palette cohesion
- Note Restrictions: Document practical constraints (actor allergies, comfort, mobility)
- Photo References: While not stored in system, reference photos in notes field
- Update After Changes: Refresh from breakdown after script revisions
When to Create Character Styling
- After Breakdown: Auto-import requires completed breakdown with character descriptions
- Before Wardrobe Budget: Detailed specs inform accurate cost estimates
- Before Costume Design: Guidelines inform wardrobe designer's creative process
- Before Principal Photography: All characters styled before first shoot day
- During Prep: Allows time for costume sourcing, fitting, and adjustments
Example Workflow: Sci-Fi Pilot Character
- Complete Breakdown: Generate breakdown with character "EDDY (40s, pilot)"
- Auto-Import: Open Character Styling, Eddy auto-imports with base appearance
- Select Character: Click "Eddy" in sidebar
- Review Auto-Populated Data:
- Staging Archetype: Hero (Offset) - inferred from "pilot" role
- Base Appearance: "Worn flight jacket, cargo pants, pilot helmet" (from breakdown)
- Occupational Styling: "Pilot uniform with rank insignia" (from occupation)
- Add Wardrobe Details: "Brown leather jacket with patched elbows, dark cargo pants, black combat boots, faded blue shirt underneath"
- Add Wardrobe Colors:
- #8B4513 (brown jacket)
- #2F4F4F (dark cargo pants)
- #4682B4 (blue shirt)
- Set Staging Archetype: Confirm "Hero (Offset)" for dynamic action framing
- Add Consistency Rules:
- "Always wears dog tags (military service backstory)"
- "Jacket never fully removed - conceals sidearm"
- "Helmet in hand or clipped to belt when not flying"
- Add Evolution Notes: "Act I: Clean, professional pilot appearance. Act II: Jacket torn, dirt on clothes after crash. Act III: Civilian clothes after abandoning ship."
- Add Scene Variation:
- Scene 25 (Formal Military Event): "Dress uniform, navy blue with medals, polished boots"
- Bind to Theme: Link to primary theme for color palette consistency
- Save: Save to browser storage for wardrobe planning
Example Workflow: Contemporary Drama Character
- Complete Breakdown: Generate breakdown with character "SARAH (30s, attorney)"
- Auto-Import: Sarah imports with professional styling
- Base Appearance: "Professional business attire - tailored suits, conservative colors"
- Wardrobe Colors:
- #1C1C1C (charcoal suits)
- #F5F5DC (cream blouses)
- #000000 (black accessories)
- Occupational Styling: "Corporate attorney aesthetic - power suits, minimal jewelry, professional hairstyle"
- Staging Archetype: Hero (Center) - protagonist in legal drama
- Consistency Rules:
- "Always wears mother's bracelet (subtle, not flashy)"
- "Hair in professional bun for court scenes"
- "Glasses for reading (progressive lenses)"
- Evolution Notes: "Act I: Perfectly polished, rigid professionalism. Act II: Slightly disheveled as stress increases, looser hair. Act III: Casual clothes, natural hair - embracing authenticity."
- Scene Variations:
- Scene 45 (Home scenes): "Jeans, comfortable sweater, bare feet"
- Scene 72 (Courtroom climax): "Navy blue power suit, red blouse (confidence)"
- Save: Save to browser storage for wardrobe planning
Common Pitfalls
- Skipping Breakdown: Auto-import depends on completed breakdown character data
- Vague Descriptions: "Nice suit" vs "Charcoal three-piece suit, pinstripe, burgundy tie"
- Missing Colors: No hex codes leads to wardrobe department guessing colors
- Ignoring Evolution: Static appearance throughout narrative lacks visual storytelling
- No Consistency Rules: Undocumented details cause continuity errors
- Wrong Archetype: Mismatched staging disrupts visual hierarchy
- Outdated Data: Failing to refresh after script changes leads to character mismatches
Prop Library
Organize and manage all props with spatial relationships, location associations, and placement guidelines. The Prop Library centralizes prop specifications and provides production-ready documentation for prop departments.
What is Prop Library?
Prop Library captures comprehensive specifications for every prop in your production:
- Prop Category: Classification (hand, personal, set, hero)
- Spatial Role: Layering designation (foreground-interactive, midground-static, background-dressing)
- Hero Status: Flag for plot-critical props requiring special attention
- Visual Description: Detailed appearance specifications
- Functional Use: How the prop functions in the story
- Location Associations: Where the prop appears
- Placement Rules: Guidelines for positioning in frame
- Designer Notes: Additional production guidance
Why Use Prop Library?
Prop Library provides critical benefits for production planning:
- Centralized Management: Single source of truth for all prop specifications
- Department Communication: Clear specifications for prop master, set dresser, and art department
- Spatial Organization: Layering and placement rules ensure proper framing
- Location Tracking: Know which props appear in which locations
- Hero Prop Identification: Plot-critical props flagged for special handling
- Continuity: Consistent prop specifications prevent errors
- Budget Planning: Complete inventory enables accurate prop budgets
How to Use Prop Library
- Complete Breakdown First: Run Breakdown to generate prop data with visual descriptions
- Open Prop Library: Go to
Production → Design System → Prop Library - Auto-Import (Automatic):
- Props automatically import from Breakdown on first open
- Category and spatial role intelligently assigned based on breakdown data
- Visual descriptions and functional use auto-populated
- Hero props identified from plot significance
- Filter Props: Use category filter dropdown to view specific types (all, hand, personal, set, hero)
- Select Prop: Click a prop from the sidebar to edit its specifications
- Define Classification:
- Category: Hand (character handles), Personal (character-specific), Set (background), Hero (plot-critical)
- Spatial Role: Foreground-interactive, Foreground-static, Midground-interactive, Midground-static, Background-dressing
- Hero Status: Check if prop is plot-critical and requires special handling
- Add Visual Details:
- Visual Description: Detailed appearance (size, color, material, condition)
- Functional Use: How prop functions in story (teleportation device, communication tool)
- Associate Locations: Link prop to locations where it appears for tracking continuity
- Add Placement Rules: Guidelines for positioning prop in frame (e.g., "Always centered when featured," "Near character's left hand")
- Save: Save to browser storage for prop planning
Prop Categories Explained
Hand Props
- Definition: Props that characters directly handle and manipulate
- Spatial Role: Typically foreground-interactive
- Examples: Phone, keys, weapon, book, tool, drinking glass
- Production: Prop master responsibility, actor handles, requires duplicates
Personal Props
- Definition: Character-specific items that define personality or backstory
- Spatial Role: Foreground-interactive or midground-static
- Examples: Locket, dog tags, signature hat, special watch, family photo
- Production: Character consistency crucial, often hero props, tracked by wardrobe/props
Set Props
- Definition: Environmental props for set dressing and atmosphere
- Spatial Role: Background-dressing or midground-static
- Examples: Furniture, lamps, artwork, plants, books on shelf, kitchen appliances
- Production: Set dresser responsibility, establishes location, less scrutiny than hand props
Hero Props
- Definition: Plot-critical props that drive the narrative
- Spatial Role: Usually foreground-interactive, featured prominently
- Examples: MacGuffin, murder weapon, treasure map, magic artifact, secret documents
- Production: Multiple duplicates, special handling, careful tracking, often requires stunt/beauty versions
Spatial Roles Explained
Foreground-Interactive
- Definition: Props in foreground that characters interact with
- Visibility: High scrutiny, clear focus, detailed appearance critical
- Examples: Phone in character's hand, gun being fired, key unlocking door
- Production: Hero/beauty versions, multiple duplicates for stunts
Foreground-Static
- Definition: Props in foreground without interaction
- Visibility: High visibility but no handling
- Examples: Centerpiece on table, artwork on wall behind character, car in driveway
- Production: Still requires quality appearance, less risk of damage
Midground-Interactive
- Definition: Props in mid-ground with occasional interaction
- Visibility: Moderate visibility, less detailed scrutiny
- Examples: Character opens fridge in background, picks up object across room
- Production: Working functionality important, appearance less critical
Midground-Static
- Definition: Props in mid-ground without interaction
- Visibility: Visible but not featured
- Examples: Furniture away from main action, decorations on far wall
- Production: Establishes environment, lower priority for detail
Background-Dressing
- Definition: Props for environmental context and atmosphere
- Visibility: Low scrutiny, out of focus
- Examples: Books on distant shelf, plants in corner, generic office supplies
- Production: Quantity over quality, establishes setting, minimal budget
Smart Auto-Import Features
Prop Library's auto-import system provides intelligent defaults:
- Category Assignment: Infers category from breakdown metadata
- Hand props: Items with character associations and plot significance
- Personal props: Character-specific items
- Set props: Environmental items without character association
- Hero props: Items flagged with high plot significance
- Spatial Role Assignment: Infers layering from category and usage
- Hand/Personal → Foreground-interactive
- Hero → Foreground-interactive
- Set → Background-dressing
- Visual Description Extraction: Pulls appearance from breakdown visual data
- Functional Use Extraction: Pulls usage from breakdown plot significance
Location Associations
Track where props appear for continuity and logistics:
- Link to Locations: Associate prop with specific locations from Location Design
- Continuity Tracking: Ensure prop appears consistently in designated locations
- Logistics Planning: Prop department knows which props needed for which locations
- Scene Preparation: Call sheets include correct props for each location
- Multiple Locations: Props can appear in multiple locations (e.g., character's phone)
Placement Rules
Guidelines for positioning props in frame:
- Framing Guidelines: "Always centered when featured," "Left side of frame," "Near character"
- Character Positioning: "In protagonist's left hand," "Clipped to belt," "Worn on chain"
- Interaction Rules: "Never fully shown until Act III," "Always partially obscured"
- Spatial Relationships: "3ft from control panel," "On desk near laptop," "Hanging on wall behind door"
- Story Beats: "Prominently featured in reveal scene," "Background until discovery"
Hero Prop Management
Plot-critical props require special handling:
- Multiple Versions: Beauty (close-ups), stunt (action), backup (replacement)
- Special Tracking: Serial numbers, custody logs, secure storage
- Insurance: High-value or irreplaceable props may require insurance
- Continuity: Script supervisor tracks hero prop appearance and condition
- VFX Coordination: Hero props may need tracking markers or digital doubles
Production Benefits
Pre-Production
- Prop Budget: Complete inventory enables accurate cost estimates
- Sourcing: Detailed specifications guide prop acquisition (purchase, rent, build)
- Manufacturing: Custom props require specifications for fabrication
- Timeline Planning: Lead times for custom/specialty props
Production
- Call Sheets: Location associations inform which props needed per scene
- Set Dressing: Placement rules guide prop positioning
- Continuity: Spatial roles and placement rules prevent errors
- Camera Department: Spatial roles inform shot planning and framing
Post-Production
- VFX: Visual descriptions provide reference for digital props or set extensions
- Color Grading: Hero prop appearance must be consistent
- Reshoots: Documented specifications enable accurate prop recreation
Best Practices
- Complete Breakdown First: Prop Library depends on breakdown data for auto-import
- Flag Hero Props: Identify plot-critical props early for special handling
- Detailed Descriptions: Specific details prevent ambiguity ("silver watch" vs "vintage 1960s Rolex GMT-Master")
- Link Locations: Track where props appear for logistics and continuity
- Document Placement: Placement rules guide camera and set dressing
- Update After Changes: Refresh from breakdown after script revisions
When to Create Prop Library
- After Breakdown: Auto-import requires completed breakdown with prop data
- Before Prop Budget: Complete inventory informs accurate cost estimates
- Before Sourcing: Specifications guide prop acquisition decisions
- During Prep: Allows time for custom prop fabrication
- Before Principal Photography: All props sourced and ready before first shoot day
Example Workflow: Sci-Fi Communication Device
- Complete Breakdown: Generate breakdown with prop "Comms Device"
- Auto-Import: Open Prop Library, "Comms Device" auto-imports
- Select Prop: Click "Comms Device" in sidebar
- Review Auto-Populated Data:
- Category: Hero (flagged as plot-critical)
- Spatial Role: Foreground-interactive
- Visual Description: "Cylindrical device with blue energy core" (from breakdown)
- Functional Use: "Communication between ships" (from breakdown)
- Enhance Visual Description: "6-inch cylindrical handheld device, brushed aluminum casing with blue LED energy core. Retractable antenna on top. Worn grip texture. Glowing blue buttons on side panel."
- Add Location Associations:
- The Rust Bucket - Cockpit
- Spaceport - Communications Room
- Desert Planet - Crash Site
- Add Placement Rules:
- "Clipped to pilot's belt when not in use"
- "Held in left hand during communication scenes"
- "Prominently featured in Act II reveal - centered in close-up"
- "Never shown in full detail until Act II (partial reveals only)"
- Check Hero Status: ✓ Mark as Hero Prop (plot-critical)
- Add Designer Notes: "Requires 3 versions: Beauty (close-ups with LED effects), Stunt (rubber for action scenes), VFX tracking version. LED core uses practical blue LED, enhanced in post. Antenna retracts via spring mechanism."
- Save: Save to browser storage for prop planning
Example Workflow: Contemporary Office Props
- Complete Breakdown: Generate breakdown with office location props
- Auto-Import: Props import (laptop, desk, chair, coffee mug, phone, etc.)
- Filter by Category: Select "Set" to view background props
- Select "Office Desk":
- Category: Set
- Spatial Role: Midground-static
- Visual Description: "Modern L-shaped desk, white laminate surface, chrome legs"
- Location: Corporate Headquarters - Executive Office
- Placement Rule: "Against window wall, facing door, laptop on left side"
- Select "Laptop":
- Category: Hand (character uses it)
- Spatial Role: Foreground-interactive
- Visual Description: "Silver MacBook Pro 16-inch, screen displays financial reports"
- Functional Use: "Character reviews financial data, discovers embezzlement"
- Location: Corporate Headquarters - Executive Office
- Placement Rule: "On desk, screen visible to camera in over-shoulder shots"
- Hero Status: ✓ (Contains plot-critical data)
- Select "Coffee Mug":
- Category: Personal (character's signature mug)
- Spatial Role: Foreground-interactive
- Visual Description: "Navy blue ceramic mug with 'World's Best Dad' text, visible chip on handle"
- Location: Corporate Headquarters - Executive Office, Home - Kitchen
- Placement Rule: "On desk near keyboard, character holds in left hand during tense calls"
- Notes: "Character trait - always drinks coffee during stressful moments. Mug chip is continuity detail (happened in Act I)"
- Export: Share with prop master and set dresser
Common Pitfalls
- Skipping Breakdown: Auto-import depends on completed breakdown prop data
- Vague Descriptions: "Nice watch" vs "Vintage 1960s Rolex GMT-Master, stainless steel, black face, worn leather strap"
- Wrong Categories: Misclassifying props affects spatial role and production planning
- Ignoring Hero Props: Not flagging plot-critical props leads to inadequate preparation
- Missing Location Links: Unlinked props cause logistics confusion on set
- No Placement Rules: Undocumented placement causes framing inconsistencies
- Outdated Data: Failing to refresh after script changes leads to prop mismatches
Design Continuity Check
Automated validation system that ensures consistency across all Design System components (Visual Themes, Location Design, Character Styling, Prop Library).
What It Does
- Cross-Reference Validation: Verifies that all design elements reference each other correctly
- Theme Consistency: Ensures locations, characters, and props use valid theme IDs from Visual Themes
- Coverage Analysis: Identifies breakdown elements (locations/characters) that lack design specifications
- Completeness Scoring: Calculates overall design system consistency percentage
- Hero Prop Verification: Checks that plot-critical props are properly marked
- Issue Categorization: Organizes problems by severity (Errors, Warnings, Info)
Why Use Continuity Check
- Pre-Production Quality Assurance: Catch design inconsistencies before they become production problems
- Design System Validation: Ensure all components work together seamlessly
- Production Planning: Verify that every element in your breakdown has proper design specifications
- Team Communication: Generate reports showing design gaps that need attention
- Visual Effects Coordination: Confirm theme consistency for VFX workflows
- Budget Forecasting: Identify missing design elements that impact cost estimates
How to Use
- Open Continuity Check: Go to
Production → Design System → Continuity Check - Run Validation: Click the "Run Validation" button to analyze your design system
- Review Results:
- PASSED/FAILED Badge: Overall validation status (fails if any errors exist)
- Statistics Overview: Total elements, themed elements, consistency score, issue counts
- Sources Checked: List of all design system files analyzed
- Filter Issues: Use tabs to view specific severity levels
- All Issues: Complete list of all detected problems
- Errors: Critical issues that break references (must fix for passing validation)
- Warnings: Important inconsistencies that should be addressed
- Info: Suggestions for improving design coverage
- Address Issues: Click through to relevant design dialogs to fix problems
- Re-Validate: Run validation again to confirm fixes
- Save Report: Click "Save" to store validation results locally
Validation Types
1. Theme Consistency Validation
What It Checks: All theme references point to existing themes in Visual Themes
- Location Themes: Verifies each location's
themeIdexists in Visual Themes → Location Themes - Character Themes: Confirms each character's
themeIdexists in Visual Themes → Character Themes - Prop Themes: Validates prop
themeIdreferences - Primary Theme Exception: Elements with
themeId: "primary"always pass (references the main theme)
Example Error: "Location 'Spaceship Bridge' references theme 'tech-blue' which does not exist"
How to Fix: Either create the missing theme in Visual Themes or change the element to use an existing theme ID
2. Location-Prop Association Validation
What It Checks: Props that reference locations actually have those locations in Location Design
- Case-Insensitive Matching: "cockpit" matches "Cockpit" or "COCKPIT"
- Parent-Child Matching: "Cockpit" matches "The Rust Bucket - Cockpit" (hierarchical names)
- Missing Location Detection: Flags props that reference non-existent locations
Example Warning: "Prop 'Control Panel' references location 'Engine Room' which is not in Location Design"
How to Fix: Add the location to Location Design or remove the invalid association from the prop
3. Breakdown Coverage Validation
What It Checks: Elements from your breakdown have corresponding design specifications
- Location Coverage: All persistent breakdown locations should have entries in Location Design
- Character Coverage: All persistent breakdown characters should have entries in Character Styling
- Ephemeral Filtering: Excludes temporary elements like "Voice (O.S.)" or one-time locations
- Parent-Child Matching: Breakdown location "Cockpit" matches design location "The Rust Bucket - Cockpit"
Example Info: "Breakdown character 'Detective Martinez' has no styling in Character Styling"
How to Fix: Add design specifications for the missing element, or ignore if intentionally excluded
4. Color Palette Consistency
What It Checks: Character wardrobe colors complement the theme palette they're using
- Soft Validation: Suggests incorporating theme colors, but doesn't require it
- Primary Theme Only: Only checks characters using the primary theme
- Overlap Detection: Flags when no wardrobe colors match any palette colors
Example Info: "Character 'Hero' wardrobe colors don't include theme palette colors"
Suggestion: Consider adding theme colors (#1a2b4a, #3d5a80, #98c1d9) to wardrobe for visual cohesion
5. Hero Prop Verification
What It Checks: At least one prop is marked as "hero" (plot-critical)
- Production Priority: Hero props get visual reference priority in composition
- Plot Integration: Ensures important narrative elements are properly flagged
- Optional Check: Info level only (not required for passing validation)
Example Info: "No hero props identified in Prop Library"
Suggestion: Mark plot-critical props (MacGuffins, weapons, heirlooms) as hero props for production priority
6. Missing Design Data Detection
What It Checks: At least one design system component has data
- Empty System Detection: Flags if all design components are empty
- Getting Started Guidance: Suggests starting with Visual Themes
- Critical Error: Validation fails if no design data exists
Example Error: "No design system data found. Please create Visual Themes, Location Design, Character Styling, or Prop Library first."
Statistics Explained
- Total Elements: Count of all locations + characters + props across the design system
- Themed: How many elements have explicit theme IDs assigned (excludes elements using default/no theme)
- Consistency Score: Percentage calculated as
1 - (errors / total elements)× 100- 100%: Perfect consistency, no errors
- 90-99%: Good, minor issues
- 75-89%: Fair, several problems need attention
- Below 75%: Poor, major consistency issues
- Errors Found: Critical issues that cause validation to fail
- Warnings Found: Important inconsistencies (validation can still pass)
- Info Count: Suggestions for improving design coverage
Issue Severity Levels
Errors (Red) - Validation Fails
- Missing Design System Data: No design components created yet
- Invalid Theme References: Elements reference themes that don't exist in Visual Themes
- Broken References: Critical cross-reference failures between components
- Impact: Production confusion, inconsistent visual direction, broken workflows
- Action Required: Must fix to achieve passing validation status
Warnings (Yellow) - Should Address
- Missing Location References: Props reference locations not in Location Design
- Inconsistent Associations: Design elements don't align with expected patterns
- Production Gaps: Elements that may cause coordination issues
- Impact: Potential production complications, less efficient workflows
- Action Recommended: Should fix for optimal production planning
Info (Blue) - Consider Improvements
- Missing Design Coverage: Breakdown elements without design specifications
- Color Palette Mismatches: Wardrobe colors don't incorporate theme palette
- Missing Hero Props: No plot-critical props marked
- Optimization Suggestions: Ways to improve design system completeness
- Impact: Missed opportunities for consistency and efficiency
- Action Optional: Consider addressing for maximum production value
Production Benefits
Pre-Production Phase
- Design Validation: Verify all elements work together before locking designs
- Budget Accuracy: Ensure cost estimates include all required design elements
- Department Coordination: Confirm art, wardrobe, and props have complete specifications
- Location Planning: Verify every breakdown location has design details for scouting
- Character Consistency: Ensure all characters have complete appearance specifications
Production Phase
- Set Dressing Reference: Confirmed prop-to-location associations guide set decoration
- Wardrobe Continuity: Theme-consistent character styling prevents visual discontinuity
- Shooting Efficiency: Complete design specs reduce on-set questions and delays
- VFX Coordination: Consistent themes ensure seamless visual effects integration
Post-Production Phase
- Color Grading Reference: Theme palettes guide color correction decisions
- Reshoots Accuracy: Saved design data ensures perfect continuity for pickups
- VFX Consistency: Design themes inform CGI element creation and integration
- Marketing Assets: Consistent design system aids promotional material creation
Best Practices
Regular Validation Workflow
- After Initial Design: Run validation when you complete each design component
- Before Locking Designs: Validate before sending specs to production departments
- After Breakdown Updates: Re-validate when adding new locations/characters to breakdown
- Before Major Milestones: Check consistency before pre-production meetings
- Weekly Reviews: Regular validation during active design development
Efficient Issue Resolution
- Address Errors First: Fix critical issues to achieve passing status
- Group Similar Fixes: Fix all theme reference errors together, then location associations
- Use Info as Guide: Info issues show where design coverage could be expanded
- Re-Validate Frequently: Run validation after each group of fixes to track progress
- Document Intentional Gaps: Note why certain breakdown elements lack design specs
Team Collaboration
- Production Meeting Prep: Run validation before design review meetings
- Department Assignments: Use issue list to assign tasks (art dept, wardrobe, props)
- Progress Tracking: Regular validation shows design system completion progress
- Sign-Off Process: Achieve passing validation before production design lock
Common Workflows
Initial Design System Setup
- Create Visual Themes (establishes color palettes and moods)
- Run Continuity Check → Expect "No design system data" error (normal)
- Create Location Design (reference Visual Themes)
- Run Continuity Check → May see "Breakdown location has no design" info items
- Create Character Styling (reference Visual Themes)
- Run Continuity Check → May see theme consistency warnings
- Create Prop Library (associate with locations)
- Run Continuity Check → Review location-prop association warnings
- Fix all errors → Achieve PASSED status
Expanding Existing Design
- Update Breakdown with new scenes/locations/characters
- Run Continuity Check → See info items for new breakdown elements
- Add new locations to Location Design
- Add new characters to Character Styling
- Update Prop Library with new props and location associations
- Run Continuity Check → Verify no new errors introduced
- Save validation report showing expanded coverage
Pre-Production Lock
- Complete all design components
- Run Continuity Check → Must achieve PASSED status
- Review all warnings → Address critical production issues
- Review all info items → Decide which gaps to fill
- Final validation → Save report for production records
- Lock design system → Save all components
Common Issues and Solutions
Issue: "Location references theme which does not exist"
Cause: Location has themeId: "custom-theme" but Visual Themes doesn't
have a Location Theme with that ID
Solutions:
- Option 1: Go to Visual Themes → Add a Location Theme → Set its ID to "custom-theme"
- Option 2: Go to Location Design → Change location's theme to "primary" or existing theme ID
- Option 3: Go to Location Design → Remove theme assignment (use default styling)
Issue: "Prop references location which is not in Location Design"
Cause: Prop has location association "Engine Room" but Location Design doesn't have that location
Solutions:
- Option 1: Go to Location Design → Add "Engine Room" as a new location
- Option 2: Go to Prop Library → Remove "Engine Room" from prop's location associations
- Option 3: Check spelling - might be "Engine Room" vs "engine room" (validation is case-insensitive)
Issue: "Breakdown character has no styling"
Cause: Breakdown includes "Detective Martinez" but Character Styling doesn't have that character
Solutions:
- Option 1: Go to Character Styling → Add "Detective Martinez" with full styling details
- Option 2: If character is minor/ephemeral, this is expected - info items are optional to address
- Option 3: Verify character name spelling matches breakdown exactly
Issue: "No hero props identified"
Cause: No props in Prop Library have hero status enabled
Solutions:
- Option 1: Go to Prop Library → Select plot-critical prop → Check "Mark as Hero Prop"
- Option 2: If no props are plot-critical, ignore this info item (optional suggestion)
- Examples of Hero Props: MacGuffins, signature weapons, important heirlooms, key plot devices
Tips for Success
- Start with Themes: Create Visual Themes first to establish foundation for all other components
- Validate Early, Validate Often: Run validation after each component update to catch issues immediately
- Use Hierarchical Naming: Name locations with parent-child structure ("Ship - Cockpit") for better organization
- Case Doesn't Matter: "cockpit", "Cockpit", "COCKPIT" all match - use whatever's most readable
- Info Items Are Optional: Address info suggestions based on production priorities
- Errors Must Be Fixed: Cannot achieve PASSED status with any error-level issues
- Export at Milestones: Save validation reports at key decision points for historical record
- Review Before Meetings: Run validation before production design reviews to show completeness
Script Report
Comprehensive analysis of your entire screenplay with production-ready breakdowns.
Report Sections
- Title Page: Professional cover with key information
- Synopsis: Story summary from Movie Concept
- Statistics: Page count, scene count, estimated runtime
- Character Breakdown: All characters with dialogue count
- Location Breakdown: All locations with usage statistics
- Scene List: Complete scene-by-scene breakdown
- Production Notes: Special requirements and considerations
Export Options
- PDF format with professional formatting
- Include or exclude specific sections
- Add custom notes or disclaimers
- Print-ready layout
Movie Concept Report
Generates a comprehensive report of your story's foundational concept and thematic elements, based on the data entered in Script → Movie Concept.
Report Contents
- Movie Idea - Your core story premise
- Genres - Selected genre classifications
- Story Archetype - The archetypal pattern of your narrative
- Protagonist / Goal / Obstacle - Core dramatic engine
- Stakes - What's at risk in the story
- Logline - Your one-sentence story summary
- Themes - Thematic elements explored in the story
PDF Export
Click the Download PDF button to generate a professional PDF report of your movie concept. The PDF uses Courier font for industry-standard formatting.
Uses
- Pitch meeting preparation
- Development notes reference
- Maintaining story focus during writing
- Collaboration with producers and development executives
Location Report
Detailed breakdown of all locations for production planning and budgeting.
Report Contents
- Complete location list with descriptions
- INT/EXT/BOTH categorization
- Scene count per location
- Page count per location
- Day/Night breakdown
- Production requirements
Production Benefits
- Location scouting reference
- Budget estimation tool
- Shooting schedule planning
- Department communication
Scene Report
Scene-by-scene breakdown with all production-relevant information.
Information Per Scene
- Scene number and heading
- Page numbers (start-end)
- Length in pages (1/8ths)
- Characters present
- Location details
- Time of day
- Brief description
Uses
- Shooting schedule creation
- Day-out-of-days planning
- Department breakdowns
- Script supervision
Character Report
Comprehensive character analysis for casting and production.
Character Information
- Character profiles and descriptions
- Total dialogue lines
- Scene appearances
- Speaking vs. non-speaking scenes
- Character relationships
- Arc summaries
Casting Benefits
- Role size comparison
- Character importance metrics
- Audition side selection
- Scheduling requirements
Viable Story
Professional assessment of your screenplay's storytelling fundamentals and market viability using industry-standard criteria.
Evaluation Categories
The analysis evaluates seven critical storytelling areas:
- Central Problem & Character Torment: How the main conflict drives your protagonist throughout the screenplay
- Audience Identification & Character Connection: How well audiences can connect with your main character
- Stakes & Consequences: The importance and escalation of what your character stands to lose
- Genre Expectations & Market Appeal: How well your story delivers on genre promises and commercial viability
- Character Agency & Active Protagonist: How actively your protagonist drives the story forward
- Emotional Journey & Transformation: The depth and believability of character growth
- Story Logic & Believability: Internal consistency and audience suspension of disbelief
Assessment Scale
Each category item is evaluated using a four-point scale:
- Strong: Exceptional execution that meets or exceeds professional standards
- Moderate: Good foundation with room for enhancement
- Weak: Significant improvement needed to meet industry expectations
- Unclear: Insufficient information to make a determination
Comprehensive Analysis
Each evaluation includes:
- Overall Assessment: Summary of your screenplay's viability and potential
- Key Strengths: What's working well in your story
- Primary Concerns: Areas that need attention for market success
- Development Suggestions: Specific, actionable recommendations for improvement
- Category Breakdown: Detailed feedback for each of the seven evaluation areas
Report Features
- Overall Viability Score: Percentage-based assessment of story potential
- Score Distribution: Breakdown of Strong/Moderate/Weak/Unclear ratings
- Tabbed Interface: Easy navigation through different analysis categories
- PDF Export: Professional report generation for sharing and archiving
- Re-analysis Capability: Update evaluation as your screenplay evolves
- Context Integration: Incorporates your movie concept and theme structure when available
Usage Tips
- Ensure your screenplay has substantial content for meaningful analysis
- Use this assessment early in development to identify structural issues
- Focus on "Weak" areas first for maximum impact on story viability
- Re-run analysis after major revisions to track improvement
- Export reports to track development progress over time
Screenplay Summary
Generate a comprehensive, AI-powered summary of your entire screenplay to quickly capture the core narrative arc.
Features
- Comprehensive Overview: Summarizes the main plot points, character arcs, and thematic elements.
- Character & Location Awareness: Intelligently identifies key characters and locations to provide context-rich summaries.
- Context Integration: Incorporates your defined Movie Concept and Theme Structure for a more aligned summary.
- Caching: Generated summaries are cached for performance, allowing for instant retrieval on subsequent views unless the script has significantly changed.
Usage
- Go to Reports → Script Evaluation → Screenplay Summary.
- Click Generate Summary.
- View the generated summary in the dialog or copy it to your clipboard.
Note: This tool provides a high-level synopsis useful for pitch decks, treatments, or simply reviewing your story's flow.
Quantitative Evaluation
Professional screenplay assessment using industry-standard metrics and scoring.
Evaluation Categories
- Structure (25%): Three-act progression, pacing, scene flow
- Characters (25%): Development, distinctiveness, arcs
- Dialogue (25%): Authenticity, subtext, voice
- Style (25%): Action lines, formatting, readability
Scoring System
- Each category scored 1-10
- Weighted overall score
- Industry benchmark comparisons
- Specific strengths and weaknesses
Detailed Feedback
Each score includes:
- Specific examples from script
- Comparison to professional standards
- Actionable improvement suggestions
- Industry context and expectations
Qualitative Analysis
Deep thematic and artistic evaluation of your screenplay's meaning and impact.
Analysis Areas
- Thematic Depth: Universal truths explored
- Emotional Journey: Audience experience
- Originality: Unique voice and perspective
- Cultural Relevance: Timeliness and importance
- Artistic Merit: Cinematic potential
Comprehensive Review
Includes discussion of:
- Story's deeper meaning
- Character psychology
- Symbolic elements
- Social commentary
- Genre innovation
Readiness Evaluation
Professional assessment to determine if your screenplay is ready to send to development executives or needs another draft. This Hollywood-caliber evaluation uses industry-standard criteria to give you honest feedback on your script's readiness.
How to Access
- Go to Reports → Readiness
- Click Evaluate Readiness to begin the analysis
- Review results across five evaluation tabs
- Export as PDF for reference or sharing
What It Evaluates
The Readiness evaluation analyzes your screenplay on five critical axes using a 0-5 scale:
1. Concept & Logline
- Is the core idea compelling, fresh, and marketable?
- Does the logline have a hook, irony, and clear mental picture?
- Does it effectively communicate genre and tone?
- Score 5: High-concept, instantly graspable, sparks curiosity
- Score 3: Interesting but might be too niche or familiar
- Score 0: Derivative, confusing, or lacks a clear hook
2. Structure & Pacing
- Does the script follow coherent dramatic structure (3-Act)?
- Are key plot points well-placed and effective?
- Does the story build momentum or sag in Act II?
- Score 5: Rock-solid structure with expertly placed turning points
- Score 3: Basic structure present but weak plot points
- Score 0: Lacks clear structure, feels like random events
3. Character Development
- Is the protagonist active with a clear, primal goal?
- Is there a compelling character arc with meaningful change?
- Are antagonist and supporting characters distinct?
- Score 5: Memorable protagonist with formidable antagonist
- Score 3: Protagonist somewhat passive, vague goals
- Score 0: Flat stereotypes with unclear motivations
4. Plot & Conflict
- Is there clear central conflict that escalates?
- Are the stakes high and clear?
- Does plot rely on believable causality?
- Score 5: Compelling conflict with life-and-death stakes
- Score 3: Conflict present but stakes are low
- Score 0: No clear conflict, things just "happen"
5. Dialogue & Subtext
- Does dialogue feel natural and character-specific?
- Does it reveal character without being purely expositional?
- Is there subtext and layered meaning?
- Score 5: Sharp dialogue with layers of subtext
- Score 3: Dialogue gets job done but is on-the-nose
- Score 0: Clunky, exposition-heavy, unrealistic
Required Elements Check
The evaluation verifies your screenplay contains all essential elements:
- Protagonist with Goal: Who is this about and what do they want?
- Central Conflict: What is in their way?
- Inciting Incident: What event kicks off the story?
- Climactic Resolution: Does the ending pay off the setup?
- Professional Formatting: Industry-standard presentation
Each element is marked present/absent and rated: good, vague, late, or poor.
The Verdict: Pass, Revise, or Reject
Based on comprehensive analysis, you'll receive one of three verdicts:
✓ PASS - Ready to Send
- Overall score ≥4.2 out of 5.0
- All required elements present with "good" quality
- Fewer than 2 critical gaps
- Meaning: Your screenplay meets industry standards and is ready to be passed to senior development executives
⚠ REVISE - Needs Another Draft
- Overall score 3.0-4.1, OR
- 1 missing/poor required element, OR
- 2+ critical gaps
- Meaning: Promising screenplay, but needs another draft before sending to executives. Focus on the top priority fixes to elevate the script
✗ REJECT - Major Overhaul Required
- Overall score <3.0, OR
- 2+ missing required elements, OR
- Fundamental concept flaw
- Meaning: Significant structural or conceptual issues need addressing. Substantial rework is needed
Surgical, Actionable Fixes
Instead of rewriting your story, the Readiness evaluation provides 3-5 specific, scene-referenced fixes grounded in established screenwriting principles:
- Priority: Ranked by impact (1 = highest priority)
- Location: Specific scene numbers (e.g., "Scene 8-12 (Act I)")
- Problem: Exactly what's not working
- Fix: Concrete solution with scene references
- Why: Explanation grounded in Syd Field, Robert McKee, Blake Snyder, etc.
Example Fix
Priority 1: Scene 8-12 (Act I)
Problem: The Inciting Incident happens on Scene 25. Scenes 1-24 are character setup with low stakes.
Fix: Move the discovery of the first clue up to Scene 10-12. The protagonist's initial reaction can kick off the main journey of Act II.
Why: This will hook the reader early and establish the story's central conflict much sooner, as per Syd Field's paradigm.
Critical Gaps
The evaluation identifies major structural or conceptual problems that could prevent your screenplay from selling:
- Late inciting incidents (after page 25)
- Unclear protagonist goals
- Act II pacing issues
- Passive protagonists
- Missing key plot points
Each gap is described with specific reference to your screenplay's scene numbers.
Questions a Producer Will Ask
Be prepared for practical questions decision-makers will inevitably ask:
- "Who is the audience for this?"
- "What's the 'trailer moment'?"
- "Why would an audience root for this protagonist?"
- "What's the budget range?"
- "Who do you see playing the lead?"
These questions help you prepare for pitch meetings and identify areas to strengthen.
Context-Aware Analysis
The evaluation becomes more accurate when you've filled in project metadata:
- Movie Concept: Title, genres, logline, premise, story archetype
- Theme Structure: Primary theme, thematic question/answer
- Characters: Character names and descriptions
- Locations: Setting information
This context helps the AI understand your creative intentions and evaluate accordingly.
Large Screenplay Support
For screenplays over 50KB, the evaluation automatically uses chunked processing:
- Screenplay split into ~50KB chunks at scene boundaries
- Each chunk analyzed with same evaluation criteria
- Results combined and averaged for comprehensive assessment
- Progress tracking during multi-section analysis
This ensures even full-length feature screenplays get thorough evaluation.
Export to PDF
After evaluation, click Export PDF to generate a professional report including:
- Cover page with script title and generation date
- Color-coded verdict (green/orange/red)
- Overall score and all axis scores
- Project context (concept, themes, characters)
- Required elements checklist with quality ratings
- Complete list of critical gaps
- Detailed top priority fixes (PROBLEM/FIX/WHY format)
- Producer questions to prepare for
- Summary page with verdict interpretation and thresholds
The PDF uses professional formatting and is suitable for sharing with writing partners or advisors.
Best Practices
When to Use Readiness Evaluation
- Before Querying: Ensure your script meets industry standards before sending to agents/managers
- After Major Revision: Verify improvements have elevated the script
- Before Competitions: Make sure your entry is competitive
- Objective Feedback: Get unbiased assessment based on established screenwriting principles
How to Interpret Results
- Don't take REJECT personally: Early drafts often need substantial work
- Focus on top priority fixes first: The highest-impact changes are ranked #1
- Use scene references: All feedback references specific scene numbers from your screenplay
- Consider the "Why": Each fix explains the screenwriting principle behind the suggestion
- Track progress: Re-evaluate after implementing fixes to measure improvement
Grounded in Screenwriting Principles
The Readiness evaluation is based on established Hollywood frameworks from:
- Syd Field: Three-act paradigm, plot points, page counts
- Robert McKee: Story structure, character arc, active protagonists
- Blake Snyder: Save the Cat, beat sheet, genre conventions
- Industry Standards: Reader expectations, executive decision criteria
This isn't subjective opinion—it's objective assessment against proven standards used by Hollywood development executives and screenplay readers.
Important Notes
- Readiness evaluation requires an AI API key (Settings → AI Assistant)
- Analysis time varies based on screenplay length (typically 30-90 seconds)
- Large screenplays (100+ pages) may take several minutes for chunked processing
- Results are stored in your session—export to PDF to save permanently
- Each evaluation uses AI tokens—consider costs for frequent re-evaluations
Pitch Deck
Generate professional presentation materials for pitching your screenplay with our comprehensive Pitch Deck tool. This feature creates a complete 13-slide presentation that showcases your screenplay's commercial potential.
How to Access
- Go to Production → Marketing → Pitch Deck
- The Pitch Deck dialog will open with two tabs: Form and Preview
- Fill in additional information to enhance your pitch deck
- Export as PDF or PowerPoint presentation
Automatic Content Generation
The Pitch Deck intelligently pulls data from your screenplay and project metadata:
- From Title Page: Project title, writer name, contact information
- From Movie Concept: Logline, genres, themes, tone, story archetype
- From Characters: Main character profiles with descriptions
- From Locations: Key settings and atmosphere
- From Theme Structure: Story's thematic journey
- From Screenplay: Synopsis and format details
Form-Based Enhancement
The Form tab provides a comprehensive interface to add information not available in your screenplay:
Team Tab
- Writer Bio: Your background and credentials
- Additional Team: Director, producer, or other attached talent
- Contact Details: Agent/manager information
Audience Tab
- Target Demographic: Primary audience description
- Audience Size: Market size estimates
- Psychographics: Audience interests and behaviors
- Why They Connect: Emotional resonance points
Creative Tab
- Visual Style: Cinematography and aesthetic approach
- Comparable Titles: Similar successful films
- "Meets" Combination: E.g., "Gone Girl meets Zodiac"
- Why Now: Current relevance and market timing
Contact Tab
- Budget Range: Estimated production costs
- Funding Ask: What you're seeking from investors
- Market Comparables: Financial performance references
- Call to Action: Next steps for interested parties
Generated Slides
The Pitch Deck creates a professional 13-slide presentation:
- Cover Page: Title, writer, key visual placeholder
- Logline: One-sentence hook with genre
- Synopsis: Story overview with format details
- Character Breakdowns: Main characters with descriptions
- World & Setting: Locations and atmosphere
- Tone & Visual Style: Look and feel with mood board placeholder
- Comparable Titles: Market positioning references
- Creative Team: Writer and attached talent
- Target Audience: Demographics and market size
- Format & Info: Runtime, structure, production details
- Why Now?: Current relevance and timing
- Financials/The Ask: Budget and funding needs
- Contact & Next Steps: How to move forward
Smart Field Visibility
The form intelligently shows/hides fields based on your existing data:
- If you have character data, character fields are pre-filled
- If themes exist, they appear in relevant sections
- Missing data fields are highlighted for easy identification
- Optional fields can be left blank without affecting output
Export Options
PDF Export
- Professional layout with dark theme
- Optimized for screen viewing
- Includes all formatting and structure
- Ready for email attachment
PowerPoint Export
- Standard .pptx format
- Editable slides for customization
- Professional dark theme design
- 16:9 aspect ratio for presentations
Best Practices
- Complete Your Metadata First: Fill in Movie Concept, Characters, and Locations before generating
- Keep It Concise: Form fields have character limits to ensure readability
- Visual Placeholders: The deck includes image placeholders for you to add visuals later
- Review Before Export: Use the Preview tab to check all content
- Customize After Export: PowerPoint files can be further edited with your branding
Tips for Success
Pro Tips
- Start Early: Begin filling in pitch deck data as you develop your screenplay
- Think Commercially: Focus on marketability and audience appeal
- Use Comparables Wisely: Choose recent, successful films in your genre
- Keep Budget Realistic: Research similar productions for accurate estimates
- Update Regularly: Refresh your pitch deck as your project evolves
Look Book
Create comprehensive visual reference documents for your screenplay with our Look Book tool. This feature generates professional presentation materials that capture the visual essence, mood, and aesthetic direction of your project for directors, cinematographers, and production teams.
How to Access
- Go to Production → Creative Planning → Look Book
- The Look Book dialog will open with multiple tabs for different visual aspects
- Fill in visual descriptions and generate images using AI
- Export as PowerPoint presentation for production meetings
Automatic Content Generation
The Look Book intelligently pulls data from your screenplay and project metadata:
- From Title Page: Project title, writer name, and project details
- From Movie Concept: Genre, tone, themes, and story direction
- From Characters: Character profiles and personality descriptions
- From Locations: Setting descriptions and environmental details
- From Screenplay: Visual cues and atmosphere descriptions
AI-Powered Auto-Fill
Save time with intelligent form population:
AI Fill Form Button
Click the sparkles ✨ button to automatically populate form fields based on your screenplay content. The AI analyzes your script and suggests:
- Writer's Statement: Thematic interpretation of your story
- Visual Style: Cinematographic approach and aesthetic direction
- Mood & Tone: Emotional atmosphere and visual feeling
- Color Palette: Primary and secondary color schemes
- Lighting Style: Cinematographic lighting approach
- Architectural Style: Environmental and set design direction
Visual Sections Overview
Cover Section
- Project Title: Main screenplay title
- Writer Name: Author credit
- Key Visual: Hero image representing the overall project
- Date: Creation or version date
Story Foundation
- Logline: One-sentence story summary
- Synopsis: Detailed plot overview
- Writer's Statement: Creative vision and thematic approach
- Themes: Core thematic elements and message
Visual Direction
- Mood & Tone: Visual atmosphere with reference images
- Color Palette: Primary and secondary color schemes with actual color swatches
- Visual Style: Overall aesthetic approach and visual treatment
Production Design
- Locations: Key settings with visual references
- Overall Aesthetic: Design philosophy and artistic direction
- Wardrobe Style: Character costume and styling approach
Technical Approach
- Cinematography: Camera work, lighting, and visual composition
- Sound & Music: Audio landscape and musical direction
- Editing Style: Post-production approach and pacing
Character Visuals
- Character Portraits: Visual representation of main characters
- Casting Ideas: Actor suggestions and character archetypes
Industry Context
- Comparable Films: Similar successful projects for reference
- Market Positioning: Genre placement and audience targeting
AI Image Generation
Generate professional visual references using AI:
Automatic Image Creation
- Generate Images Toggle: Enable/disable AI image generation
- Contextual Prompts: AI creates images based on your descriptions
- Multiple Formats: Character portraits, location shots, mood boards
- Base64 Integration: Images embedded directly in presentations
Supported Image Types
- Cover Images: Hero shots representing your project
- Mood Boards: Atmospheric reference images
- Character Visuals: Character appearance references
- Location Shots: Environmental and set design references
- Cinematography References: Lighting and composition examples
Export Options
PowerPoint Presentation
Generate professional presentation materials:
- Comprehensive Slides: Each section becomes a dedicated slide
- Professional Layout: Cinematic dark theme with proper typography
- Embedded Images: Generated visuals included directly in slides
- Custom Filename: Specify your preferred presentation name
- Template Styles: Choose from cinematic, modern, or classic layouts
- Page Orientation: Landscape (default) or portrait format
Export Features
- Include Generated Images: Toggle to include or exclude AI-generated visuals
- Color Swatches: Actual color rectangles for palette sections
- Placeholder Graphics: Professional placeholders when images aren't available
- Multi-slide Sections: Large sections automatically split across multiple slides
Best Practices
💡 Pro Tips
- Start with AI Fill: Use the auto-fill feature first, then customize
- Be Specific: Detailed descriptions generate better AI images
- Think Production: Consider how directors and DPs will use this reference
- Update Regularly: Refine your look book as your vision evolves
- Include Context: Explain why visual choices support the story
- Reference Professional Work: Use comparable films to communicate effectively
Use Cases
Pre-Production
- Director Meetings: Communicate visual vision effectively
- Cinematographer Prep: Establish lighting and composition approach
- Production Designer Brief: Set design and location direction
- Costume Designer Reference: Character styling and wardrobe direction
Pitching & Development
- Producer Presentations: Visual storytelling for project development
- Investor Meetings: Demonstrate professional preparation and vision
- Network Pitches: Show visual understanding of the project
- Director Recruitment: Attract visual-oriented directors
Team Communication
- Department Heads: Align all visual departments on unified vision
- Location Scouting: Reference for finding appropriate settings
- Casting Reference: Visual guide for character appearance
- Post-Production: Color grading and editing style reference
Creative Breakdown
Generate comprehensive scene-by-scene creative analysis of your screenplay with style-specific directorial insights. This feature provides detailed narrative, character, and visual direction guidance for each scene, making it an essential tool for directors, cinematographers, and production teams during pre-production planning.
How to Access
- Go to Production → Creative Planning → Creative Breakdown
- The Creative Breakdown dialog will open
- Select a directorial style from descriptive summaries (optional) or provide custom guidance
- Click "Generate Creative Breakdown" to analyze your screenplay
- View results organized by Summary and individual Scenes
- Export as PDF for production reference
Director Style Integration
One of the most powerful features is the ability to analyze your screenplay through the lens of specific directorial styles:
Director Style Options
- 39 Professional Director Styles: Choose from descriptive style summaries that capture the essence of renowned filmmakers' approaches. Each option displays a concise description of the director's signature techniques and thematic preoccupations, such as "Blends fluid, emotionally driven long takes and iconic shots of awestruck faces with recurring themes of absent fathers and childhood wonder"
- Custom Style Input: Provide your own directorial guidance with specific visual and tonal direction
- No Style: Generate analysis without directorial influence for a neutral creative breakdown
When you select a style, the analysis incorporates the complete directorial philosophy including signature visual techniques, thematic preoccupations, and stylistic approaches into every scene's breakdown. The style summaries help you choose the most appropriate cinematic approach for your screenplay without being influenced by specific director names.
Automatic Context Integration
The Creative Breakdown intelligently incorporates data from throughout your project:
- From Movie Concept: Genre, tone, logline, and thematic direction
- From Characters: Character profiles, motivations, arcs, and personality traits
- From Locations: Location descriptions, atmosphere, and significance
- From Theme Structure: Central themes, thematic questions, and arguments
- From Production Design: Visual themes and aesthetic direction
- From Screenplay: Scene content, dialogue, and action
Three-Layer Scene Analysis
Each scene receives comprehensive analysis across three critical dimensions:
1. Narrative & Thematic Analysis
- Primary Objective: What the scene accomplishes in the story
- Emotional Beats: Key emotional moments and character feelings
- Subtext: What's happening beneath the surface dialogue and action
- Themes: Thematic elements present in the scene
- Pacing: Scene tempo classified as slow, moderate, or fast
- Turn or Revelation: Major dramatic shifts or discoveries (when present)
2. Character Information
- Characters Present: List of all characters in the scene
- Motivations: What each character wants in the scene
- Playable Objectives: Actionable character goals actors can perform
- Obstacles: What stands in the way of character objectives
- Character Arcs: How characters develop or change in the scene
- Relationships: Dynamics between characters and how they evolve
3. Visual & Tonal Direction
- Mood: Overall emotional atmosphere of the scene
- Atmosphere: Environmental and sensory qualities
- Lighting: Suggested lighting approach and quality
- Camera Approach: Recommended camera techniques and movements
- Visual Metaphors: Symbolic visual elements that support themes
- Director Style Reference: How the selected directorial style would be applied to this scene (when applicable)
Summary Overview
The Summary tab provides a high-level analysis of your entire screenplay:
Screenplay-Wide Analysis
- Total Scenes: Complete scene count
- Dominant Themes: Most frequently occurring themes across all scenes
- Emotional Arc Summary: Overall emotional journey of the screenplay
- Pacing Profile: Analysis of screenplay tempo and rhythm (fast-paced, deliberately paced, or balanced)
- Visual Style Consistency: How unified the visual approach is throughout
- Director Style Config: Shows which directorial style summary was applied (if any)
Scene Cards with Visual Indicators
Each scene is presented as an expandable card with color-coded badges:
- Pacing Badges: Color-coded indicators for scene tempo
- Blue (Slow): Deliberate, contemplative pacing with time for emotional beats to breathe
- Orange (Moderate): Balanced, steady rhythm with clear dramatic progression
- Red (Fast): High energy, action-driven pacing with rapid scene progression
- Turn Indicator: Purple "Turn" badge shows when scenes contain dramatic revelations or shifts
- Scene Heading: Complete scene location and time of day
- Expandable Details: Click any scene card to reveal full three-layer analysis
Progressive Generation
The Creative Breakdown uses scene-by-scene processing for optimal results:
Real-Time Progress Tracking
- Scene Extraction: Automatically splits screenplay into individual scenes
- Progressive Processing: Analyzes each scene separately with context awareness
- Live Progress Bar: Shows current scene being analyzed and overall completion
- Fallback Handling: If a scene fails to analyze, provides informative placeholder data
- Final Summary: Aggregates insights across all scenes after completion
Export Options
PDF Export
Generate professional PDF reports for production use:
- Complete Documentation: All summary and scene analysis included
- Professional Layout: Clean, readable format with proper text wrapping
- Color-Coded Elements: Pacing indicators maintained in PDF
- Scene-by-Scene Organization: Each scene clearly separated and labeled
- Director Style Attribution: Documents which directorial approach was used
- Custom Filename: Automatically named based on script title
Pacing Analysis
The Creative Breakdown includes sophisticated pacing analysis:
Multi-Layer Pacing Enforcement
- Explicit AI Constraints: Clear instructions ensure AI returns only "slow," "moderate," or "fast"
- Client-Side Validation: Automatically normalizes any non-standard pacing values
- Keyword Detection: If descriptive text is provided, extracts correct pacing value
- Type Safety: TypeScript enum ensures only valid values are accepted
Best Practices
💡 Pro Tips
- Choose Relevant Styles: Select directorial style summaries that match your screenplay's genre or desired visual approach
- Use Custom Guidance: For unique visions, provide specific directorial instructions rather than selecting "none"
- Review Scene Turns: Pay special attention to scenes with the purple "Turn" badge—these are pivotal moments
- Study Pacing Patterns: Look at the summary's pacing profile to ensure proper screenplay rhythm
- Share with Department Heads: Export PDFs for cinematography, production design, and directing teams
- Regenerate After Rewrites: Click "New Creative Breakdown" after significant script changes
- Compare Styles: Generate multiple breakdowns with different stylistic approaches to explore various interpretations
- Use for Pre-Vis: Visual direction guidance is perfect for storyboarding and shot planning
Use Cases
Pre-Production Planning
- Director's Prep: Comprehensive scene-by-scene vision and approach
- Shot List Creation: Visual direction guides camera planning
- Actor Notes: Character objectives and emotional beats for rehearsals
- Cinematography Brief: Lighting, mood, and camera approach per scene
- Production Design: Atmosphere and visual metaphor guidance
- Schedule Optimization: Pacing analysis helps determine shooting order
Script Development
- Structural Analysis: Identify scenes lacking clear objectives or turns
- Pacing Diagnosis: Ensure proper rhythm and tempo variation
- Theme Tracking: Verify themes are woven throughout screenplay
- Character Consistency: Check if character motivations track logically
- Emotional Arc Validation: Confirm emotional progression makes sense
Education & Analysis
- Film School Projects: Learn how master directors approach scenes
- Script Reading: Deeper understanding of screenplay mechanics
- Director Style Study: Explore how different directors interpret same material
- Genre Comparison: See how visual approaches differ by genre
Director Style Library
The Creative Breakdown includes 39 comprehensive directorial style guides, each presented through descriptive summaries:
Available Directorial Styles
Each style guide is presented as a descriptive summary that captures the essence of a particular filmmaking approach, including signature visual techniques, thematic preoccupations, and characteristic storytelling methods. Examples of style summaries you might encounter:
- "Blends fluid, emotionally driven long takes and iconic shots of awestruck faces with recurring themes of absent fathers and childhood wonder"
- "Constructs complex, non-linear narratives centered on time and obsession, utilizing large-format practical visuals and rising auditory tension"
- "Merges pioneering visual effects and technological innovation with linear, high-stakes action narratives focused on strong female protagonists"
- "Applies the rhythmic choreography of ensemble comedy to deconstruct blockbuster genres through grounded, character-driven action"
- "Fuses sweeping, epic camera movements and groundbreaking digital effects with a gritty, 'lived-in' aesthetic"
- "Prioritizes 'sensory overload' through frenetic editing, constant camera motion, and saturated color palettes"
- "Grounds fantasy elements in gritty political realism using desaturated, steely color palettes"
- "Masterfully builds immersive, 'lived-in' worlds through atmospheric lighting and detailed production design"
- "Blends German Expressionist visuals and gothic whimsy to tell sympathetic stories about misunderstood outcasts"
- And 30 more unique stylistic approaches...
These descriptive summaries allow you to select a cinematic style that best fits your screenplay's tone and vision, focusing on the artistic approach rather than individual identities.
Error Handling & Recovery
The Creative Breakdown includes robust error handling:
- Scene Parse Failures: Provides fallback analysis for scenes that fail to process
- Token Truncation Detection: Warns internally when responses are incomplete
- User-Friendly Messages: Technical errors translated to actionable user guidance
- Partial Results: Even if some scenes fail, successfully analyzed scenes are preserved
- Regeneration Option: Easy one-click regeneration for improved results
Performance Considerations
Generation Time
Processing time depends on screenplay length and scene count:
- Short Scripts (10-20 scenes): 30-60 seconds
- Feature Length (40-80 scenes): 2-4 minutes
- Long Features (80+ scenes): 4-7 minutes
Processing is progressive, so you can see results being generated in real-time. The live progress bar keeps you informed throughout the entire process.
Comparison with Other Features
| Feature | Focus | Best For |
|---|---|---|
| Creative Breakdown | Scene-by-scene creative direction with directorial style | Directors, cinematographers, production planning |
| Shot List | Specific camera shots and technical details | Camera operators, shot planning |
| Logistical Breakdown | Production logistics and requirements | 1st ADs, production managers, budgeting |
| Look Book | Overall visual aesthetic and presentation | Pitching, department head briefings |
Hitchcock Asymmetry Report
An advanced "forensic" analysis tool that evaluates your screenplay's suspense mechanics using the principles of "Information Asymmetry" (commonly associated with Alfred Hitchcock).
The Core Philosophy
"There is a distinct difference between suspense and surprise."
This report ignores emotion and focuses purely on Objective Information States:
- Suspense: The Audience knows something the Character does not (e.g., The Bomb under the table).
- Mystery: The Character knows something the Audience does not.
- Surprise: Neither knows (Brief shock, not sustained tension).
- Boredom (Dead Zone): Both know exactly the same information for too long.
Key Metrics
- Squirm Score (0-100): A weighted calculation of how much "unresolved information" exists in your script. A high score means the audience is constantly waiting for the other shoe to drop.
- The Knowledge Ledger: A tracking table of every "Key Information Entity" (Secret, Threat, or MacGuffin) and who knows about it in each scene.
- Dead Zones: Sequences where Information Symmetry (Boredom) persists for too long, indicating pacing issues.
- Master's Notes: Qualitative feedback provided in the persona of a droll, demanding "Master of Suspense."
Visual Aids
- Suspense Gauge: Color-coded visual indicator of your overall Squirm Score.
- Ledger Table: Detailed view of secrets, showing "Viewer Awareness" vs "Character Awareness."
How to Use
- Go to Reports → Script Evaluation → Hitchcock Asymmetry Report.
- Click "Invoke The Master" to begin analysis.
- The system will perform a "Map-Reduce" analysis on your screenplay (chunk by chunk).
- Review the Squirm Score and Master's Notes in the "Suspense Audit" tab.
- Check the Knowledge Ledger tab to see specific secrets identified (e.g., "The Poisoned Drink").
- Investigate Dead Zones to find scenes that may need more dramatic irony.
- Export PDF: Download a comprehensive report for your records.
💡 Tips for High Scores
- Give the Audience the Secret: Don't hide the killer; show them hiding in the closet before the hero enters.
- Extend the Duration: Suspense is a function of time. How long can you keep the bomb ticking before it explodes?
- Avoid Symmetry: If the hero learns a secret immediately after the audience does, the tension evaporates.
Actor Breakdown
Generate comprehensive, actor-focused performance analysis for your screenplay with detailed scene-by-scene guidance. This feature provides playable, Stanislavski-based performance packets that help actors understand their characters deeply and execute nuanced, moment-by-moment performances. Essential for actors, directors, and acting coaches during rehearsal and performance preparation.
How to Access
- Go to Production → Creative Planning → Actor Breakdown
- The Actor Breakdown dialog will open
- Click "Generate Actor Breakdown" to analyze your screenplay
- View results organized by Overview, By Character, or By Scene
- Export as PDF for rehearsal reference
Two-Phase Actor Analysis
The Actor Breakdown uses a sophisticated two-phase approach modeled after professional acting preparation:
Phase 1: Character Triangulation (Global Dossier)
Analyzes the entire screenplay to build a comprehensive character profile from three perspectives:
Three Sources of Character Evidence
- Self-Descriptions: Everything the character says about themselves—their history, feelings, motivations, and beliefs. Direct quotes from dialogue that reveal the character's self-perception.
- Others' Descriptions: What other characters say about them. Reveals how the character is perceived, their reputation, and their impact on others.
- Action Descriptions: What the script's action lines reveal—physical actions, habits, mannerisms, appearance, and behavior patterns. Shows what the character does versus what they say.
From this triangulated evidence, the system synthesizes:
- Psychology: Core traits, fears, deep motivations, and behavioral patterns
- Overall Arc: How the character changes throughout the story
- Super-Objective: The character's ultimate goal that drives them through the entire screenplay (their "spine")
Phase 2: Scene-Level Performance Packets
For each scene where the character appears, generates detailed, playable performance guidance:
Five-Step Scene Analysis
- Step 1 - Sensory Inventory (Given Circumstances): Physical environment, atmosphere, lighting quality, emotional temperature, and what the character physically feels. Grounds the actor in the reality of the scene.
- Step 2 - Hierarchy of Want (Motivational Engine): Super-objective, scene objective, obstacles, and stakes. Defines why the character is in the scene.
- Step 3 - Emotional Score (Beat Mapping): Maps emotional beats to specific moments in the scene with trigger lines and internal states.
- Step 4 - Playable Packet (Line-by-Line Analysis): For every dialogue line, provides context, subtext, action (transitive verb/tactic), emotional beat, and performance details.
- Step 5 - Technical & Continuity Notes: Camera guidance, director style interpretation, emotional continuity from previous scenes, and physical continuity.
Performance Details Integration
Each dialogue line in the Playable Packet includes detailed, visual performance guidance:
Five Performance Dimensions
- Body Language: Specific gestures, posture shifts, and physical actions during the line (e.g., "leans forward," "clenches fists," "turns away")
- Energy: Intensity and vitality level (e.g., "subdued," "building," "explosive," "sustained")
- Vocal Delivery: Tone, pace, and volume guidance (e.g., "whispered," "projected," "rapid," "measured")
- Facial Expression: Specific facial cues (e.g., "furrowed brow," "wide eyes," "tight jaw," "slight smile")
- Physical Intensity: Level of physical commitment (e.g., "minimal movement," "moderate gestures," "intense physicality")
Integration with Production: Performance details automatically enhance Storyboard panels and Trailer videos when those features use Actor Breakdown data.
Automatic Context Integration
The Actor Breakdown intelligently incorporates data from throughout your project:
- From Movie Concept: Genre, tone, and thematic direction inform character psychology
- From Characters: Character profiles, motivations, and arcs provide foundation for analysis
- From Theme Structure: Central themes connect to character super-objectives
- From Creative Breakdown: Director's vision, visual mood, lighting, and scene objectives enhance performance context
- From Screenplay: All dialogue, action lines, and scene structure
Three-Tab Interface
Results are organized in three complementary views:
Overview Tab
High-level analysis of all characters:
- Total Characters: Count of significant characters analyzed (filters characters with >1 line or >1 scene)
- Total Scenes: Number of scenes in the screenplay
- Top Characters by Scenes: Characters with most scene appearances
- Top Characters by Dialogue: Characters with most dialogue lines
- Overall Emotional Journey: Narrative arc summary across all characters
By Character Tab
Detailed analysis for a selected character:
- Character Selector: Dropdown showing all characters with scene/line counts
- Global Dossier: Complete character triangulation with self-descriptions, others' descriptions, action descriptions, psychology, arc, and super-objective
- Scene-by-Scene Analysis: Expandable cards for every scene the character appears in, showing all five analysis steps
- Complete Playable Packets: Every dialogue line with context, subtext, action, and performance details fully displayed
By Scene Tab
Scene-centric view showing all character activity:
- Scene Cards: One card per scene in screenplay order
- Character Presence: Shows which analyzed characters appear in each scene
- Quick Overview: Scene objective, obstacle, and line count per character
- Expandable Details: Click to see full analysis for all characters in the scene
Stanislavski-Based Terminology
The Actor Breakdown uses professional acting terminology from the Stanislavski Method:
Key Acting Concepts
- Super-Objective (Spine): The character's ultimate goal driving all actions throughout the screenplay. Expressed as "To [verb] [object]" (e.g., "To prove my worth to my family").
- Scene Objective: What the character wants in a specific scene. Must be playable and specific (e.g., "To convince Sarah to trust me").
- Transitive Verbs (Tactics): What the character is doing to their scene partner with each line. Must be active verbs that do something TO someone (e.g., "to challenge," "to probe," "to reassure," "to deflect").
- Given Circumstances: The physical and emotional reality of the scene—where you are, what you feel, what just happened.
- Subtext: What the character is thinking and feeling but NOT saying. The inner monologue beneath the dialogue.
- Moment Before: What happened immediately before this line that caused it to be spoken.
- Obstacle: What stands in the way of the character getting what they want.
- Stakes: What happens if the character fails to achieve their objective.
Progressive Generation
Actor Breakdown uses multi-phase processing for comprehensive results:
Real-Time Progress Tracking
- Character Filtering: Automatically identifies significant characters (>1 dialogue line OR >1 scene appearance)
- Global Analysis: Processes entire screenplay for each character to build global dossier
- Scene-by-Scene Analysis: Generates playable packets for each scene where character appears
- Live Progress Bar: Shows current character and scene being analyzed with overall completion percentage
- Summary Generation: Aggregates insights across all characters after completion
Processing Time: Longer than Creative Breakdown due to two-phase analysis. Expect 4-8 minutes for feature-length screenplays with 3-5 major characters.
Export Options
PDF Export
Generate professional PDF performance guides for actors:
- Complete Documentation: All character dossiers and scene analyses included
- Actor-Ready Format: Organized for easy reference during rehearsal and performance
- Performance Details Highlighted: Body language, energy, vocal delivery clearly formatted
- Scene-by-Scene Organization: Each scene analysis clearly separated and labeled
- Custom Filename: Automatically named based on script title
Best Practices
💡 Pro Tips for Actors
- Start with Global Dossier: Read your character's complete triangulation before diving into individual scenes. Understanding the super-objective is crucial.
- Track Emotional Continuity: Pay attention to how your emotional state carries from scene to scene. The "moment before" connects your performance.
- Make Tactics Physical: Turn transitive verbs into actual physical actions. "To challenge" becomes a forward lean and locked eye contact.
- Use Subtext for Inner Life: The subtext is your character's private thoughts. Speak these silently to yourself while delivering the line.
- Study Performance Details: Body language, energy, and vocal delivery suggestions are starting points—adapt them to your interpretation.
- Work Scene-by-Scene: Don't try to memorize everything at once. Master one scene's performance packet at a time.
- Share with Director: Discuss your character's super-objective and scene objectives with the director early in rehearsal.
💡 Pro Tips for Directors
- Generate After Creative Breakdown: Creative Breakdown data enhances Actor Breakdown with directorial vision and visual mood.
- Use in Table Reads: Have actors reference their scene objectives during the first read-through.
- Focus on Super-Objectives: Ensure all actors understand their character's spine before blocking begins.
- Discuss Tactics: Use the transitive verbs as starting points for directing line delivery.
- Check Performance Consistency: Verify performance details align with your visual direction from Creative Breakdown.
- Regenerate After Script Changes: Click "Generate New Breakdown" after significant rewrites that affect character arcs.
Integration with Other Features
Actor Breakdown data enhances other production features:
Storyboard Enhancement
When you generate a Storyboard after creating an Actor Breakdown:
- Automatic Loading: Storyboard automatically loads Actor Breakdown data from cache
- Performance Injection: Body language, energy, vocal delivery, facial expressions, and physical intensity are added to shot descriptions
- Visual Accuracy: AI-generated storyboard panels reflect the actor's intended performance details
- Character Consistency: Performance guidance ensures character portrayal matches acting preparation
Trailer Enhancement
When you generate a Trailer after creating an Actor Breakdown:
- Automatic Loading: Trailer automatically loads Actor Breakdown data from cache
- Performance Context: Energy levels and intensity guide shot selection for trailer pacing
- Emotional Accuracy: Trailer shots reflect the character's emotional journey from Actor Breakdown
- Narration Pacing: Vocal delivery guidance informs trailer narration timing
Use Cases
Actor Preparation
- Character Study: Deep dive into psychology, motivations, and behavioral patterns
- Rehearsal Guide: Scene-by-scene objectives and tactics for blocking rehearsals
- Line Delivery: Subtext and transitive verbs guide how to speak each line
- Physical Performance: Body language and gestures for visual authenticity
- Emotional Arc Tracking: Understand character's emotional journey across entire screenplay
- Audition Preparation: Quick access to character dossier and key scenes
Directing & Coaching
- Director's Prep: Understand each character's super-objective and arc before rehearsals
- Acting Coach Resource: Professional-grade analysis for coaching sessions
- Table Read Guidance: Provide actors with objectives before first read-through
- Blocking Sessions: Use performance details to inform physical staging
- Note Giving: Reference specific tactics and emotional beats when giving director's notes
Pre-Production
- Casting Breakdown: Global dossiers help create accurate casting descriptions
- Production Planning: Performance intensity informs shooting schedule complexity
- Storyboard Accuracy: Performance details ensure storyboards match acting vision
- Trailer Strategy: Energy levels guide trailer shot selection and pacing
Comparison with Creative Breakdown
| Aspect | Creative Breakdown | Actor Breakdown |
|---|---|---|
| Perspective | Director's creative vision | Actor's performance preparation |
| Focus | Visual direction, mood, atmosphere, camera | Character psychology, objectives, tactics, performance |
| Primary User | Directors, cinematographers, production designers | Actors, acting coaches, directors |
| Granularity | Scene-level analysis | Line-by-line analysis with global character context |
| Analysis Depth | Narrative objectives, visual metaphors, pacing | Subtext, tactics, given circumstances, emotional beats |
| Integration | Feeds into Shot List, Storyboard, Look Book | Feeds into Storyboard, Trailer, rehearsal prep |
| Best Used | Early pre-production planning | Casting, rehearsal, and performance preparation |
Recommended Workflow
- Generate Creative Breakdown first: Establishes directorial vision and visual mood
- Generate Actor Breakdown: Uses Creative Breakdown data to provide performance context
- Share Both with Cast: Actors get both visual context (from Creative) and performance guidance (from Actor)
- Generate Storyboard/Trailer: Both features benefit from having both breakdowns available
Error Handling & Recovery
The Actor Breakdown includes robust error handling:
- Character Filtering: Automatically excludes minor characters to focus on significant roles
- Scene Parse Failures: Provides fallback analysis for scenes that fail to process
- JSON Repair: Multiple levels of JSON parsing with aggressive error recovery
- User-Friendly Messages: Technical errors translated to actionable guidance
- Partial Results: Successfully analyzed characters/scenes are preserved even if some fail
- Regeneration Option: Easy one-click regeneration for improved results
Performance Considerations
Generation Time
Processing time depends on screenplay length and number of significant characters:
- Short Scripts (1-2 characters, 10-20 scenes): 2-3 minutes
- Feature Length (3-5 characters, 40-80 scenes): 4-8 minutes
- Ensemble Films (6+ characters, 80+ scenes): 8-15 minutes
Processing includes global analysis for each character plus scene-by-scene analysis for all their appearances. The live progress bar shows current phase, character, and scene being processed.
Stanislavski Method Background
Acting Foundation
The Actor Breakdown is based on Constantin Stanislavski's System, the foundation of modern actor training:
- The Method of Physical Actions: Every line has a physical, transitive action (to push, to soothe, to attack)
- Emotional Memory & Given Circumstances: Grounding performance in sensory reality
- Super-Objective (Spine): The through-line that connects all character choices
- Subtext: The unspoken thoughts and feelings beneath dialogue
- Emotional Recall: Using emotional beats to guide performance intensity
This professional framework ensures actors receive playable guidance—not vague descriptions, but concrete actions they can physically perform.
Emotional Arc
Visualize and analyze your protagonist's fortune journey throughout your screenplay using Kurt Vonnegut's Story Shape Theory. This AI-powered tool tracks objective circumstances—not emotions—to reveal narrative structure, pacing issues, and dramatic peaks.
Fortune vs. Emotion: A Critical Distinction
This analysis tracks fortune (objective circumstances), not emotions (subjective feelings):
- Fortune: What happens TO the protagonist (winning, losing, achieving goals, suffering setbacks)
- Emotion: How the protagonist FEELS about events (happiness, sadness, anger)
Example: A character may feel happy (emotion) while their circumstances are terrible (misfortune), or feel anxious (emotion) while everything is going their way (good fortune).
The Vonnegut Fortune Scale
The analysis uses a -10 to +10 scale to measure the protagonist's objective circumstances at each scene:
Fortune Levels
- +10 to +6 (Triumphant): Ultimate victory, dream achieved, perfect circumstances
- +5 to +1 (Fortunate): Positive progress, gains, advantages
- -0.5 to +0.5 (Neutral): Balanced state, neither winning nor losing
- -1 to -5 (Misfortune): Setbacks, losses, disadvantages
- -6 to -10 (Catastrophic): Total disaster, ultimate loss, complete failure
Interactive Fortune Graph
The graph tab displays a visual representation of your protagonist's fortune journey:
- Y-Axis: Fortune score from -10 (Catastrophic) to +10 (Triumphant)
- X-Axis: Scene numbers in chronological order
- Color-Coded Points: Each scene is marked with a color indicating its fortune level
- Peak/Trough Markers: Highlighted indicators for highest and lowest points
- Interactive Navigation: Click any data point to jump to that scene in your screenplay
Analysis Components
The Insights tab provides comprehensive analysis of your narrative structure:
1. Dynamic Range Analysis
- Fortune Span: Total range between highest and lowest points
- Average Fortune: Overall trajectory of the protagonist's journey
- Peak Scene: The scene with the best circumstances for your protagonist
- Trough Scene: The scene with the worst circumstances
2. Pacing & Flat Lines Detection
The analyzer identifies sequences of 3 or more consecutive scenes with minimal fortune change (less than 2 points). These "plateaus" can indicate:
- Pacing issues where dramatic stakes don't escalate
- Opportunities to increase tension or raise the stakes
- Sections that may benefit from compression or restructuring
3. Fortune Distribution
See how your scenes are distributed across fortune levels:
- Number of catastrophic, misfortune, neutral, fortunate, and triumphant scenes
- Balance assessment to ensure varied dramatic circumstances
- Identification of over-reliance on any single fortune level
4. Story Beat Recognition
When applicable, the analysis identifies classic story beats:
- Opening, Inciting Incident, Rising Action
- Midpoint, Crisis, Climax
- Resolution, Denouement
Scene-by-Scene Breakdown
The Details tab provides a comprehensive breakdown for each scene:
- Fortune Score & Level: Precise rating and classification
- Description: Analysis of why the scene has this fortune level
- Trigger Event: The key event that drives the fortune change
- Story Beat: Structural function (when identified)
- Scene Navigation: Click any scene card to jump to it in your screenplay
PDF Export
Generate a professional analysis report containing:
- Fortune Arc Graph: High-quality visualization with all data points
- Statistical Overview: Total scenes, fortune range, average, peak/trough
- Scale Explanation: Complete Vonnegut fortune scale reference
- Fortune Distribution: Breakdown of scenes by fortune level
- Key Scenes Analysis: Detailed examination of peak and trough moments
- Plateau Detection: Identified flat lines with recommendations
- Insights & Recommendations: AI-generated suggestions for improvement
- Scene-by-Scene Breakdown: Complete fortune analysis for every scene
Common Story Shapes
Kurt Vonnegut identified recurring patterns in storytelling. Your analysis may reveal shapes like:
- "Man in a Hole": Fortune drops, then recovers (classic setback-and-recovery)
- "Boy Meets Girl": Fortune rises, drops, then rises higher (romantic comedy pattern)
- "Cinderella": Gradual rise, sudden drop, triumphant recovery
- "Tragedy": High fortune declining to catastrophe
- "Hero's Journey": Multiple peaks and troughs with overall upward trajectory
Use Cases
- Structure Analysis: Verify your story has sufficient dramatic range
- Pacing Diagnosis: Identify sections where stakes don't escalate
- Climax Verification: Ensure your peak/trough occurs at the right structural point
- Rewrite Guidance: Target specific scenes that need stakes raised or lowered
- Genre Alignment: Verify your fortune pattern matches genre expectations
- Pitch Preparation: Use the PDF report to demonstrate narrative structure to producers
How to Use
- Access via Reports → Emotional Arc in the main menu
- Ensure you have AI Assistant configured with a valid API key
- The analyzer will automatically detect your protagonist from character data
- Click "Generate Emotional Arc" to analyze your screenplay
- For large screenplays (>50KB), the system uses scene-based chunking for optimal processing
- Navigate between Graph, Insights, and Details tabs to explore the analysis
- Click "Export PDF" to generate a professional report
Requirements
- Valid AI Assistant API key (configured in AI Assistant Settings)
- At least one character defined with "Protagonist" role
- Screenplay with properly formatted scene headings (INT./EXT.)
Tips for Best Results
- Define Your Protagonist: Ensure your main character is marked as "Protagonist" in Characters
- Clear Scene Headings: Use standard screenplay format (INT./EXT. LOCATION - TIME)
- Complete Scenes: Include action and dialogue for accurate fortune assessment
- Review Insights: Pay special attention to plateau detection—these often reveal real pacing issues
- Compare to Genre: Different genres have different expected fortune patterns (tragedy vs. comedy)
- Iterate: Regenerate after revisions to track improvement in dramatic structure
Coverage Report
Generate a comprehensive, industry-standard screenplay coverage report that serves both producers and screenwriters with professional-grade analysis.
Report Structure
The Coverage Report follows professional coverage standards used by major studios and production companies:
1. Cover Page
- Title, author, and format information
- Genre classification and page count
- Reader-generated compelling logline
- 3 comparable successful titles
2. Executive Summary
- 250-300 word plot synopsis (beginning to end)
- Overall weighted score (0-100)
- Final recommendation: RECOMMEND / CONSIDER / DEVELOPMENT NEEDED
3. Quantitative Scorecard
Detailed scoring across 6 weighted categories:
- Concept & Premise (20%): Originality, hook potential, thematic depth
- Plot & Structure (20%): Three-act structure, plot points, pacing, resolution
- Characters (20%): Protagonist arc, antagonist, supporting cast
- Dialogue (15%): Authenticity, subtext, exposition handling
- Commercial Viability (15%): Audience appeal, genre adherence, marketability
- Execution & Craft (10%): Formatting, clarity, tone
4. Developmental Analysis
In-depth qualitative assessment covering:
- Concept and premise analysis with specific examples
- Plot structure and narrative momentum evaluation
- Character development and relationship dynamics
- Dialogue effectiveness and authenticity
- Thematic integration and dramatic impact
5. Final Thoughts
- 5 key strengths with specific examples
- 5 actionable development recommendations
- Final recommendation justification
Using Coverage Report
- Access: Reports menu → Coverage Report
- Generate: Click "Generate Coverage Report" - analysis takes 2-5 minutes
- Review: Navigate through tabs: Cover Page, Executive Summary, Scorecard, Analysis, Final Thoughts
- Export: Download professional PDF report for submission or reference
Professional Applications
For Screenwriters:
- Objective assessment of script readiness
- Specific, actionable revision guidance
- Industry-standard evaluation perspective
- Professional presentation for submissions
For Producers:
- Quick executive summary with recommendation
- Quantitative scoring for comparison
- Commercial viability assessment
- Detailed analysis for development decisions
Tips for Best Results
- Complete Screenplay: Works best with finished drafts (feature-length recommended)
- Project Context: Add movie concept, theme structure, and character details for richer analysis
- Industry Standards: Report follows professional coverage format used by major studios
- Objective Analysis: Provides honest, constructive assessment for both commercial and artistic elements
Relationship Mapper
Visualize and analyze character relationships through an interactive network graph that reveals relationship dynamics, character centrality, and the social structure of your screenplay.
Key Insight: Understanding how characters connect reveals the social fabric of your story. Central characters drive the narrative, while isolated characters may signal missed opportunities for development or integration into the main plot.
What Is Relationship Mapping?
The Relationship Mapper analyzes your screenplay to identify:
- Character Presence: Detects characters from dialogue and action line mentions
- Shared Scenes: Identifies when characters appear together in the same scene
- Relationship Strength: Measures connection strength by number of shared scenes
- Character Centrality: Calculates percentage of possible connections each character has
- Network Structure: Reveals the overall social architecture of your screenplay
How to Use Relationship Mapper
- Access: Reports menu → Relationship Mapper
- Analysis: The tool automatically analyzes your screenplay and generates the network graph
- Explore: View the interactive force-directed graph with color-coded nodes
- Interact: Click characters to highlight their relationships, use zoom controls to navigate
- Review: Check character statistics and top relationships by shared scenes
- Export: Download comprehensive PDF report with graph and tabular data
Understanding the Network Graph
The interactive visualization uses a force-directed layout to reveal relationship patterns:
Visual Elements
- Nodes (Circles): Each character represented by a colored circle
- Node Size: Larger nodes = higher centrality (more connections)
- Node Color: Color intensity corresponds to centrality percentage
- Links (Lines): Connections between characters who share scenes
- Link Thickness: Thicker lines = more shared scenes (stronger relationship)
- Spatial Layout: Characters with more connections naturally gravitate toward center
Centrality Explained
Centrality measures the percentage of possible connections each character has:
- 100% Centrality: Character shares scenes with every other character (maximally connected)
- 50% Centrality: Character connected to half of other characters
- Low Centrality: Character appears with few other characters (potentially isolated)
- Formula: (Number of connections ÷ Total possible connections) × 100
Interactive Features
- Zoom Controls: Zoom in/out to focus on specific areas of the network
- Fit to Screen: Auto-fit entire graph to available space for overview
- Hover Tooltips: Hover over nodes to see character name and statistics
- Click to Highlight: Click characters in the list to highlight their connections
- Pan & Drag: Click and drag to reposition the graph view
- Dynamic Layout: Force-directed physics creates natural clustering
Character Statistics Panel
The right panel displays comprehensive character data:
- Total Characters: Count of unique characters detected
- Total Relationships: Number of character pair connections
- Most Central Character: Character with highest centrality percentage
- Character List: All characters with their centrality, scene count, and dialogue lines
- Top Relationships: Strongest connections sorted by shared scenes
Character Name Normalization
The tool intelligently merges character name variations:
- Voice-Over: "ALICE (V.O.)" → "ALICE"
- Off-Screen: "ALICE (O.S.)" → "ALICE"
- Continued: "ALICE (CONT'D)" → "ALICE"
- Possessive Voice: "ALICE'S VOICE" → "ALICE"
- Recording/Narration: "ALICE NARRATION" → "ALICE"
What the Graph Reveals
Story Structure Patterns
- Protagonist Centrality: Main character typically has highest centrality (appears with most other characters)
- Support Network: Central cluster shows core cast who drive main plot
- Isolated Characters: Peripheral nodes may indicate subplot characters or underdeveloped relationships
- Character Clusters: Groups of tightly connected characters reveal subplot networks
- Bridge Characters: Characters connecting different clusters serve as plot connectors
Common Patterns and What They Mean
- Star Pattern: One highly central character with many peripheral characters (common in coming-of-age stories)
- Dense Network: Ensemble cast where most characters know each other (ensemble films)
- Divided Network: Two or more separate clusters (parallel storylines or segregated worlds)
- Linear Chain: Characters connected in sequence (journey narratives)
- Hierarchical: Clear tiers of connectivity (organizational or social hierarchies)
Using Relationship Mapper for Development
Identify Story Issues
- Protagonist Not Central: If your main character has low centrality, they may not be driving enough of the story
- Orphaned Characters: Isolated characters with few connections may need integration or removal
- Missing Relationships: Expected connections that don't exist (e.g., protagonist never meets antagonist)
- Ensemble Balance: Check if ensemble films have evenly distributed centrality
- Subplot Integration: Verify subplot characters connect to main plot through bridge characters
Strengthen Your Screenplay
- Add Key Relationships: Create scenes between disconnected characters to strengthen plot cohesion
- Increase Stakes: Add scenes between characters with weak connections to deepen relationships
- Remove Redundancy: Characters with identical relationship patterns may be redundant
- Balance Screen Time: Use centrality and scene count to identify unbalanced character presence
- Verify Story Promises: Ensure relationships introduced early are developed throughout
PDF Export
Generate a professional PDF report including:
- Network Graph Visualization: High-quality image of the relationship network
- Summary Statistics: Total characters, relationships, most central character
- Character Statistics Table: Complete data for all characters (name, centrality, scenes, lines)
- Top 20 Relationships: Strongest connections sorted by shared scenes with visual strength bars
- Metadata: Script title, generation date, and analysis timestamp
- Professional Formatting: Clean layout suitable for development notes
Integration with Other Tools
Relationship Mapper works seamlessly with other NoosphereWriter features:
- Character Report: Cross-reference relationship data with detailed character analysis
- Scene Report: Identify which scenes contain key character interactions
- Coverage Report: Relationship dynamics inform overall screenplay evaluation
- Qualitative Analysis: Relationship patterns affect character development scores
- Plot Board: Visualize how character interactions align with plot beats
Best Practices
- Analyze Complete Drafts: Most useful with finished or near-finished screenplays
- Track Changes: Re-run after major revisions to see how relationship structure evolves
- Compare to Genre: Research typical relationship patterns in your genre for benchmarking
- Focus on Central Characters: Prioritize strengthening relationships for characters with high centrality
- Balance Centrality: Ensemble pieces should avoid extreme centrality imbalances
- Use with Character Development: Combine relationship insights with character arc analysis
Understanding Limitations
- Scene Presence Only: Analysis based on shared scenes, not quality of interactions
- No Emotional Valence: Doesn't distinguish between positive, negative, or neutral relationships
- No Temporal Analysis: Doesn't track how relationships change over time
- Detection Accuracy: All-caps names in action lines detected; lowercase mentions may be missed
- Character Variations: Manual review recommended to verify name normalization accuracy
Common Questions
- "Should my protagonist always have 100% centrality?" - Not necessarily. While protagonists often have high centrality, some stories feature protagonists with limited social circles (isolation narratives, solo journeys). Genre and story type determine appropriate centrality.
- "What's a healthy centrality range for supporting characters?" - Supporting characters typically range from 20-60% centrality. Below 20% may indicate underdevelopment; above 60% suggests they may be co-protagonists.
- "My antagonist has low centrality. Is that a problem?" - Depends on story structure. Direct conflict stories require high antagonist-protagonist interaction (higher centrality). Hidden antagonists or shadowy figures naturally have lower centrality.
- "The graph shows two separate clusters. What does this mean?" - This indicates parallel storylines or segregated worlds (e.g., protagonist's normal world vs. adventure world). Ensure plot eventually connects these clusters through bridge characters or convergent events.
- "How many relationships should my screenplay have?" - Varies by cast size. Formula: Maximum possible relationships = N × (N-1) ÷ 2, where N = number of characters. Aim for at least 40-60% of possible relationships for well-connected ensemble; 30-40% for focused narratives.
Technical Details
- Detection Method: Characters identified from dialogue tags and all-caps action line mentions
- Relationship Definition: Two characters sharing at least one scene creates a relationship link
- Strength Calculation: Number of unique scenes where both characters appear
- Visualization: Force-directed graph layout with real-time physics simulation
- Export Format: PDF with embedded graph image at 800×440 aspect ratio
Scene Purpose Classifier
Analyze and visualize the narrative function of every scene in your screenplay. Identify Setup/Payoff connections, Plant/Recall patterns, and ensure your story structure delivers on its promises.
Key Insight: Every scene should serve a clear narrative purpose. Setup scenes establish elements that Payoff scenes resolve later, creating satisfying story structure. Unresolved setups or orphaned payoffs indicate missed opportunities for narrative closure.
What Is Scene Purpose Classification?
The Scene Purpose Classifier uses AI to analyze each scene and identify:
- Narrative Function: The primary role each scene plays in your story (Setup, Payoff, Complication, Revelation, Confrontation, or Resolution)
- Structural Elements: Optional markers like Plant (subtle setup), Recall (callback), or Midpoint Mirror (scene that mirrors an earlier one)
- Scene Connections: Links between scenes that set up and pay off narrative elements
- Structural Issues: Unresolved setups and orphaned payoffs that may need attention
How to Use Scene Purpose Classifier
- Access: Reports menu → Visual Analysis → Scene Purpose Classifier
- Analysis: The tool automatically analyzes your screenplay and classifies every scene
- Explore: View the interactive connection graph showing scene relationships
- Review: Check the Issues tab for unresolved setups and orphaned payoffs
- Filter: Click on function cards to filter scenes by narrative function
- Export: Download a comprehensive PDF report with all analysis data
Understanding Narrative Functions
Each scene is classified into one of six primary narrative functions:
Setup (Blue)
Establishes elements, characters, situations, or information that will pay off later:
- Introduces key props, relationships, or abilities
- Plants seeds for future plot developments
- Creates expectations or promises to the audience
Payoff (Green)
Resolves, delivers on, or revisits a previous setup:
- Fulfills narrative promises made earlier
- Completes character arcs or plot threads
- Delivers emotional or dramatic resolution
Complication (Amber)
Introduces obstacles, conflicts, or difficulties:
- Raises stakes for characters
- Creates tension and conflict
- Throws new challenges into the narrative
Revelation (Purple)
Reveals key information that changes understanding:
- Discloses secrets or hidden truths
- Provides crucial exposition
- Shifts audience or character perspective
Confrontation (Red)
Direct conflict between opposing forces:
- Physical or verbal conflicts
- Showdowns between protagonist and antagonist
- Climactic action sequences
Resolution (Cyan)
Resolves conflicts, threads, or story arcs:
- Wraps up plot lines
- Shows consequences of earlier events
- Provides narrative closure
The Connection Graph
The interactive force-directed graph visualizes scene relationships:
- Nodes: Each scene represented as a colored circle based on its narrative function
- Node Size: Larger nodes indicate scenes with more connections
- Links: Lines connecting scenes that have setup/payoff relationships
- Link Color: Green for setup-payoff, lime for plant-recall, purple for midpoint mirrors
- Click to Select: Click any node to highlight its connections and view details
Interactive Features
- Zoom Controls: Zoom in/out to focus on specific areas
- Fit to Screen: Auto-fit entire graph to available space
- Click Selection: Click scenes to highlight their connections
- Filter by Function: Click the function cards at the top to filter the view
Issues Tab
The Issues tab helps you identify structural problems:
Unresolved Setups
Scenes marked as Setup that have no corresponding Payoff scene identified. These may indicate:
- Chekhov's guns that never fire
- Character introductions that never pay off
- Plot threads left dangling
- Expectations set but not fulfilled
Orphaned Payoffs
Scenes marked as Payoff with no clear Setup scene identified. These may indicate:
- Resolutions without proper groundwork
- Deus ex machina elements
- Callbacks to setups that were cut in revisions
- Character abilities appearing without establishment
All Scenes Panel
The right panel lists all analyzed scenes with:
- Scene Number: Position in the screenplay
- Narrative Function Badge: Color-coded function label
- Scene Heading: Location and time of day
- Click to Select: Highlights the scene in the graph
PDF Export
Generate a professional PDF report including:
- Summary Statistics: Counts by narrative function
- Scene Analysis: All scenes with their classifications and reasoning
- Connection Details: Complete list of scene-to-scene connections
- Issues Report: Unresolved setups and orphaned payoffs
Regenerate Analysis
Click the Regenerate button to re-run the AI analysis. Use this when:
- You've made changes to your screenplay
- You want a fresh perspective on scene classifications
- The initial analysis seems incomplete
Best Practices
- Review Unresolved Setups: Each setup should have a corresponding payoff—consider adding resolution or removing unnecessary setups
- Check Orphaned Payoffs: Ensure each payoff has proper groundwork earlier in the script
- Balance Functions: A healthy screenplay typically has a mix of all function types
- Use Graph Clusters: Scenes that cluster together often belong to the same subplot
- Track Setup-Payoff Distance: Setups placed too early may be forgotten; too late may feel rushed
Common Questions
- "Should every Setup have a Payoff?" - Ideally yes. Unresolved setups frustrate audiences who expected resolution. However, deliberate ambiguity can be effective in certain genres.
- "What if a scene has multiple functions?" - The classifier assigns the primary function, but scenes can serve multiple purposes. Complex scenes often have a dominant function with secondary effects.
- "Why is my opening scene classified as Setup?" - Opening scenes typically establish the world, characters, and conflicts that will develop—this is classic Setup function.
Pacing Heat-Map
Visual representation of your screenplay's pacing, tension, and energy levels.
Heat-Map Elements
- Color Coding: Red (high intensity) to Blue (low intensity)
- Scene Length: Visual scene duration
- Tension Tracking: Conflict and stakes
- Energy Levels: Action vs. dialogue ratio
Analysis Insights
- Identify pacing issues
- Balance action and dialogue
- Ensure proper rhythm
- Optimize audience engagement
Emotional Intensity
AI-powered analysis of emotional engagement and viewer response throughout your screenplay. This feature measures the level of emotional intensity expected from viewers, helping you create compelling emotional journeys with effective peaks and valleys that maintain audience investment.
Key Insight: Analyzing the level of emotional intensity in each act helps judge the tonal significance of your story. Screenplays with high emotional intensity—referring to viewer emotional response—are guaranteed to garner more engagement from audiences. Emotional peaks and valleys create suspense and maintain viewer investment throughout the narrative.
How It Works
Emotional Intensity analysis evaluates your screenplay scene-by-scene to create a visual emotional journey:
- Go to
Reports → Emotional Intensity - The tool automatically analyzes your entire screenplay
- View the emotional intensity journey as a line graph showing peaks and valleys
- Review insights about emotional patterns and potential issues
- Click any data point to navigate directly to that scene in your editor
- Export comprehensive analysis as a professional PDF report
Five Emotional Analysis Factors
Each scene is evaluated using five key factors that determine viewer emotional response:
1. Dialogue Emotion Density
- Emotional Language: Presence of joy, fear, anger, sadness markers in dialogue
- Subtext Evaluation: Emotional meaning beneath surface conversation
- Emotional Variety: Range and depth of feelings expressed
- Character Vulnerability: Moments where characters reveal inner emotions
2. Action Intensity
- Physical Reactions: Body language, trembling, tears, aggressive movements
- Visceral Actions: Screaming, sobbing, embracing, fighting
- Behavioral Indicators: Emotional state shown through character actions
- Environmental Response: How characters physically interact with their surroundings emotionally
3. Stakes Personal Impact
- Life/Death of Loved Ones: Highest emotional intensity
- Relationship Stakes: Breakdowns, reconciliations, betrayals
- Identity/Self-Worth: Character's sense of self at risk
- Career/Material Concerns: Moderate emotional investment
- Personal vs. External: How personally invested characters are in outcomes
4. Conflict Emotional Layer
- Emotional Wounds: Deep psychological scars being exposed
- Trust/Betrayal Dynamics: Love/hate relationships and shifting loyalties
- Internal vs. External: Psychological conflict beyond physical confrontation
- Emotional Subtext: Feelings driving surface-level conflicts
5. Tone & Cinematography
- Atmospheric Description: Dark, isolating, oppressive vs. warm, intimate settings
- Emotional Staging: How scene descriptions evoke specific feelings
- Sensory Details: Visual and environmental elements that create emotional mood
- Cinematic Tone: Overall emotional quality of scene presentation
Intensity Levels
Scenes are rated on a 1-10 scale and classified into four intensity levels:
- Calm (1-3): ● Neutral, everyday moments with minimal emotional engagement
- Neutral (4-6): ● Moderate emotional content with some viewer response
- Heightened (7-8): ● Strong emotions and high emotional stakes
- Intense (9-10): ● Emotional peaks and cathartic moments with maximum viewer response
Emotional Journey Visualization
The feature presents your screenplay's emotional arc as an interactive line graph:
- X-Axis: Scenes from beginning to end
- Y-Axis: Emotional intensity score (1-10)
- Line Graph: Shows emotional journey with visible peaks and valleys
- Color-Coded Points: Each data point colored by intensity level
- Click to Navigate: Click any point to jump directly to that scene in your editor
- Hover Information: Scene number, intensity score, and level displayed on hover
Emotional Intensity Insights
The analysis automatically identifies five types of potential issues:
1. Emotional Plateau
- What It Is: Long sequences without emotional variation
- Why It Matters: Extended flat intensity risks viewer disengagement
- Common Location: Act 2 middle sections
- Recommendation: Add emotional reveals or escalate personal stakes to create variation
2. Emotional Whiplash
- What It Is: Too-rapid shifts between emotional extremes
- Why It Matters: Viewers need processing time between intense emotional moments
- Example: Jumping from calm (2/10) to intense (9/10) without transition
- Recommendation: Add transitional beats or foreshadowing to prepare viewers
3. Missing Emotional Beats
- What It Is: Insufficient time to process major emotional events
- Why It Matters: Emotional impact requires reflection and reaction time
- Example: Character loss followed immediately by action sequence
- Recommendation: Insert scenes showing characters processing emotions
4. Climax Underwhelming
- What It Is: Climax scenes that don't reach expected emotional intensity
- Why It Matters: Climax should be the emotional peak of the journey
- Typical Issue: Climax scoring 5-7/10 instead of 8-10/10
- Recommendation: Deepen personal stakes and character vulnerability at climax
5. Character Disconnect
- What It Is: Character emotions don't match the situation
- Why It Matters: Emotional authenticity is crucial for viewer investment
- Example: Low emotional intensity during supposedly devastating moment
- Recommendation: Align character reactions with narrative stakes
Understanding the Analysis
Important: Viewer Response vs. Story Content
Emotional intensity measures the level of emotional response from viewers, not just the presence of emotions in the story. High emotional intensity means viewers feel strong emotions—fear, joy, suspense, sadness, excitement—while watching.
A scene can have emotional content (a character is sad) but low emotional intensity if viewers aren't moved by it. Conversely, a scene with minimal dialogue can have high emotional intensity if viewers are deeply invested in the outcome.
Summary Statistics
The analysis provides comprehensive statistics about your screenplay's emotional journey:
- Total Scenes: Number of scenes analyzed
- Average Emotional Score: Overall emotional intensity across entire screenplay
- Intensity Distribution: Count of calm, neutral, heightened, and intense scenes
- Identified Issues: Number of insights requiring attention
- Emotional Range: Difference between highest and lowest scores (indicates variety)
Scene Navigation
The emotional intensity graph is fully interactive:
- Click Data Points: Jump directly to any scene in your editor
- Investigate Peaks: Review your most intense emotional moments
- Examine Valleys: Check if low-intensity scenes serve a purpose
- Track Progression: See how emotional intensity builds across acts
- Hover for Details: Scene number, score, and intensity level
PDF Export
Export your emotional intensity analysis as a professional PDF report including:
- Summary Statistics: Total scenes, average score, intensity distribution
- Visual Line Graph: Embedded emotional journey visualization
- Detailed Insights: Complete list of identified issues with severity ratings
- Scene-by-Scene Data: Optional detailed breakdown of each scene's scores
- Recommendations: Specific guidance for addressing each insight
- Professional Formatting: Suitable for sharing with collaborators or using in development
Processing Large Screenplays
The feature handles screenplays of any size efficiently:
- Small Screenplays (<50KB): Single-request processing for speed
- Large Screenplays (>50KB): Automatic chunking with progress tracking
- Scene Boundary Preservation: Chunks split at scene boundaries for accuracy
- Context Maintenance: Emotional arc context preserved across chunks
- Progress Indication: Estimated processing time displayed for large scripts
Integration with Other Tools
Emotional Intensity works seamlessly with other NoosphereWriter features:
- Movie Concept: Analysis considers your stated genre and tone for context
- Theme Structure: Emotional beats aligned with thematic development
- Characters: Character arcs inform expected emotional responses
- Pacing Heat-Map: Compare narrative pacing with emotional engagement
- Qualitative Analysis: Cross-reference emotional patterns with story quality
- Coverage Report: Emotional intensity as part of overall evaluation
Best Practices
- Peaks and Valleys: Effective screenplays have emotional variety, not constant high intensity
- Build to Climax: Highest emotional intensity should typically occur at story climax
- Recovery Time: After intense scenes, allow processing time with lower intensity
- Genre Expectations: Different genres require different emotional patterns (thriller vs. drama)
- Act Structure: Consider emotional intensity distribution across three acts
- Opening Hook: First 10 pages should establish emotional engagement
- Character Arcs: Emotional journey should align with character development
Common Questions
- "Should all scenes have high emotional intensity?" - No! Valleys are essential. Constant high intensity leads to viewer fatigue. Effective screenplays create emotional rhythm through variation.
- "What's a good average emotional score?" - Depends on genre. Dramas often average 6-7/10, thrillers 7-8/10, action films 6-7/10. More important than average is the presence of peaks and valleys.
- "My climax scored 6/10. Is that bad?" - Generally yes. Climax should be one of your highest-intensity moments. Consider deepening personal stakes or character vulnerability.
- "Can I have too much emotional variety?" - Rarely. The issue is usually emotional whiplash (too-rapid shifts) rather than variety itself. Include transitional beats between extremes.
- "How does this differ from Pacing Heat-Map?" - Pacing measures narrative energy and tension. Emotional Intensity measures viewer emotional response. A fast-paced action scene might have moderate emotional intensity if viewers aren't emotionally invested in the outcome.
Workflow Recommendation
When to use Emotional Intensity analysis:
- After First Draft: Identify emotional plateau issues in Act 2
- During Revision: Ensure climax reaches expected emotional peak
- Before Final Polish: Verify emotional peaks and valleys create effective rhythm
- In Combination: Use alongside Pacing Heat-Map to balance narrative energy and emotional engagement
- Genre Validation: Confirm emotional intensity patterns match genre expectations
What Makes Emotional Intensity Unique
Unlike other analysis tools that focus on structure, pacing, or craft, Emotional Intensity specifically measures:
- Viewer Response: How audiences feel while watching, not just what happens on screen
- Emotional Journey: Complete emotional arc from beginning to end visualized clearly
- Engagement Patterns: Peaks and valleys that maintain viewer investment
- Context-Aware Analysis: Considers your movie concept, characters, and themes
- Actionable Insights: Specific scene references with concrete recommendations
Success Pattern
Screenplays with high emotional intensity—meaning strong viewer emotional response—are guaranteed to garner more engagement and interest from audiences. The key is creating emotional peaks above the "presence threshold" (the level of viewer awareness) and valleys that provide recovery time, building a compelling emotional journey that keeps audiences invested throughout the entire story.
Emotional Analysis
Deeply analyze the emotional and narrative layers of your screenplay using advanced literary and dramatic theory. This feature goes beyond basic sentiment analysis to evaluate the structural and subtextual elements that create compelling drama.
How to Access
- Open the Workflow Builder from the main menu.
- Select Emotional Analysis from the list of available workflows.
- Click Execute to run the analysis on your current screenplay.
Five Dimensions of Analysis
The Emotional Analysis agent evaluates your script across five critical dimensions of dramatic writing:
1. Value Charges
Based on Robert McKee's story theory, this analyzes how the "charge" of a scene shifts from beginning to end.
- Polarity Shift: Tracks movement between positive (+) and negative (-) states.
- Turning Points: Identifies the specific moment or action that causes the value to change.
- Dramatic Arc: Ensures scenes aren't static but move the story forward through value changes.
2. Pacing & Rhythm
Evaluates the tempo of your scenes to ensure engagement.
- Beat Analysis: Looks at the density of dramatic beats.
- Dialogue vs. Action: Balances verbal and physical pacing.
- Tempo Variation: Checks for necessary fluctuations in speed to maintain interest.
3. Suspense & Surprise
Analyzes how information is managed to create engagement.
- Suspense: When the audience knows more than the characters (anticipation).
- Surprise: When the characters and audience discover something simultaneously.
- Mystery: When characters know more than the audience (curiosity).
4. Objective Correlative
Based on T.S. Eliot's concept, this identifies how internal emotions are externalized.
- Symbolism: Physical objects or events that represent abstract feelings.
- Visual Storytelling: Showing emotion through environment and action rather than just dialogue.
- Atmosphere: How the setting reflects the emotional state of the characters.
5. Subtext
Digs beneath the surface dialogue to find the true meaning.
- Implicit Meaning: What is being said "between the lines."
- Hidden Agendas: Character motivations that aren't explicitly stated.
- Unspoken Conflict: Tension that exists without direct confrontation.
Understanding the Results
Interpreting the Output
The analysis provides a detailed breakdown for your screenplay, highlighting strengths and areas for improvement in each dimension. Use these insights to:
- Refine Scene Endings: Ensure every scene has a clear value change.
- Enhance Visuals: Strengthen objective correlatives to "show, don't tell."
- Deepen Dialogue: Add layers of subtext to on-the-nose conversations.
- Tighten Pacing: Adjust scene length and density based on rhythm analysis.
Best Practices
- Run Iteratively: Use the analysis after major rewrites to track improvements.
- Focus on Key Scenes: Pay special attention to the analysis of your Inciting Incident, Climax, and Act Turns.
- Balance Elements: A great script balances all five dimensions—don't sacrifice pacing for symbolism, or vice versa.
Statistics
Detailed metrics about your screenplay.
Basic Statistics
- Total word count
- Page count
- Scene count
- Character count
- Location count
- Estimated runtime
Advanced Metrics
- Dialogue percentage
- Action percentage
- Average scene length
- Words per character
- Day/Night ratio
- INT/EXT ratio
Writing Analytics Dashboard
Track your daily writing habits, productivity streaks, and visualize your progress over time. The dashboard updates automatically as you write.
Overview Tab
The dashboard provides a quick snapshot of your current writing performance:
- Key Metrics: View your current streak, total words written, total time spent, and number of sessions.
- Writing Activity Chart: A bar chart showing your daily word count output for the last 30 days.
History Tab
View a detailed chronologial log of your writing sessions:
- Session Log: See exactly how many words were added in each session, along with start/end times and duration.
- Daily Totals: Tracks your cumulative progress day-by-day.
Timeline Tab
Track the major events in your project's lifecycle:
- Project Milestones: A visual timeline showing when the project started and other key achievements.
- Backup Points: Automatically milestones created when significant backups occur.
Patterns Tab
Gain deeper insights into your writing habits:
- Productivity Heatmap: A visual grid showing which days of the week and times of day you are most productive, helping you schedule writing sessions for your peak creativity window.
Data Management
- Reset Data: The "Reset Data" button allows you to clear all analytics history for the current script. Warning: This is permanent and corresponds to the specific script file.
Token Usage
Monitor your AI token usage and estimated costs to manage your API quota effectively.
Dashboard Features
- Overview Cards: View total requests, input tokens, and output tokens.
- Feature Breakdown: See which features (e.g., Idea Lab, Script Doctor) are consuming the most tokens.
- Model Usage: Track usage by specific AI model (e.g., Gemini 1.5 Pro, Gemini 1.5 Flash).
- Recent Activity: Daily usage statistics for the selected timeframe.
Data Management
- Timeframes: Filter data by 24h, 7d, 30d, or All Time.
- Export: Download your usage data as a JSON file.
- Clear Data: Reset all usage statistics stored in your browser.
AI Errors
Review and troubleshoot AI-related errors to ensure smooth operation.
Error Dashboard
- Error Overview: Total error count and distribution by type (e.g., API Key, Network, Rate Limit).
- Most Common Errors: Identify frequent issues and their patterns.
- Reliability Report: View the uptime and failure rates for specific AI features.
Troubleshooting
Use the detailed error logs to diagnose issues with API keys, internet connection, or specific model availability. Statistics are stored locally to help you identify patterns over time.
Diagnose Scene
AI-powered scene analysis tool that evaluates your scenes against professional screenwriting criteria.
How to Access Diagnose Scene
- Right-click on any Scene Heading line
- Hover over "Report" in the context menu
- Select "Diagnose Scene"
Diagnostic Framework
- Character & Goals: POV, Want, Obstacle
- Stakes & Consequences: Why it matters, what's at risk
- Structure & Change: Turning points, scene necessity
- Escalation & Pacing: Conflict build, urgency
Using the Report
- Review Strengths and Weaknesses
- Consider the specific Suggestions
- Use insights to guide your rewrite
Areas for Improvement
AI-powered scene improvement analysis tool that provides actionable recommendations across key areas of screenwriting craft.
How to Access
- Right-click on any Scene Heading line
- Hover over "Report" in the context menu
- Select "Areas for Improvement"
Analysis Areas
- Goals, Stakes, Structure, Obstacles
- Dialogue, Subtext, Actions, Visuals
Using Recommendations
- Read the specific diagnostic questions
- Apply the suggested techniques
- Focus on one area at a time
Subtext Gap Analyzer
A powerful diagnostic tool that reveals the hidden emotional layers of your scene by comparing what characters say (Dialogue) versus what they do (Action).
How it Works
The analyzer uses AI to:
- Analyze Action: Infers the character's internal intent or "Shadow Text" from their behavior.
- Analyze Dialogue: Infers the semantic meaning of their speech.
- Calculate Gap: Measures the dissonance between the two. A higher gap indicates rich subtext, while a low gap suggests "on-the-nose" writing.
How to Use
- Right-click on any Scene Heading.
- Hover over the Report menu.
- Select Analyze Subtext Gap.
Understanding the Report
- Dissonance Score: An overall percentage representing the subtextual complexity of the scene. Higher is generally better for dramatic scenes.
- Shadow Text Breakdown: A line-by-line analysis showing the inferred intent behind every action and line of dialogue.
- Highlights & Alerts: Automatically flags moments of brilliant subtext and potential on-the-nose dialogue.
Tutorials
Interactive step-by-step guides to help you learn NoosphereWriter's key features and workflows.
Accessing Tutorials
Open the Tutorials dialog from the Help menu or by pressing F1.
Available Tutorials
- Formatting & Core Workflow: Learn the basics
- Breaking Writer's Block: Idea Lab
- Character Psychology: Character tools
- The Script Doctor: Analysis tools
Keyboard Shortcuts
Boost your productivity with these essential keyboard shortcuts:
- Ctrl+S: Save
- Ctrl+P: Print/Export PDF
- F1: Open Documentation
- Tab: Change element type (Action -> Character -> Dialogue)
View the full list of shortcuts in the Help menu.
Comments & Annotations
Add inline comments and notes throughout your screenplay for collaboration and revision tracking.
Creating Comments
Managing Comments
Best Practices